Celeriac
Apium graveolens var rapaceum
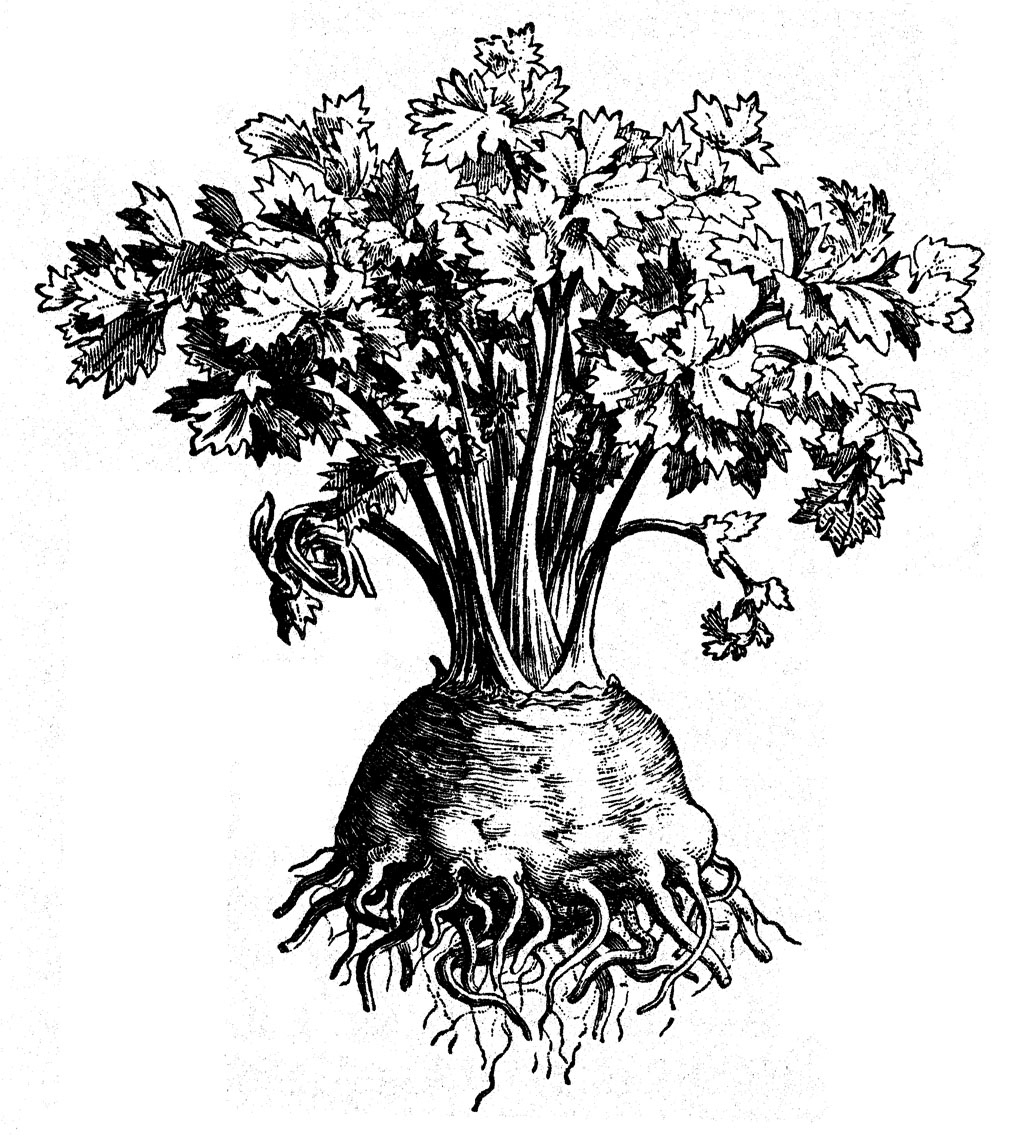
Introduction: Celeriac is grown for its root (more accurately this is a swollen stem base, or corm, not a root) rather than its stems, which is why it is often called celery root or turnip rooted celery. It has long been popular in Germany and Eastern Europe, where it is the most popular kind of celery. In this country it is relatively unusual however.
Ease of growing: Celeriac has pretty much the same requirements as celery and is grown in the same way. It is easier to grow though, because you don’t really care about the quality of the stems, the main edible part is the root.
Nutritional content: The root is a lot more nutritious than its cousin celery. It contains carbohydrate (almost 200 calories per pound), vitamins C, K and B6, as well as phosphorus and manganese. It also contains apigenin, which has anti-cancer properties.
Climate: For optimal growth celeriac needs the same climate ascelery, which means a long period of cool (60 – 75˚F), moist weather. It doesn’t like extreme heat or cold, though it can tolerate mild frost. In cool areas it can be grown all summer, but in hotter ones it is most often grown as a fall / winter crop.
Crop value: Celeriac is a somewhat overlooked plant and deserves to be more widely grown. It is fairly easy to grow and can be harvested for a long period over the winter.
Soil: Celeriac likes the same fertile, moisture retentive, high organic matter soil as celery.
| About Celeriac Seed facts Germ temp: 40 (60 – 70) 80˚F Germ time: 14 – 21 days Viability: 5 years Germination percentage: 55%+ Weeks to grow transplants: 8 – 12 Planning facts Growing temp: 45 (60 – 65) 75˚F Start: 8 – 10 weeks before last frost Plant out: 0 – 2 weeks after last frost Direct sow: 2 weeks before last frost Fall crop: Start 3 – 4 months before first fall frost Days to harvest: 85 – 120 days from transplant |
Planning
When: Celeriac needs about 100 days of cool (60 – 70˚F) weather to grow to perfection. If there is a long period of cool weather in spring it can be grown at this time (this works better than celery). However it usually does best as a fall crop.
Where: A sunny spot is best, though it can also grow in light shade.
Planting
Sowing: Celeriac seed has a reputation of being difficult to germinate, but I have never found it to be particularly problematic. I have read one piece that said fresh seed germinates best and another that said 2 or 3 year old seed is actually better because germination inhibitors have broken down. It is fairly slow to germinate (up to 3 weeks) and get going though, so you need to give it plenty of time.
Some people pre-soak the seed in hot (120˚F) water for a half hour before planting, or in compost tea overnight.
Some authorities say the seed must be scattered on the surface and left uncovered, as it needs light to germinate. Others say a light ⅛ – ¼˝ covering of soil is best. I can’t say I have noticed much difference either way,
Seed sitting on the surface must be kept moist at all times, as it can dry out easily which can be fatal. Germination may take as little as a week, or as long as three weeks. Some books say it is important that the temperature fluctuates below 60˚F at night during germination. Temperatures above 80˚F may inhibit germination.
Indoors: Unlike most root crops, celeriac is often started indoors in spring, 10 weeks before the last frost date. This is simply because it is slow to get started and it saves time.
A fall crop may be started in the greenhouse or nursery bed. Sow it in midsummer, 3 – 4 months before the first fall frost. Transplant it to its permanent position 8 – 10 weeks later.
Transplants
Starting inside: Celeriac is often started indoors, because it is so slow growing initially. It doesn’t mind transplanting when young, so is commonly started in flats, leaving 1˝ between plants.
Though it germinates best at 78˚F, the seedlings prefer a fairly cool 60˚F temperature for growth. Prick out the seedlings to 2˝ apart when they have their first true leaves, as they seem to benefit from transplanting at this stage. As always, take care to keep them moist. They should take 8 – 12 weeks to reach 5˝ in height and grow 5 – 6 leaves, which is the ideal transplant size.
Hardening off: If transplants are to go outside while it is still cold, the seedlings should be hardened off. They will then tolerate temperatures as low as 25˚F. Start by putting the plants outside for 2 hours on the first day, then 4 hours on the second day. Adding 2 hours every day for a week.
Vernalization: If the recently planted seedlings are exposed to extended cold temperatures (10 days below 45˚F) after a warm period they could be vernalized. They would then react to warmer weather by bolting. If cold weather unexpectedly returns after planting out, you should protect the plants with cloches.
Transplanting: When planting celeriac be sure to keep the root ball of each plant as intact as possible. Some people run and knife between the plants in the flat, a few days before planting to separate them.
Outdoors: Celeriac produces a better root system when direct sown For a spring crop, this is done when hard frosts are past. For a fall crop it is done in mid summer. Simply scatter the seed on the soil surface and keep moist until it germinates. Thin when all of the plants have emerged and they have a set of true leaves.
Spacing
Space the plants 10˝ – 12˝ – 15˝ apart in the beds, depending upon the fertility of the soil. If growing in rows plant them 8˝ apart, with 18 – 24˝ between the rows.
Care
To produce the best roots celeriac needs to grow quickly, without a check in its growth. To do this it must get everything it needs.
Watering: Celeriac needs moist soil at all times, which usually isn’t too much of a problem in the cool growing conditions it prefers.
Weeding: The small plants can’t compete with weeds very well, so keep them well weeded. To avoid damaging the shallow roots (most are within a couple of inches of the surface) it is best to hand weed.
Fertilization: Celeriac is a fairly hungry crop and if the soil isn’t very fertile, it is good to give the plants a feed of liquid kelp or compost tea every three weeks. If the soil is fertile this isn’t necessary. Too much nitrogen can even result in excessive top growth instead of root growth.
Mulch: This is useful to conserve moisture and suppress weeds.
Pruning: Any lateral shoots that appear on the side of the root are often removed. This is done to encourage the plant to devotes all of its energy to sizing up the root, rather than growing more foliage.
Earthing up: This isn’t essential but is often done to keep the expanding roots covered with soil, so they stay pale in color.
Pests: These are the same as for celery, but less problematic. Carrot fly is sometimes a problem.
Harvesting
When: You can gather the first roots when they are only 2˝ in diameter, However they start to expand rapidly at this point, so the longer you wait the bigger they will get. Like many root crops they get better with lower temperatures and even light frost.
How: Dig or pull the root, brush off excess soil and cut off the tops so they don’t draw moisture from the root. Don’t throw these away, they can be used separately as flavoring.
Storage: The roots are best left in the ground under mulch and harvested as needed, If the ground is likely to freeze, dig them and store in a cool root cellar at 32 to 40˚F. They will keep in the fridge in a plastic bag for a couple of weeks.
Seed saving: Celeriac is a biennial and doesn’t produce flowers until its second spring (it sometimes produces flowers prematurely in its first year, but you don’t want to save seed from those plants).
The biggest problem with saving the seed is getting the plants to survive the winter. In mild areas they will usually do this in the ground, perhaps under a mulch to protect them from frost. In colder areas they may have to be dug up and stored in a root cellar until spring (See Storage).
Varieties: The choice of celeriac varieties is limited, but slowly expanding. This isn’t a huge problem as they are all relatively similar anyway.
Alabaster – (120 days)
Brilliant – Smooth skin and nutty flavor. Early maturing (110 days).
Monarch – A highly rated, fairly new variety (100 days)
Giant Prague – (This is the easiest variety to find (120 days).
Kitchen use
This is a plant that hardly anyone in America knows how to use. The knobby root looks a little formidable, but is easily peeled to leave a tasty white core (if the top part of the root is woody it should be discarded). They are most often used in soups or cooked in the same ways as potato, but they are also good raw in salads.
The green leafy tops and stems can be used as flavoring like leaf celery.


