


Making seedling flats
These shallow wooden boxes are the traditional seed sowing containers and despite the introduction of some excellent alternatives they continue to be popular. This is because they are versatile, easy to make and hold a lot of plants. They can be of different depths for different crops and can also be used for pricking out.
The main drawback of flats is the considerable root disturbance during transplanting, so they are only used with plants that transplant easily, such as Brassicas, tomatoes, lettuce, onion, peppers and more.

Size
Flats are pretty simple to make and there isn’t a great deal of design involved in making them. They can be any size you want, so size them to make the most efficient use of the wood you have without too much cutting (cutting wastes both wood and time). I found that 24 x 14 worked well with the wood I had (the four bottom boards are just under 3 ½” wide).
The depth of a flat is more critical, as you need enough depth for the roots, but don’t want them to be too deep, as this makes them heavy and requires more soil mix to fill them. I find that 3 ½” is a good average depth, as well as a standard lumber dimension. Some gardeners like to have two different depths, a shallow one (3”) for starting seeds and a deeper (4”) one for pricking out.
The only other important design criteria is that there should be a narrow gap between the bottom boards, for good drainage.
Materials
I never buy material for making flats, because have some salvaged cedar and redwood boards, from when a neighbor tore down an old fence (if ever you see a redwood or cedar fence being replaced, grab the old materials before they go to the dump). I also had some 4” X ¼” tongue and groove redwood paneling that another neighbor gave me when he was selling his house, and this was perfect for the bottoms. You can use any old wood for making flats, even if it isn’t rot resistant (just empty them and keep them dry when not in use.

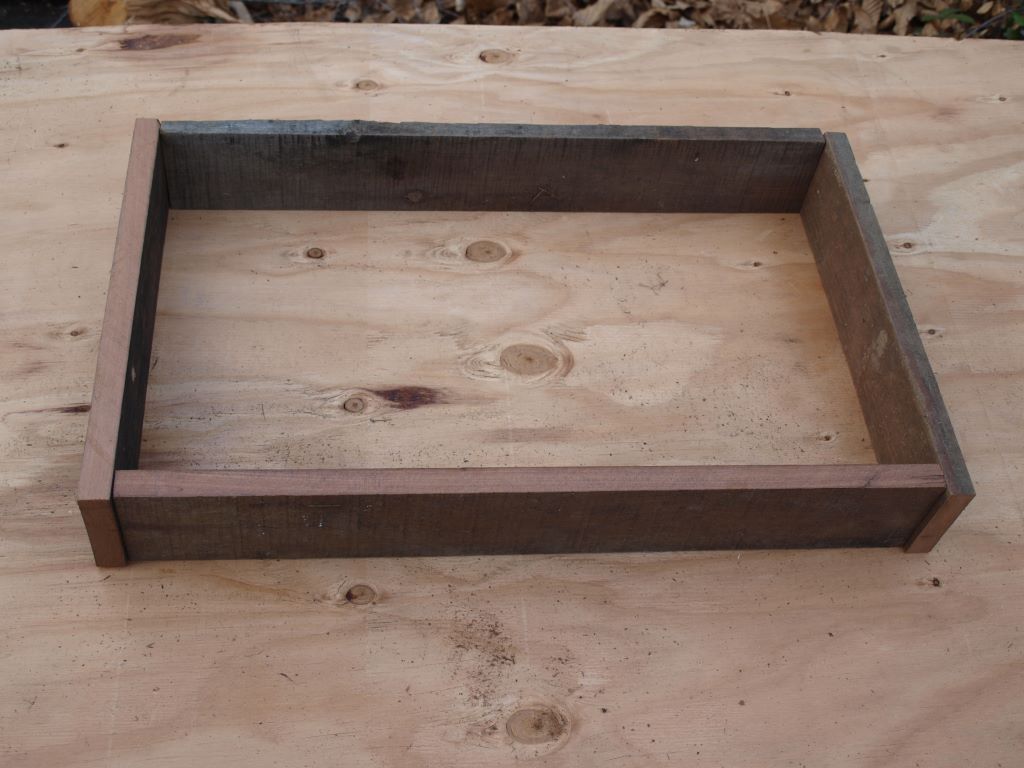
Assembly
I ripped the fence boards down to a width of 3 ¼” on my table saw and cut them into 22 ½” pieces for the sides and 14” pieces for the ends. When nailed together this gave me a finished flat measuring 24” X 14”). The bottom boards were a full 24” in length. You can see from the photographs how they all go together.
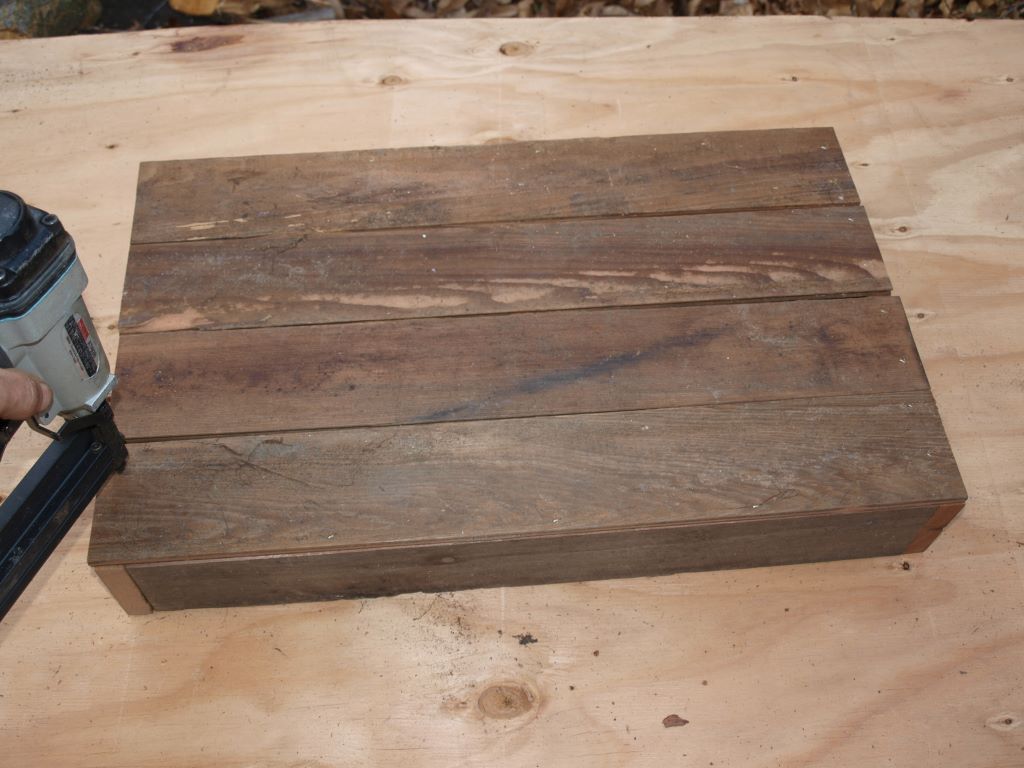
I used 1 ¼” staples (and an air stapler) to nail the flats together (because I already had them and didn’t have any nails). The gun makes the process go very quickly and with all the pieces cut I could assemble a flat in under 3 minutes (I’m guessing now, I never actually timed it). If I didn’t have the staples I would have nailed the sides together with 1½” galvanized common nails and attached the bottoms with ¾” galvanized common nails. I can’t think of anything else to say here, as I said before this is a pretty simple process and a picture is worth a thousand words anyway.