


Onion
Allium cepa
Introduction: The onion is an almost universal kitchen ingredients and one that few cooks would willingly do without. It probably originated somewhere in central Asia, but has been cultivated by every major civilization from the Egyptians, Greeks and Romans onward. Its use as a flavoring has spread around the world and it is prized by people everywhere.
Apparently the word onion comes from the Latin unio meaning one, because it only produces one bulb, unlike the related garlic, shallot and potato onion.
Onions are biennial and spend their first year growing a nutrient filled bulb. In their second year they flower and set seed (and then die). When growing onions you have to be careful not to vernalize them, as this will cause them to flower in their first year (see Bolting below).
Ease of growing: The most important thing to remember about growing this biennial is that it is day length sensitive. It is programmed to produce bulbs when the appropriate day length arrives, no matter how big or small it is.
It is your job as a gardener to get the plants as big as possible before the onset of bulbing. To do this you must use a variety that is appropriate for the day length of your location. You should also plant them as early as possible, so they can put on the maximum amount of vegetative growth before they start to produce a bulb.
If you do everything at the right times, you will find onions are a pretty easy crop to grow.
Crop value: Though the onion isn’t the most nutritious crop, it is so indispensable in the kitchen that it is one of the most important crops you can grow.
| About Onion Seed facts Germ temp: 50 (60 – 65) 85°F Germ time: 7 – 28 days 136 days / 32°F 30 days / 41°F 13 days / 50°F 7 days / 59°F 5 days / 68°F * Optimum 4 days / 77°F 4 days / 86°F 13 days / 95°F Seed viability: 1 – 4 years Germination percentage: 70%+ Weeks to grow transplant: 10 – 12 Planning facts Hardiness: Hardy Growing temp: 55 (65 – 75) 80°F Plants per person: 25 Plants per sq ft: 16 Planting: Start: 10 – 16 weeks before last frost Plant out: 2 – 4 wks before last frost Direct sow: 4 – 6 wks before last frost Fall crop: Plant 6 – 12 before first fall frost Harvest facts Days to harvest: Seed: 160 – 180 days Sets/plants 90 – 120 Yield per plant: 4 oz Yield per sq ft: 1 – 4 lb |
Nutritional content: Actually the nutritional value of onions shouldn’t be underestimated, as they are eaten in quantity. The bulbs are a good source of vitamin C, potassium and calcium. They also contain a variety of beneficial phytochemicals, including diallyl sulfide, kaempferol and quercitin. They contain about 200 calories per pound.
The leaves are rich in vitamin A.
Climate: Onions grow best if it is cool (55 – 75°F) for all of their vegetative growth, but warm (70 – 80°F) and dry when they are bulbing up and ripening. They are very day length sensitive, so it is important to plant at the right time and choose the right variety for your latitude.
Soil
pH: 6.0 (6.8) 7. 5
Onions are not very efficient feeders because their roots are weak and shallow (they may only venture about 6˝ from the plant). Consequently they need a loose, rich, moisture retentive soil with lots of organic matter. They don’t like compacted, heavy, dry, acid, weedy, salty, or poorly drained soils. They are very sensitive to wet soils and their roots may rot if it is too wet (especially over the winter).
Onions don’t require a lot of nutrients, but they aren’t very efficient feeders, so they need to have plenty available. For example they only need about 150 pounds of nitrogen per acre, but you may have to add 300 pounds for them to get even that much.

Soil preparation: Prepare the soil by incorporating 2˝ of compost, or aged manure, into the top 10˝ of soil, which is where most of their feeder roots are to be found. For an early spring planting you could do this in fall, using fresh manure if necessary. Cultivate the soil deeply, remove stones and debris and make a nice seed bed. This encourages their weak roots to penetrate more deeply.
Onions don’t need a lot of nitrogen, but they do like potassium (wood ashes or greensand) and phosphorus (colloidal phosphate), so add some to the soil if necessary. They also need plenty of micronutrients, so seaweed can be a big help.
If the pH is low then add lime, as they don’t like acid soil.
Raised beds work very well for onions, as you can give them the perfect deep, well-drained soil.
A traditional method of growing onions is to dig a trench 6 – 8˝ deep and 6 – 8˝ wide and put a layer of fertilizer mix in the bottom. Mix compost (or aged manure) with the soil and put it back in the trench. You then plant into this.
You might also add a layer of phosphorus fertilizer 3˝ down, to further improve their growth.
Planning
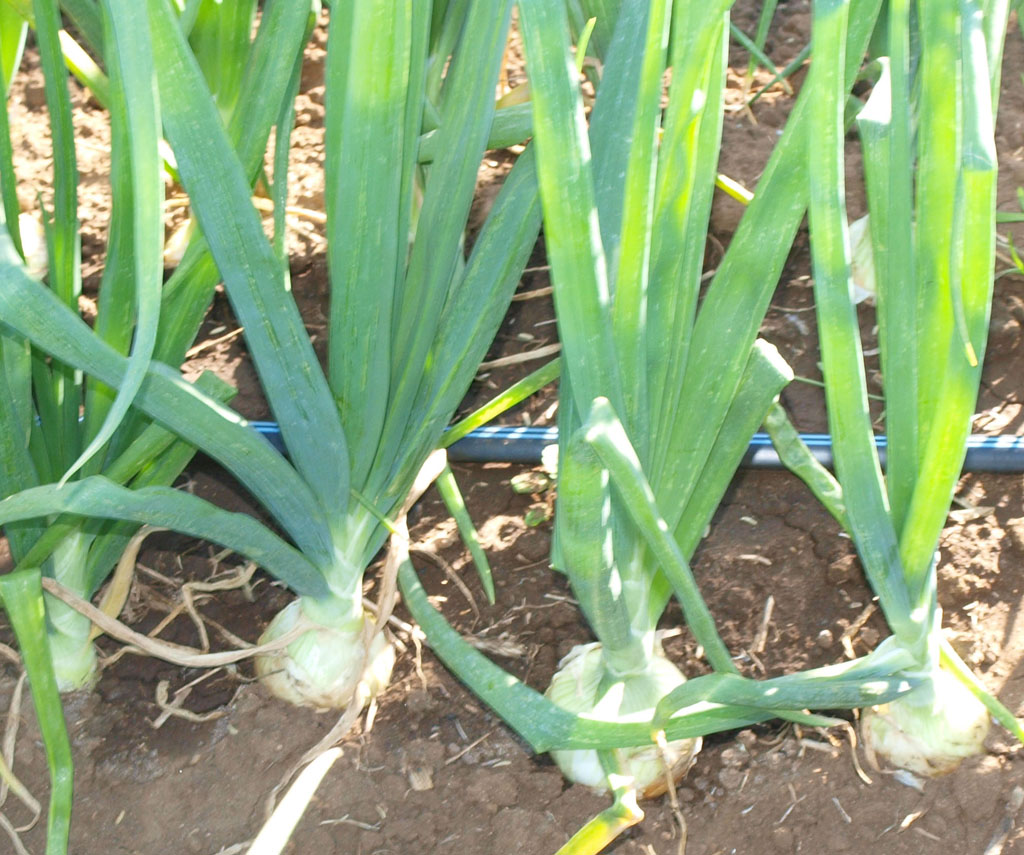
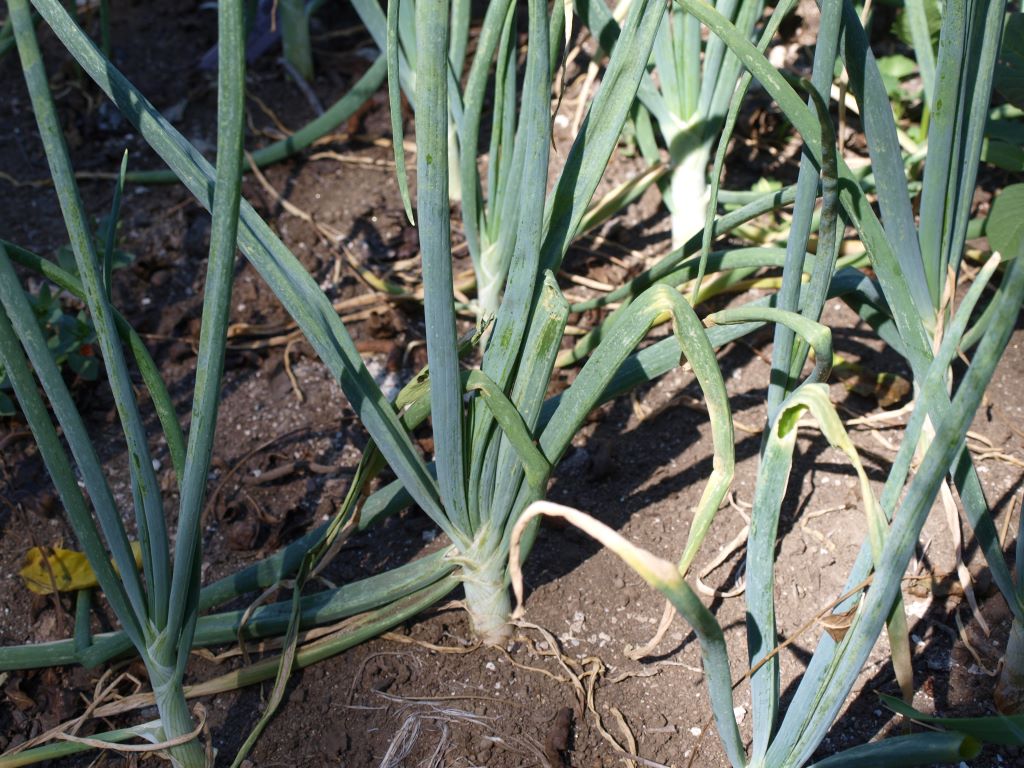
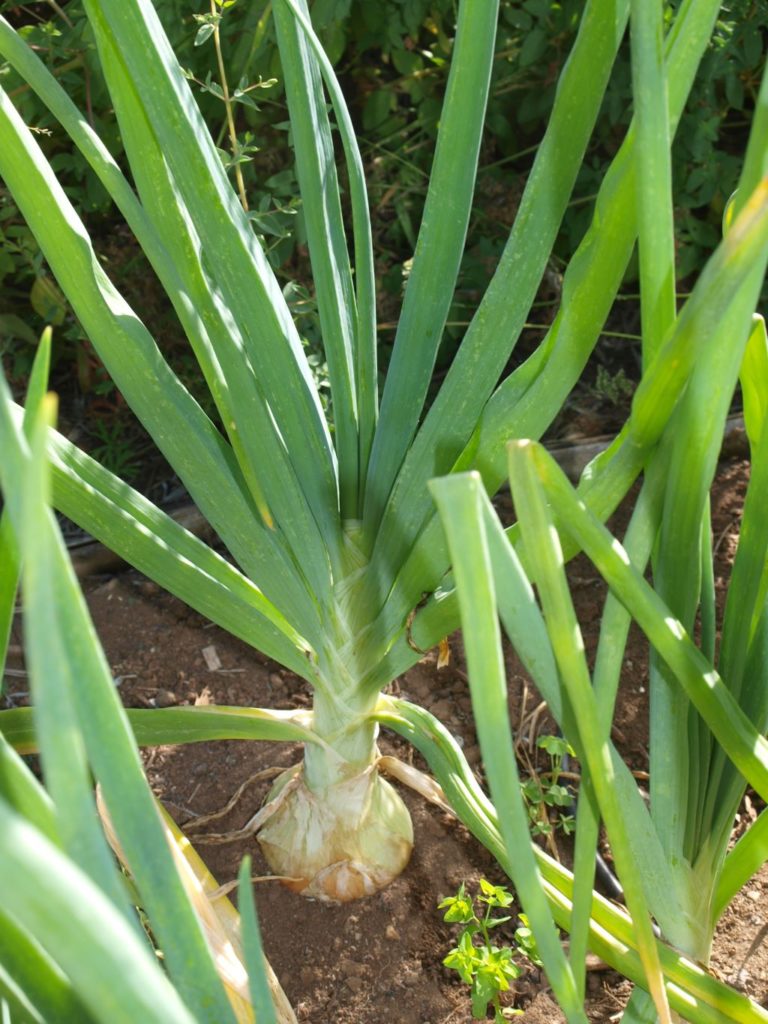
Bulbing: The onion bulb is a food storage organ comprised of layers of specialized leaves. Bulbing occurs when the plant stops producing new leaves and starts to store food in the base of the leaves. This causes them to swell and form the bulb. When the bulb is mature, all of the food has gone from the leaves to the bulb, so they wither, fall over and die.
Each of these leaves forms a layer of the onion bulb, so the more of these there are the bigger the bulb will get. A fully mature onion will ideally have 12 – 13 leaves when it starts to bulb up.
Day length: The main trigger of bulbing is day length; the plants will start to produce bulbs when they receive a certain number of hours of daylight (or more accurately hours of darkness). Different varieties require different day lengths, which is why we classify them as either short, intermediate or long day length.
| Onion day length Short day: Under 13 hours Intermediate day: 13 – 14 hours Long day: 14 hours or more Very long day: 16 or more hours A few varieties are day neutral |
Generally short and intermediate day varieties are grown below 36 degrees latitude, while long day types are grown above this line (which is roughly from San Francisco to Washington DC.
If a long day variety is planted where the days are too short, it will grow well enough as a green onion, but will never produce a bulb. It can be used for green onions though.
If you plant a short day variety where the days get too long, it will bulb prematurely when it gets the day length it needs, so the bulbs won’t get very big.
Temperature; This also affects bulbing: cool weather may slow it down slightly, while warm weather may hasten it.
Where: Onions prefer a warm, sunny site, protected from strong winds. It is important that the soil is well-drained, especially if they are to be in the ground over the winter.
Onions are vulnerable to weeds, so a very weedy site isn’t good.
Crop rotation: Don’t plant onions where any other Alliums have grown in the past 3 years.
When: It is important that bulb onions are fully grown when the appropriate day length arrives, so they will bulb up fully. You have several options as to what and when to plant, but remember the more time the plants have to grow, the bigger they will get and the bigger the bulbs they will produce. If the winter is cooperative this usually means planting in fall or early winter, If this isn’t possible then you will plant in early spring.
If you don’t plant onions early, they won’t have time to produce large plants before bulbing starts and you will end up with small bulbs. Of course they may also grow slowly for some other reason (poor soil, root damage, pests) and they will only produce small bulbs then too.
Spring: Spring planted onions must be started early if they are to grow large enough before long summer days trigger bulbing. This means putting sets or seedlings into the ground (or starting them inside) as early as January or February. They will put on vegetative growth steadily through spring and early summer and bulb up when the days get to be the right length. They need warm weather to ripen and cure the bulbs.
You can speed up early spring growth by growing them under tunnels or cloches.
Fall: One way to give the plants more time for vegetative growth is to start them in autumn (if the climate is suitable). Some varieties are specifically intended for over-wintering and these will work best.
Timing a fall planting is somewhat tricky because if the plants grow too big over the winter they will bolt when spring arrives (this is why sets and transplants don’t usually work out well). On the other hand if you plant too late they may not survive the winter.
Fall crops are best grown from seed, planted 6 – 12 weeks before the first fall frost. The exact date will depend upon your growing conditions and you may have to experiment a bit to get it right.
Planting
You have three choices of planting method when growing onions; you can use seed, transplants or sets. All of these are fully hardy and can be planted as soon as the soil is workable in spring. When you first try growing onions it isn’t a bad idea to try two different planting methods at the same time, to see which works best for you.
Seed
Growing your own onions from seed gives you the greatest choice of varieties. The problem is that they are quite slow, growing only half as fast as lettuce.
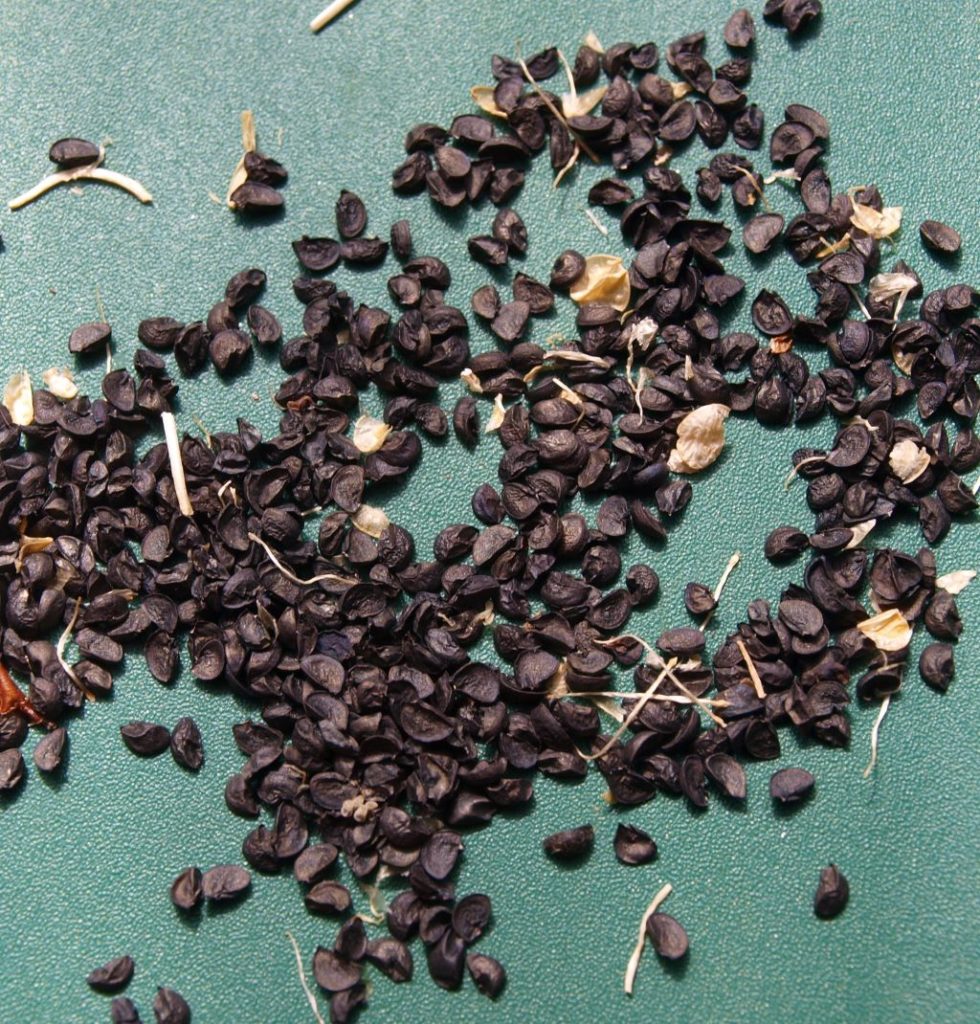
Onion seed is one of the shortest lived of all common vegetables, so it is important that it is fresh. Fresh seed germinates quickly (7 – 10 days) and grows more vigorously.
It is most common to use the seed to grow transplants, but you could also direct sow it, or use it to grow your own sets
Direct sowing: This is slower than transplanting of course, but easier and can work well in some situations (especially if you have a long growing season).
This is considered the best way to plant onions in fall for a spring crop, as they are less likely to bolt than transplants or sets. Time your fall planting so the seedlings are well established before frost arrives. In cold areas, protect them with mulch over the winter.
Onions are very hardy and can be direct sown as soon as the ground can be worked in early spring. This may be 6 weeks before the last frost (the soil should ideally be 50°F ).
You can either broadcast the seed, or sow in drills ¼ – ½˝ deep. Keep the soil moist and free of crusting until all of the seed has germinated. It is usual to sow quite thickly and gradually thin it out to the desired spacing (you can eat the larger thinnings). Thinning is very important if you want to grow large bulbs, so don’t neglect it.

Onion sets
These are small onion bulbs (⅜ – ¾˝ in diameter) grown in crowded conditions, so as to induce premature bulbing. They are the easiest way to grow onions, as you don’t have to worry about germination and are actually starting with a small bulb.
The problem with using sets is that there are very few varieties available. In fact often packages of sets often don’t even say what type they are, other than yellow, red or white onions! Hopefully the sets sold in your area will at least be appropriate for your day length.
Buying sets: Every spring sets are available in every garden center, so they are probably the commonest way to grow onions. It is good to get and plant them as soon as they become available, if left too long they will eventually start to sprout in the bag.
Growing sets: This is easier than you might imagine and has the advantage in that you can grow whatever variety you want. Simply scatter the seed on a prepared bed in spring, ¼˝ apart and cover with ¼ – ½˝ of sifted soil / compost mix. Don’t feed the plants and go lightly on the watering. Because they are growing so close together they will crowd and stunt each other, which is what you want When the tops turn brown, dig and dry the small bulbs for at least 10 days. Store them in the fridge or root cellar (below 40°F). Sets with a diameter of less than 1˝ are the best, as they are less likely to bolt.
Planting sets: This is pretty straightforward, simply place them on the ground, with the right (pointed) side up, at the desired spacing (adjust if necessary). If the soil is very loose you can just push the sets down into the soil to the proper depth (they should be just barely visible) with your finger and close up the hole. If the soil is dense pushing on the bulb may damage it, in which case you should either loosen it with a fork beforehand, or poke a small hole for each bulb.
Some gardeners sort out their sets and use the small ones (dime size or smaller) for bulb onions and larger ones for scallions. This may seem counter-intuitive, but the larger ones are more inclined to bolt.
You may have to protect the newly planted bed from birds (they sometimes pull the sets out of the ground) or cats (who use it as a litter box). To foil cats just cover the bed with a piece of wire mesh fencing until they are established.
Transplants
Using transplants gives you the largest onion bulbs and is generally considered the best way to grow onions.
Buying: Many people buy their transplants (either by mail order or from the garden center) in bundles of 50 – 80 plants. These work well, but are a little expensive, especially when you consider how easy it is to raise your own. They also have quite a big interruption in growth while they are in transit to your garden.
If you can’t plant your bundles of transplants when you get them, keep them in a cool moist place for up to 2 weeks.
Growing transplants: Start the seeds about 8 – 12 weeks before planting out time. Remember the longer the plants grow before bulbing, the bigger the bulb can get.
Onions don’t mind transplanting (it may even encourage good root growth), so are usually planted in flats (or plant pots), ¼˝ apart and ½˝ deep (cover with a sifted soil / compost mix). You can grow a lot of plants in a small area.
The seeds will germinate much quicker if you put them in a warm place (75 – 80°F). Once they have germinated they should be moved to a cool place (60 – 70°F), as this gives you stockier, hardier plants.
If the stems are smaller than ¼˝ diameter when you plant them out, you shouldn’t have to worry about vernalization (see Bolting below). However you want them to be close to this size, so the bulbs will get bigger. If you don’t plant them out until the weather has warmed up, you won’t have to worry about this too much anyway.
Planting transplants: The seedlings can be transplanted out 2 weeks before the last frost date, but I prefer to wait a bit longer, to avoid the possibility of vernalization. Use only the largest, healthiest seedlings and plant them 1˝ deep. Some people cut off part of the top and root before transplanting, claiming it encourages new root growth and vigorous recovery.
The transplants may take a week or so to recover from transplanting before they put on much growth. Keep the soil moist and feed them every 3 weeks or so to maximize growth.
Spacing: Onions don’t like competition so spacing has a direct effect on the final size of the bulbs. A wider spacing results in larger bulbs, but of course you get less of them. For maximum production of food you should plant fairly closely. The individual bulbs may be fairly small, but you will get a lot more of them (often small bulbs are more convenient than large ones anyway). Close spacing can also result in faster maturation.
Of course the fertility of the soil also affects spacing. In rich soil you can put the plants closer together.
I like to plant onions in offset rows at a fairly wide spacing across the bed, so it’s easier to weed them with a hoe. Some gardeners initially plant at half the final spacing and remove each alternate plant for use as green onions (if growing from seed you can afford to be extravagant).
Bed spacing:
Large bulbs: 4 – 5˝ apart
Medium bulbs: 3 – 4˝ apart
Pickling bulbs: 2 – 3˝ apart
Green onions: 1 – 2˝ apart
Row spacing: Put the plants 3 – 5˝ apart, in rows 12˝ – 15˝ – 24˝ apart (exact spacing depends upon variety and soil).
Care
You want onions to grow as fast as possible, so by the time the day length is right for bulbing, they will be have stored enough food to produce large bulbs. This means spacing them properly and giving them all the nutrients and water they need.
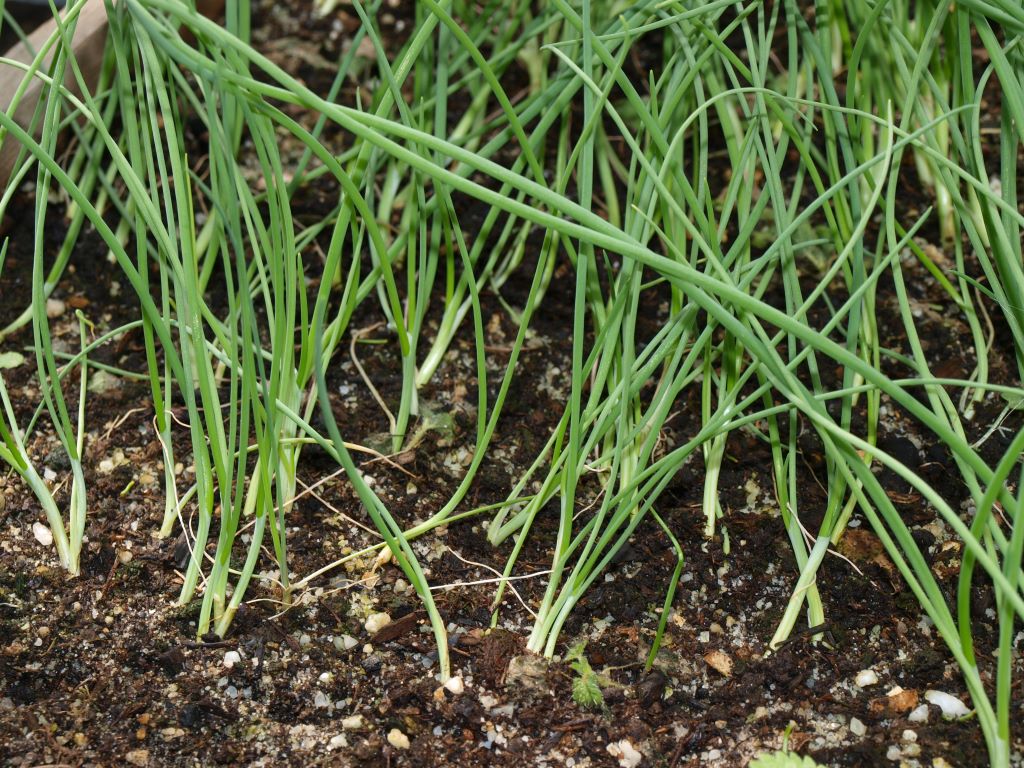
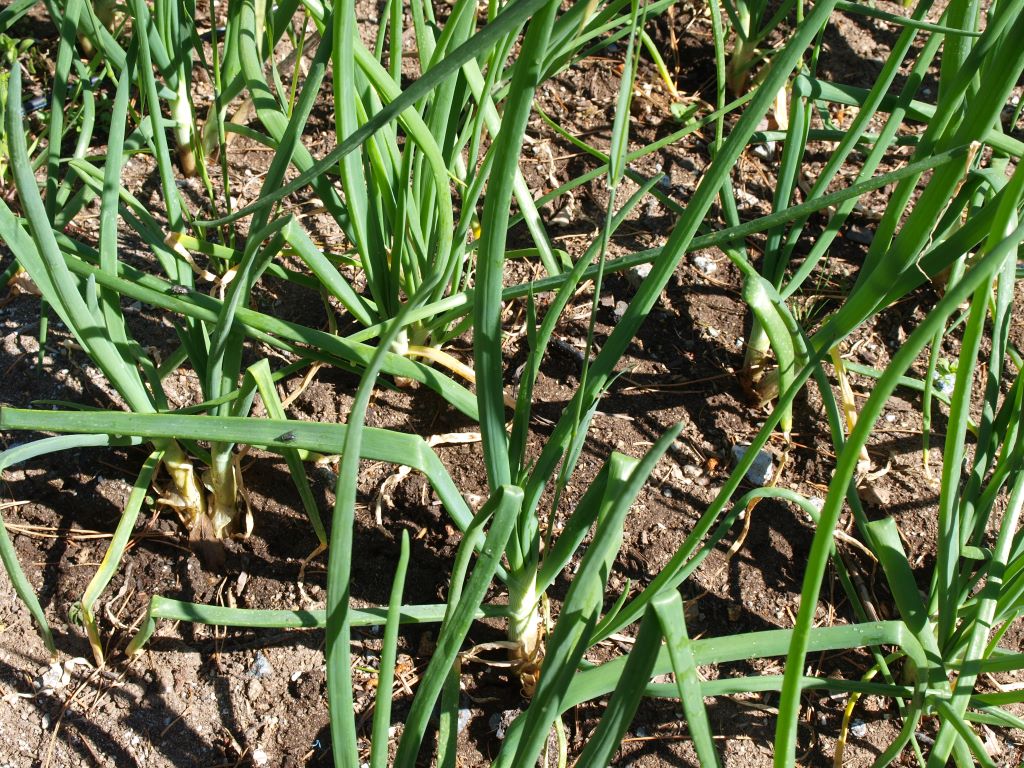
Weeds: Onions don’t produce much foliage and don’t get very big, so they can’t shade out, or outgrow weeds as they mature. This means that competition from weeds can be a major problem, especially for direct sown crops. It is critical that they are weeded methodically, especially during their first two months in the ground.
You need to be careful when weeding, as their shallow roots are easily damaged by careless hoeing. As the plants get bigger, a mulch is helpful to keep weeds down.
Water: Though onions are quite drought tolerant, a lack of water makes the bulb smaller and more pungent. It can also make the plant liable to bulb prematurely, which also means smaller bulbs. For best flavor and largest bulbs, you should keep the soil moist at all times, so there is no interruption in growth.
Give your onions water in the form of frequent shallow watering (there’s no point watering these shallow rooted plants very deeply). It is best to water in the morning, so the tops dry out quickly, as this reduces the potential for diseases such as downy mildew. Don’t over-water though as too much water may result in bulbs that don’t store well.
Stop watering the bulbs when they stop enlarging, as they need to be dry for curing. If the soil isn’t dry enough the bulbs may start to put out new roots.
Thinning: It is important that the plants have enough room to grow without competition, so thin if necessary. Use the thinnings as green onions.
Frost protection: Use row covers to protect seed beds from hard frost, as this could damage them.
Fertilization: If your soil isn’t very fertile and the plants aren’t thriving, give them a feed of compost tea or liquid seaweed every 2 – 3 weeks. Alternatively you could side dress with a fertilizer mix every 4 weeks. Stop feeding when the bulb ceases to grow rapidly.
Mulch: The sparse foliage doesn’t shade the soil very much, so a mulch is helpful to conserve soil moisture in dry weather. It will also help to keep down weeds. Mulch also insulates the soil, so don’t apply it until the soil has warmed up.
Problems
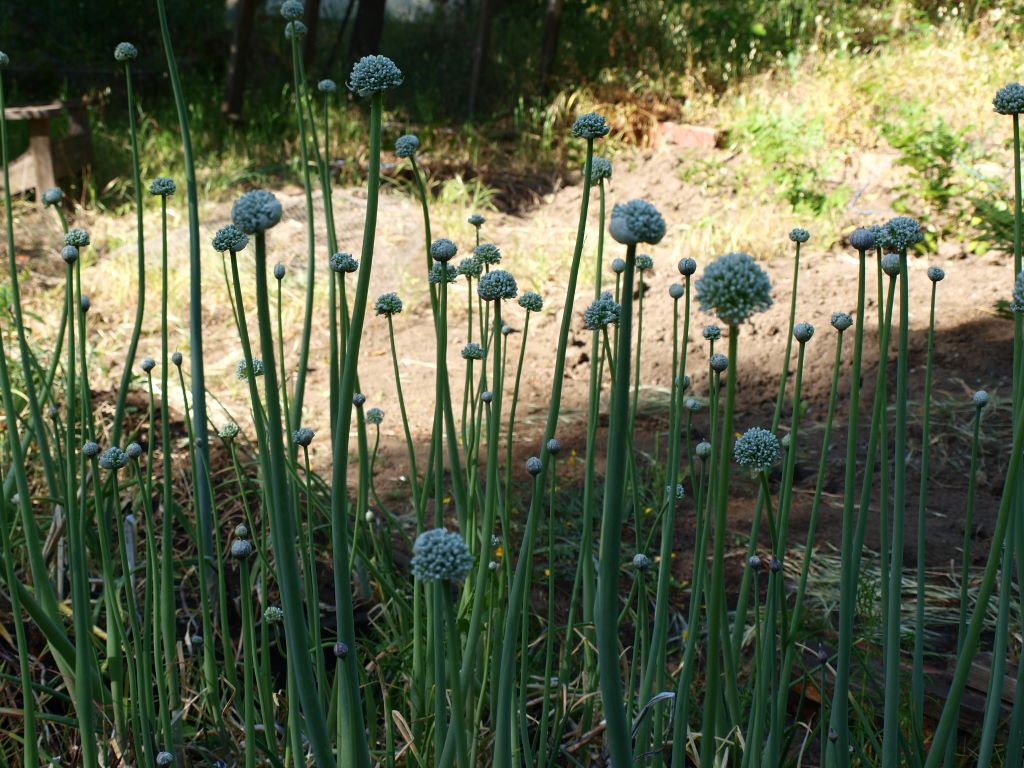
Bolting: Sometimes onions will bolt instead of bulbing, or bolt while bulbing. This usually happens because the plants were vernalized.
For a plant to be vernalized it must be at least ¼˝ in diameter (smaller plants aren’t usually affected) and must be exposed to temperatures below 50°F for two weeks. When warmer weather returns the plant thinks it has gone through a winter and so sets about following its destiny, which is to produce seed. This sometimes happens when there is a very late cold spell in spring.
This phenomenon means you must be careful when planting onions in fall or early spring. If they get too big (over ¼˝ diameter) they may bolt when spring arrives.
If a plant bolts remove the whole flower stalk promptly. Don’t just pinch off the flower, otherwise the plant will continue to waste energy on the remaining stem (which will swell up).
Bolting doesn’t affect edibility, you can just remove the woody stem core when chopping the bulb. However it does mean the plant is wasting energy, so the bulb won’t get as big as it could have. Bolted onions don’t store as well, so should be used first.
Pests: Onions are relatively pest free, except for a couple of (not insignificant) insects.
Onion maggots: This small fly is found in the northern (above 40° latitude) United States and Canada. The larvae burrow into onion bulbs and seedlings, stunting or killing them, or causing them to rot in storage I have had no experience with them, but row covers are an effective solution
Onion thrips: These creatures suck juices from the plants. They survive the winter in weeds so keep the garden clean. Spanish onions are resistant.
Disease: Though the Alliums in general are rarely affected by pests, there are quite a few potential disease problems. Onion leaf blight and purple blotch are the most serious, especially in wet or humid weather (provide good air circulation).
Other diseases include fusarium rot, downy mildew, rust, smut, pink root, onion smudge and neck rot (I can’t help thinking that the people who named these diseases didn’t display much creativity).
Nutrient deficiency
Tip burn: A deficiency of potassium or manganese may cause the tips of older leaves to die back. Liquid kelp will supply both of these (as will compost of course).
Harvesting
Bulbs
When: For immediate eating you can start harvesting bulbs as soon as they are big enough to be worth using. However if you want to store the bulbs for any length of time, they must be fully mature.
When bulbing is complete the tops turn yellow and die back, as they have no more energy in them. Stop watering at this time, to allow the bulbs to dry out and cure.
Some gardeners knock over any remaining green leaves at this point, to hasten their drying. Don’t do this prematurely though, wait until at least a half of the tops have fallen by themselves and take care not to bruise the bulb. Leave the bulbs for another week to die back fully.
How: Lift the bulbs with a fork and leave them in a dry place with good air circulation for a few days to dry.
Onion bulbs are fairly delicate, so handle them carefully at all times and don’t throw them around. This is particularly important if you want to store them. Damaged or bruised bulbs will rot easily.
If it isn’t too hot and sunny you can leave them outside, but if the sun is hot, you should move them into the shade, as they can be cooked by very strong sunlight.
If there is danger of rain or dew you should move them under cover, as you don’t want them to get wet while they are drying!
Indoor drying is often done on screens or slatted shelves in a warm, dry, well ventilated place. You can also dry them on sheets of newspaper.
After the tops have dried out completely, it is common to cut them off, leaving just 1˝ on the bulb, but some people say they store better if the tops are left on. Obviously if you want to braid your onions you need the tops intact. Finally put the bulbs in a warm, dry place for 2 – 3 weeks, to cure fully.
Greens: You can harvest individual leaves from your bulbing onions at any time. Just don’t take too many or it will affect bulb formation. Actually it is a better idea to leave the bulb onions alone and plant extra plants for scallions (use the largest sets, or the weakest looking plants). Even better is to plant some perennial welsh onions or Egyptian onions to supply green onions.
Storage: How long your onions will store depends upon what variety they are. The sweeter ones don’t store well and must be used relatively quickly. The more pungent ones may keep for many months.
Before storing the bulbs, you should examine them carefully. The papery outer skin should be in good condition, there should be no bruising and the neck should be dry and papery. If the neck is still thick it didn’t mature properly and won’t store very well. Any bulbs that are less than perfect should be used first.
Store the bulbs in boxes or mesh bags (old panty hose works well). You can also make onion braids. Ideally keep them in a cool dry place at 32 – 50°F with 60% humidity.
Excessive moisture will encourage sprouting, so the fridge isn’t a good place for them.
Large onions can be sliced and dried, small ones can be pickled.
Onion braids look great hanging in the kitchen, but it is too warm and dry to store them there for any length of time (they will dry out). You could make small braids and bring them into the kitchen as you need them.
If your onions start to rot in storage, it is usually either because they weren’t cured properly or because of fungal infection.
Seed saving: Onions are cross-pollinated by insects, but this isn’t usually a big problem as there are no close wild relatives and most people don’t let their onions flower. They will cross with shallots, potato onions and welsh onions (even though the latter is a different species).
Onions are biennial and will flower in the spring of their second year. In mild climates you can leave the bulbs in the ground over the winter, but in cold
climates you may have to store them inside and re-plant in spring.
Use the best onions you have for seed. Larger bulbs produce larger flowers (they sometimes get to 4 feet in height) and more (and perhaps healthier) seed.
Make sure the flower heads are thoroughly dry before collecting seed. When they are fully dry remove the seed from the head and dry it some more before storing. Onion seed doesn’t remain viable for very long, 2 – 3 years is probably typical.
Unusual growing ideas
Interplanting: Onions are commonly interplanted with carrots, but do well with many crops.
Containers: Green onions are well suited to growing in containers and don’t require much work. Bulb onions can be grown too, though they need a deeper container and you probably won’t get a very big harvest.
Green onions: These are varieties of bulbing onion, sown in fall and harvested as scallions or green onions in spring (which is why they are sometimes known as spring onions). They can be planted very closely together, with as many as 30 plants per square foot.
Green onions can also be multi-planted, with up to 10 seeds in one soil block, or plug tray (in this way you can grow a bunch of green onions.
There are varieties specifically bred for this purpose (White Lisbon is one), or you can use any surplus onion sets.
Green onions may be hilled up with soil to increase the length of white stem.
If you grow a long day onion in a short day area, or vice versa, you may end up with green onions by accident.
Varieties
More than with most crops, the selection of the right onion variety for your location and purpose is extremely important. You must choose a variety that is suited to your day length.
I already mentioned how onion varieties are commonly classified according to the amount of daylight they require to produce bulbs. European varieties tend to be long day, because they come from more northerly latitudes. For some reason seed packets often don’t contain day length information, which seems rather negligent.
Short day onions
These are grown in the south, up to 36° latitude and bulb when the day length is under 13 hours. If you plant them further north they tend to bulb prematurely.
In very mild climates it is common to plant them in fall to grow over the winter and bulb in spring.
Pungent – California early red, Ebenezer, Red Creole, White Creole
Sweet – Texas Early Grano, Texas super sweet, White Bermuda, Yellow Granex,
Intermediate day onions
These are grown from 34° – 38° N and bulb when the day length is 13 – 14 hours. Generally they don’t store well.
Pungent – Stockton Red, Super Star, Australian Brown, Southport Yellow globe, Italian red, White Portugal.
Sweet – Candy, Red Candy Apple, Walla Walla,
Long day onions
These are grown in the north, above 36° N and bulb when the day length is more than 14 hours. They are often hard and pungent and generally store well.
Pungent – Ailsa Craig, Copra, Early yellow globe, Red Zeppelin, New York Early, Yellow globe danvers, Sweet Spanish, Cipollini.
Sweet – Walla Walla
Other types of bulb onion
Storage onions
These tend to have pungent flesh and thick skins.
Copra, F1, Ebenezer, Yellow Globe, Yellow Of Parma
Sweet onions
These have such a mild flavor they are often eaten raw. Their skins tend to be rather thin and they contain a lot of water, which means they don’t keep very well. They are mostly short day types (but not all).
Yellow Granex F1, Walla Walla
Cipollini onions
These flat Italian onions have a fairly mild, sweet flavor and store for up to 5 months. If you grow them well they can get quite big. They are long day onions, though may do okay in intermediate areas too. They are often planted in fall to mature in spring.
Borettana
Red Cipollini
Japanese onions
These are simply Japanese varieties that have been bred for growing in mild climates. They are planted in late summer or fall and harvested the following summer, slightly before other bulb onions.
Senshyu Semi-Globe
Imai Early Yellow
Shonan
Kitchen use
Onions resemble garlic in that their pungent flavor only develops fully when cell walls are ruptured. If you bake a whole onion this will inactivate the enzymes and the flavor won’t be anywhere near as strong.
| Onion Bhaji 1 large onion 1 small hot pepper (de-seeded and chopped, the hotness is up to you) 4 oz chickpea flour (grow your own) 1 oz cilantro ¼ tsp chili powder ½ tsp turmeric ½ tsp baking powder ½ tsp ground cumin Salt Water Vegetable oil Mix all the dry ingredients together in a bowl, then add enough water to make a batter (this should have the consistency of whipping cream). Let it sit for 15 minutes. Cut the onion into ¼˝ thick slices and coat them with the batter. Then fry in 350°F oil (it needs to be hot) first on one side until crisp and then turn over (you can also deep fry, but this takes more oil). Drain well on kitchen paper and serve hot with mango chutney. |