


Shallot
Allium cepa aggregatum group
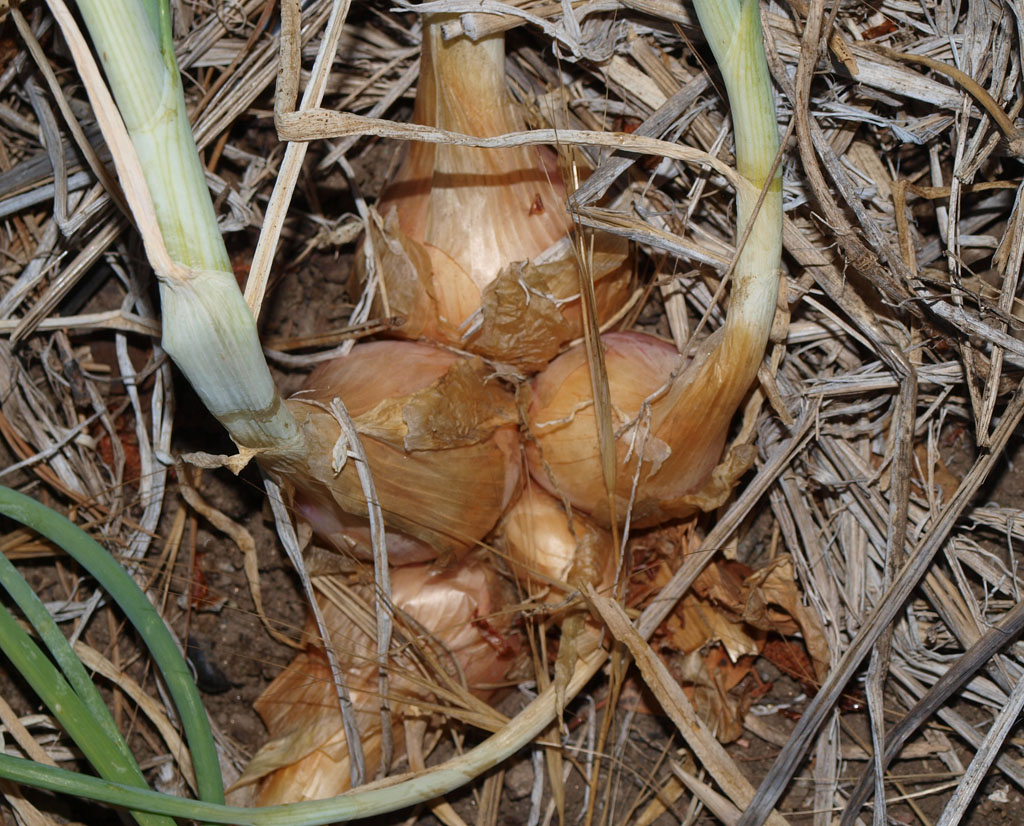
Introduction: Some gourmets consider the shallot to be the most refined of all the Allium family and it certainly is milder and more delicately flavored than onion or garlic. It is the commonest kind of multiplier onion, a group that also includes potato onions and Egyptian onions. Each plant produces a cluster of up to 10 or so bulbs, each up to 2˝ in diameter and connected at their bases.
Ease of growing: The shallot has similar growing requirements as the onion, though it is easier to grow, as you don’t have to worry so much about day length. You can grow it as an annual, or you can leave it in the ground year round.
Crop value: Shallot is a very dependable crop for the home gardener and I highly recommend it. It is easy to grow, tasty, doesn’t require much space, is quite productive and doesn’t take a lot of work to grow. The bulbs also store better than onions.
Climate: Shallots prefer the same climate as the onion, which isn’t surprising as they are simply another type of onion. They like cool weather (50 – 70°F) for growth and slightly warmer 70 – 80°F (and dry) weather for bulbing and ripening.
Like onions they are day length sensitive, with long days triggering bulbing. I didn’t realize this for a long time though, because I always plant in fall, so they have plenty of time to grow before day length triggers bulbing.
Day length isn’t such a big issue because they are perennial and in the ground for a long time. As long as each shoot has at least 4 or 5 leaves you can
rest easy and happily watch them bulb up when they are ready.
Nutritional content: Like the onion they are rich in vitamin C, potassium, calcium and a variety of beneficial phytochemicals.
| About Shallot Perennial Hardiness zones: 3 – 10 Soil temp: 50 (60 – 65) 75°F Seed viability: 1 – 4 years Yield: 1 – 4 lb sq ft (1 lb sets gives 5 – 7 lb bulbs) Yield per plant: 2 – 8 oz Days to harvest: 90 – 120 days Growing temp: 50 (60 – 70) 75°F Plants per person 5 – 10 |
Soil
pH 6.0 (6.5) 7.0
Shallots prefer the same kind of soil as onion, well-drained, rich, loose and moisture retentive. However they will do fine in a less than ideal soil. It does need to be well-drained though, as they may rot over the winter if it is too wet. If your soil isn’t very well-drained, you should grow them in raised beds, or on ridges of soil.
Soil preparation: Incorporate 2˝ of compost or aged manure into the top 6˝ of soil, to supply nutrients and aid in moisture retention. This is particularly important if your soil is light and doesn’t hold water well.
You may want to add colloidal phosphate to supply phosphorus and wood ashes or greensand for potassium. You could also use a standard fertilizer mix, though they don’t need a lot of nitrogen.
If the soil is very acidic add lime to raise the pH.
Planning
Where: Shallots don’t take up much space, so it’s fairly easy to find a place for them. If you are growing them as an annual, put them in a raised bed. If you are growing them as a perennial, put them in any vacant spot where they won’t be in the way. You can even plant them singly around the garden. Just remember that they need full sun.
When: Depending upon where you live, shallots can be either planted in fall or spring. You might even plant at both times, as extra insurance. Spring planted bulbs are also less likely to bolt.
Spring: The bulbs are quite hardy and can be planted 4 – 6 weeks before the last frost date (they actually prefer to grow in cool soil). Starting early is important to give them as long a growing season as possible before they bulb. They grow well in the long days of spring and early summer, and should be ready to harvest in mid to late summer.
Fall: In mild climates they are usually started in fall at the same time as garlic. If winter isn’t too harsh this is generally the best way to go and results in bigger bulbs. A deep mulch can help them to survive severe cold (though watch for mice getting in there and eating the bulbs). Fall planted bulbs are more likely to bolt than spring planted ones, which may be an issue with some types.
Planting
Vegetative: When shallots are grown from bulbs they are planted directly in the garden. Plant them so the pointed tip of the bulb just shows above ground level and the flat end is down. If they somehow work their way out of ground (birds often have something to do with this), just put them back in.
Seed: Seed grown shallots are usually grown in the same way as onion, which means starting them indoors as transplants. See Onions for how to do this.
Once you have raised your first crop of bulbs from seed, you can start propagating them vegetatively.
Spacing:
Beds: 4˝- 6˝ – 8˝ apart
Rows: 4 – 6˝ apart in rows 9˝ apart
Care
Weed: As with the related onions, shallots have quite sparse foliage and are vulnerable to weed competition. They should be weeded regularly, preferably by hand, as the bulbs are easily damaged (be very careful if using a hoe near the plants). A mulch can be a big help in keeping weeds down.
Water: Shallots are somewhat drought tolerant, but need evenly moist soil for best production. Don’t let the soil dry out too much as it can reduce the final yield.
Fertilization: If your soil is poor give the plants a foliar feed of compost tea when the shoots are about 6˝ high. Feed them again about a month later.
Mulch: A couple of inches of straw mulch may be applied when the shoots have appeared. This helps to keep down weeds and reduces the rate at which the soil dries out in hot weather.
Unearthing: Shallots like to grow half out of the soil. If the bulbs get partially buried, scrape away the soil to expose them almost down to the roots.
Problems
Pests: Shallots are bothered by the same pests as onions (thrips, onion maggot, slugs and snails, gophers, leafhoppers), but are usually relatively pest free.
Disease: Generally shallots are quite trouble free, but they can be afflicted by all of the same diseases as onions, as well as damping off, downy mildew, rust and more. One of the commonest problems is bulb rot caused by cold, wet soil.
Bolting: Some types of shallots may occasionally try to flower. If this happens cut off the entire flower stalk promptly, as it takes energy from the bulbs (the vegetative types can’t produce viable seed anyway).
Harvesting
When: The bulbs are ready to harvest when the tops have died down, usually in July or August.
You can harvest the green tops at any time for use like scallions.
How: Pull the whole bulb clusters (you can almost just pick them up off the ground) and leave in a warm, dry, shady place for a few days to dry.
Storage: Shallots keep very well (some varieties better than others). They generally last longer than onions, and were once saved until the store of bulb onions had gone.
They keep best in a cool dry place, at 32 – 50°F and 60% humidity. Don’t keep them in the fridge for very long, as it is too humid (too much moisture can encourage sprouting or mold).
Don’t break up the bulbs until you are going to use them, as it may start them sprouting.
Seed saving: There are actually two types of shallots, those that are propagated from seed and those that aren’t. The latter don’t produce fertile flowers and so can’t produce seed. With these you simply save some of the bulbs for replanting.
If your plants produce viable seed you can save it in the same way as for onion. The flowers are cross-pollinated by insects, but this isn’t usually a problem as there are no close wild relatives and most people don’t let their onions flower. Seed production just happens, all you have to do is not stop it. Collect the seed from the dry head and dry it thoroughly before storing.
The seed doesn’t remain viable for very long, often only a couple of years, so don’t try and keep it too long.
Unusual growing ideas
Greens: You can grow shallots as a source of scallions. The best way to do this is to have a permanent colony of the plants (or small patches in different parts of the garden).
Interplant: You could plant a low growing / fast maturing intercrop in between the rows of shallots, to make the space more productive.
Containers: Shallots do quite well in containers, so long as they are deep enough.
Indoor greens: Shallots can be grown indoors in winter to supply green onions.
Varieties
Though many garden centers simply sell “shallots”, there is actually a considerable difference between the different types. These differ in color, flavor, keeping qualities, the day length they require for bulbing and how you grow them.
You could try growing shallots that are sold for food, just be aware that there is some danger that the bulbs may contain virus disease. You will have the best chance of success with bulbs that were locally grown and are organic. Chemically grown bulbs are commonly treated to retard sprouting and will often rot before they sprout.
Types of shallot
The information on shallots is often contradictory and confusing. It can be difficult to know what is a shallot and what is not a shallot.
True shallots
These are only propagated vegetatively and can’t be grown from seed.
French Red – This is the most commonly available type (or group of types). It has pink flesh and does better than the gray type in southern areas.
French Gray (Griselle) – The French consider this the one true shallot, with the one true shallot flavor. If you want to grow it you will probably have to go on-line and hunt it down. It doesn’t keep as well as the other types (only 4 – 6 months). Also it often doesn’t do well in more southerly areas.
I’m not sure whether the following are true shallots (the French would probably say not), but they are usually propagated from bulbs.
Picasso – This Dutch type has red brown skin and pink flesh.
Yellow moon – A Dutch variety with yellow skin.
Seed grown shallots Vegetative propagation is fine for the gardener, but commercial growers prefer to grow from a small quantity of easily stored seed, rather than a large volume of perishable bulbs. Consequently there is a whole range of commercial varieties (usually hybrids) for growing from seed. The big shallots you see in supermarkets are this type.
Shallot connoisseurs consider these to be just a small perennial onion, rather than a shallot. Whatever they are they are still a useful crop that is well worth growing. They include:
Picador
Saffron
Conservor
Kitchen use
Shallots are an essential ingredient in French cuisine and they specify certain types for certain recipes.
Shallots work great if you only need a small quantity of onion.
The greens are very good too.
Potato Onion
Allium cepa aggregatum group
Introduction: The potato onion is a type of multiplier onion (like shallot) that is thought to have originated in Scandinavia. It has the same growth habits as the shallot and is cultivated in exactly the same ways. The major difference is that it produces much larger bulbs (up to 3˝ in diameter), so is actually more useful. It doesn’t have any connection to the potato except that it is usually propagated vegetatively (which is a pretty slender connection).
Growing potato onions is ideally suited to home growing, as it is so simple as to be almost foolproof. You simply plant a bulb and harvest a clump of bulbs!
This was a popular crop plant in America when people grew their own food and many families handed it down, mother to daughter for generations (the very definition of an heirloom crop). Use of this plant declined drastically when people stopped growing much of their own food, to the point where it is now almost forgotten. It is even difficult to find bulbs to plant.
Crop value: If the value of a plant is indicated by the number of pages written about it, then I should write a lot more about this one. However most of what I have written about growing onion and shallot is also relevant here, which means this entry is fairly short. Nevertheless this is an outstanding perennial food crop (probably the best overlooked one) and really should be grown by everyone.
Ease of growing: In many ways this is the easiest of all the onions to grow. It has the advantage of vegetative propagation as in the shallot, but produces bigger bulbs.
Like other onions the potato onion is day length sensitive, so should be planted in fall or early spring. This gives it plenty of time to grow before the appropriate day length triggers bulbing.
How they grow: The bulb send up several shoots and grows into a cluster of green plants. Eventually the old bulb shrinks away and each shoot in the cluster forms a new bulb on the soil surface. Generally each plant will produce 3 – 5 bulbs, but sometimes there is as many as 12.
As a rule of thumb you can expect to harvest at least five times what you plant, which should give you some idea how much you need to plant (and save) to supply yourself with onions for the year.
I have read that if you plant a large bulb it will make a cluster of many small ones, whereas if you plant a small bulb it will make one large one. I can’t verify this though, because I haven’t paid that close attention (I only have a short attention span). If it is true then it means you should plant a number of big and small bulbs every year. The small ones will then grow into big ones for eating, while the big ones will grow into small ones for replanting.
Soil: Same as for onion and shallot.
Fertilization: Same as for onion and shallot. It doesn’t need a lot of nitrogen.
When to plant:
Fall: In milder climates the bulbs are often planted in fall, along with garlic and shallot. As the plants then have longer to grow they should give you a bigger harvest (though this doesn’t always happen). Another advantage is that if you plant in fall, you don’t have to store them over the winter.
In cold climates fall planted bulbs might not survive a particularly cold winter, so there is some risk. Fall planting also encourages bolting, whereas spring planting doesn’t. This is good if you want to save seed, bad if you don’t.
Spring: In colder climates spring planting makes the most sense, especially if you don’t want them to bolt (which takes energy from the bulbs). You can plant as soon as the ground can be worked in spring, which may be a month before the last frost (or even earlier in some cases).
Spring planted bulbs usually mature a little later than those planted in fall. If you have enough bulbs you could plant at both times, to spread out the harvest and provide a little extra insurance against loss.
Spacing:
Beds: Space the plants 6 – 8˝ apart in wide beds.
Rows: Space the plants 3 – 4˝ apart in the rows, with 18 – 24˝ between the rows.
Planting: Plant as you would a shallot, so the bulb is just covered with soil (some people plant deeper in fall for better protection from the cold).
Growing from seed: The potato onion can be started from seed quite easily. The difficult part is finding seed to plant, as they don’t often produe it.
The disadvantage of vegetative propagation is that over the years bulbs can get infected with virus diseases, which can result in small (though perfectly usable) bulbs.
When plants are grown from seed they can produce big, beautiful virus free bulbs, 3 – 4˝ in diameter, in their first year.
Plants grown from seed will also show a lot more genetic variation because they aren’t all clones of the same plant. There may be differences in color, size, shape and bulbing habit. You can simply choose bulbs of those you like best for replanting the following year and propagate them vegetatively.
Care: These are surprisingly tough plants. I have had small plants appear to die in hot dry conditions, only to reappear and produce bulbs the following summer.
Watering: Water the plants regularly while they are growing rapidly. Stop watering when the bulb forms and the leaves start to turn yellow, so the neck can dry out.
Mulching: In cold climates overwintering bulbs will benefit from the protection of a thick mulch. This should be removed after all hard frosts are past, so the soil can warm up.
Problems: The only major difficulty I have found with potato onion is finding seeds or bulbs to plant. It is a lot easier to grow than it is to find. This is unfortunate because if more people could try it, then it would be much more popular. This would make it more available, so even more people could try it. Fortunately it is gradually becoming easier to find.
Insurance: The problem with growing perennial vegetables such as this is if something goes wrong you can lose everything. One year all of my stored potato onion bulbs were eaten by wood rats, fortunately I had overlooked a few bulbs in the ground. These produced seed and I was able to start over again. Avoid this by encouraging friends and neighbors to grow it too. This provides invaluable insurance against loss.
Another form of insurance is to plant some of your bulbs in fall and some in spring. Then if your fall bulbs meet an unanticipated fate, you haven’t lost everything.
Seed saving: Many people say it is hard to get potato onions to flower and produce seed, but I haven’t found this to be a problem. In fact my fall planted bulbs produce seed so readily I have had to start spring planting too.
If a bulb produces seed it will use all of its energy for that and will shrivel and become pretty much inedible.
Harvest:
When: This is a fairly short season crop and a spring planting can be harvested in late summer, when the leaves start to die back.
How: The mature bulbs sit on the ground and can often be simply picked up. If the soil is hard you may have to loosen it with a fork first.
Curing: After harvest you need to keep the bulbs in a dry place to cure (just as you would other onions).
Storage: Store your best bulbs in a cool, dark, rodent-proof place (this is especially important for any bulbs you will use for replanting). Potato onions store exceptionally well and will often stay good for up to 12 months.
Of course you need to set aside a portion of your crop for replanting the following year.
Varieties: A few varieties do exist, but think yourself lucky if you can find any potato onions at all. Even if you find somewhere to get the bulbs, you may have another problem in that they are only usually available at the end of the growing season (around October) and often sell out quickly. If you find somewhere that sells them it is a good idea to order early.
If you grow them from seed you will find quite a bit of variation in each plant and can create your own varieties.
Kitchen use: You can use the bulbs and green leaves as you would those of onions. The bulbs will be different sizes so you can choose the size you need for whatever dish you are cooking.
The potato onion is nice when fried with potatoes (which is another very slender connection between the two).