


Sweet Peppers
Capsicum annuum
Introduction: Peppers are native to Central and South America and have been an important crop in that area for over 5000 years. There are two distinct kinds of peppers, with quite different uses: the hot peppers and the sweet peppers. Their flavor and uses differ considerably, but they are grown in pretty much the same way.
Ease of growing: I have always found peppers to be pretty straightforward, so long as they have enough heat. They can be slow to get started if it isn’t warm enough.
Crop value: Sweet peppers are one of the most popular garden crops, though they aren’t particularly nutritious, aren’t particularly productive and aren’t a very important crop from a self-sufficiency standpoint.
Climate: Peppers originated in the tropical highlands of Central and South America and grow best with warm days, cool nights and high humidity. They don’t really like extreme heat and if the soil gets above 85°F in summer it can slow growth. Air temperatures above 90°F can cause flowers to drop instead of producing fruit.
| About Peppers Seed facts Germ temp: 60 (85) 95°F Germ time: 7 – 14 days 25 days / 59°F 13 days / 68°F 8 days / 77°F 8 days / 86°F * Optimum 9 days / 95°F Viability: 2 – 4 years Germination percentage: 55%+ Weeks to grow transplant: 8 – 12 Planning facts Hardiness: Tender Growing temp: 75 – 85°F day 55 – 65°F night Plants per person: 4 Plants per sq ft: 1 (or less) Planting: Start: 4 – 8 weeks before last frost Plant out: 2 – 4 wks after last frost Succession sow: After 6 – 8 wks Harvest facts Days to harvest: 120 – 150 days from seed 50 – 75 days from transplanting Harvest period: 12 weeks Yield per plant: 1 – 2 lb Yield per sq ft: ¼ – 1 lb sq ft |
Nutritional content: Peppers contain vitamin C and A (beta carotene) as well as some important detoxifying antioxidant phytochemicals, including, lutein, zeaxanthin and capsaicin. They contain about 125 calories per pound.
Sweet peppers don’t contain any capsaicin (if they did they would be hot peppers). They do contain other beneficial phytonutrients though.
Soil
pH 5.5 – 7.0
Peppers like a deep, loose soil that is fairly rich in all of the plant nutrients (especially magnesium) and organic matter. They don’t mind acid soil, but don’t like salty ones.
Soil preparation: Peppers aren’t very hungry plants and don’t need a lot of nutrients. Dig 2˝ of compost or aged manure deeply into the top 10˝ of soil, along with colloidal phosphate (for phosphorus), greensand or wood ashes (for potassium) and kelp (for trace elements). You may also want to add some kind of calcium, either lime or gypsum, depending upon soil pH. This should provide all of the nutrients they need. Alternatively you could simplify things by just using an organic fertilizer mix.
If your soil isn’t well-drained then use raised beds, as peppers don’t like having wet roots.
Planning
Where: Peppers need a warm, sunny, sheltered spot. In very hot climates (where temperatures regularly get up into the 90’s) they will benefit from light shade during the hottest part of the day.
Crop rotation: All members of the Solanum family (eggplant, potato, tomato) are subject to the same pests and diseases. Don’t plant peppers where any related plant has grown in the last 3 years.
When: Peppers grow best with warm (70 – 80°F) days, cool (55 – 65°F) nights and high humidity. Don’t plant them out until the average daytime temperature is at least 65°F and the average night temperature goes no lower than 55°F. The soil should be at least 60°F.
Peppers won’t grow well if it’s cold and may be permanently damaged by temperatures below 55°F.
In cool weather sweet peppers won’t get as big or sweet, while hot peppers won’t get as hot. In such situations you might think about growing them under cloches or in a greenhouse. You should also use an early maturing variety.
Peppers need to be started early, because they are slow to get going. Start them indoors 4 – 8 weeks before the last frost date. They are generally one of the last crops to be planted out in late spring, a couple of weeks after tomatoes (4 weeks after the last frost). If the temperature threatens to go below 55°F after you plant them, then cover with mulch, frost blankets or cloches.
Succession sowing: In areas with a long growing season you might want to make a second sowing 6 – 8 weeks after the first one.
Planting
Transplants
Starting inside: Peppers are started in pretty much the same way as tomatoes, but they are a bit more temperamental. This is because they need warmer temperatures for germination and growth than almost any common crop. The soil should be a minimum of 60°F and preferably 80°F. You can see from the germination numbers in the table that temperature has a dramatic effect on germination time. At 60°F they take almost a month to germinate, while at 80°F they take only a week or so. You need to take this into account when deciding when to start the seed.
To get your peppers going as quickly as possible start them somewhere really warm. If you can’t put the whole container inside, you could pre-germinate the seeds (see Pre-germination). Wherever you put them make sure they have good ventilation to avoid diseases such as damping off.
Seed starting mix: Some hot pepper aficionados recommend soilless mixes and say you should avoid both soil and peat when growing pepper transplants.
Seed treatment: Soaking the seed overnight is said to remove germination inhibitors and so may speed germination.
It is sometimes recommended that before planting you soak the seeds in a 10% bleach solution (or hydrogen peroxide solution) for 10 minutes, to kill any disease spores (the seed should then be rinsed carefully). It is said that this treatment may also speed germination by several days.
Pre-germination: To speed up growth and save time you can pre-germinate the seeds. Place them on a strong (tear resistant) paper towel, roll this up and put it in a plastic bag. Place this in a warm place (85°F is best) and start checking it after 3 days. As soon as the seed starts to germinate, plant it out, even if you have to pick out individual seeds. If they don’t germinate within 3 weeks, you should probably get new seed.
Planting: Plant the seeds 1˝ apart and up to ¼˝ deep in the flat (they don’t mind transplanting) or in cell packs or soil blocks (put 3 seeds in each, to be later thinned to the best one).
It is a good idea to water the seedlings with tepid water, to avoid cooling the soil. It is also important not to over water; so allow the soil surface to start to dry out before watering again.
Pricking out: When the seedlings are about 2˝ tall, prick them out into individual 4˝ pots (it’s a good idea to add extra phosphorus to the potting mix). You can bury them somewhat deeper each time you transplant, as they will form roots on their stems. When the transplants are 4 – 6˝ tall they are ready to go outside.
Hardening off: If you are planting peppers in cool spring conditions, they must be hardened off carefully before they go outside (failure to do so can have serious consequences).
Do this slowly over a week, by reducing the amount of water they get and by leaving them outside for longer periods each day. Start by putting them outside for 2 hours at midday and give them 2 additional hours every day, until they are out all day (or simply put them in a cold frame and leave it open during the day). This helps them to slowly get accustomed to the somewhat less than ideal conditions to be found outside.
In warm summer weather there is no need to harden them off. However you may want to keep them outside in the shade for a day or two, so they can get used to the drier conditions.
Planting out: The soil must be warm (at least 65°F) before these tender plants are set out. If necessary you could use black plastic mulch to hasten warming. If the air temperature is still cool at this time, you could protect the plants with cloches to speed their growth.
The actual planting is simple enough, just make a large hole, add a handful of organic fertilizer mix and plant them out so they are a couple of inches deeper than they were growing in their pots. If cutworms are a problem, you can make protective collars of newspaper or aluminum foil.
Direct sowing: It is possible to direct sow peppers, but it isn’t very practical unless you have a long growing season. Plant the seed ½˝ deep when the soil has warmed up sufficiently (a minimum of 60°F – and ideally 80°F).
Spacing:
Space the plants 12˝ – 15˝ – 18˝ apart, according to the fertility of the soil and the size of the variety. Some particularly large varieties may need even more.
If your peppers are growing in ideal conditions they can be quite problem free.
Water: Peppers are somewhat drought tolerant (especially hot peppers), but lack of water can affect fruiting so they need to be kept moist for best production. This is most critical from the time the flowers appear until the fruit reach full size. This is particularly important for sweet peppers; if they don’t get enough water, the fruits will often get blossom end rot, or develop a slightly bitter flavor.
Don’t give the plants water too frequently however, they don’t like wet roots and waterlogged soil. Also don’t leave water on the leaves overnight as this encourages disease. Drip irrigation works well with peppers.
Fertilization: If your soil is poor you could feed the plants with compost tea or liquid kelp, after they have recovered from transplanting. Feed them again as they start to flower to help in setting fruit. They need phosphorus and potassium, but not too much nitrogen (which may result in big vigorous plants, but few fruits). You should be able to tell if they need fertilizing by the amount of growth they are making.
Mulch: This is recommended to conserve moisture and to keep down weeds around these shallow rooted crops. Don’t apply it until the soil is warm though; ideally wait until they are flowering. In very hot weather mulch is sometimes recommended to keep the soil comfortably cool.
In cooler areas black plastic mulch is sometimes used to give the plants extra warmth. People have also been known to put flat rocks around the plants, with the idea that these will absorb heat during the daytime and radiate it back to the plants at night.
Pruning: You may want to pinch out the growing tip when the plant is about 6 inches tall, to make it branch and become bushier.
If your plants start to produce flowers while they are still small, it’s a good idea to pinch them off. At this stage you want your plants devoting all their energy to growth, rather than to producing fruit.
Pollination: Peppers don’t flower until they have produced about ten nodes on the stem. It is common for the first flowers to drop off without setting fruit, usually because night-time temperatures are too cool (below 50°F). Don’t worry too much about this, as soon as it gets warmer they should start to set fruit.
Lack of pollinating insects can also cause flowers to not set fruit. If this is a problem you can hand pollinate with a small paintbrush
If the fruits drop off after they have started to swell it could be temperatures above 90°F, an excess of nitrogen or a deficiency of boron.
Support: Peppers are more sturdy and upright than tomatoes, but heavily laden plants will often benefit from staking, especially in windy sites.
Problems
Pests: Peppers have more than their fair share of potential pests (as do other members of the Solanaceae), but often they are fairly pest free. Possible problems include aphids, hornworms, leafhoppers, mites, nematodes, pepper weevils, leaf miners, flea beetles and Colorado potato beetles.
Disease: Peppers can be affected by a number of diseases (anthracnose, bacterial spot, southern blight, early blight, verticillium wilt).
To minimize disease problems you should keep the foliage dry, make sure they have good air circulation and practice good sanitation. If you start to have problems then try using disease resistant varieties.
Tobacco mosaic virus: This often-fatal virus disease can be transmitted via cigarette smokers, so keep them out of the garden. Some varieties are resistant.
Boron deficiency: The fruits of boron deficient plants are often small and bitter. A deficiency usually shows up in light alkaline soils (high pH reduces its availability), as plants normally get enough boron from compost or other organic matter. Kelp and granite dust are also good sources.
If you are really sure your soil is deficient in boron, you might try dissolving a teaspoon of borax in 10 gallons of water and spraying it over 100 square feet of bed. Be careful though, larger amounts may result in boron toxicity, which is worse than a deficiency.
Magnesium deficiency: This is common and causes leaves to turn yellow and drop off. Dolomitic limestone is the long term remedy, but is slow to take effect. A faster solution is a foliar spray, made from one teaspoon of Epsom salts (magnesium sulfate) in a pint of water. This should be enough to cover 100 sq ft.
Sunscald: This manifests itself as papery bleached tan patches on the fruit. The damaged parts may then be open to fungal infections, which cause them to rot. Sunscald isn’t a disease, but is literally caused by too much direct sun. This can happen to almost any plant, though it is most common on widely spaced and sparsely foliaged ones (as you might imagine).
Avoid sunscald in the future by spacing the plants closer together, to give the ripening fruit more shade. Staking the plants can also help as it prevents them falling over and exposing the fruit to sunlight.
Blossom End Rot: See Tomato.
Harvesting
When: Sweet Peppers take 4 – 5 weeks to reach full size from pollination and another 4 – 5 weeks to ripen fully.
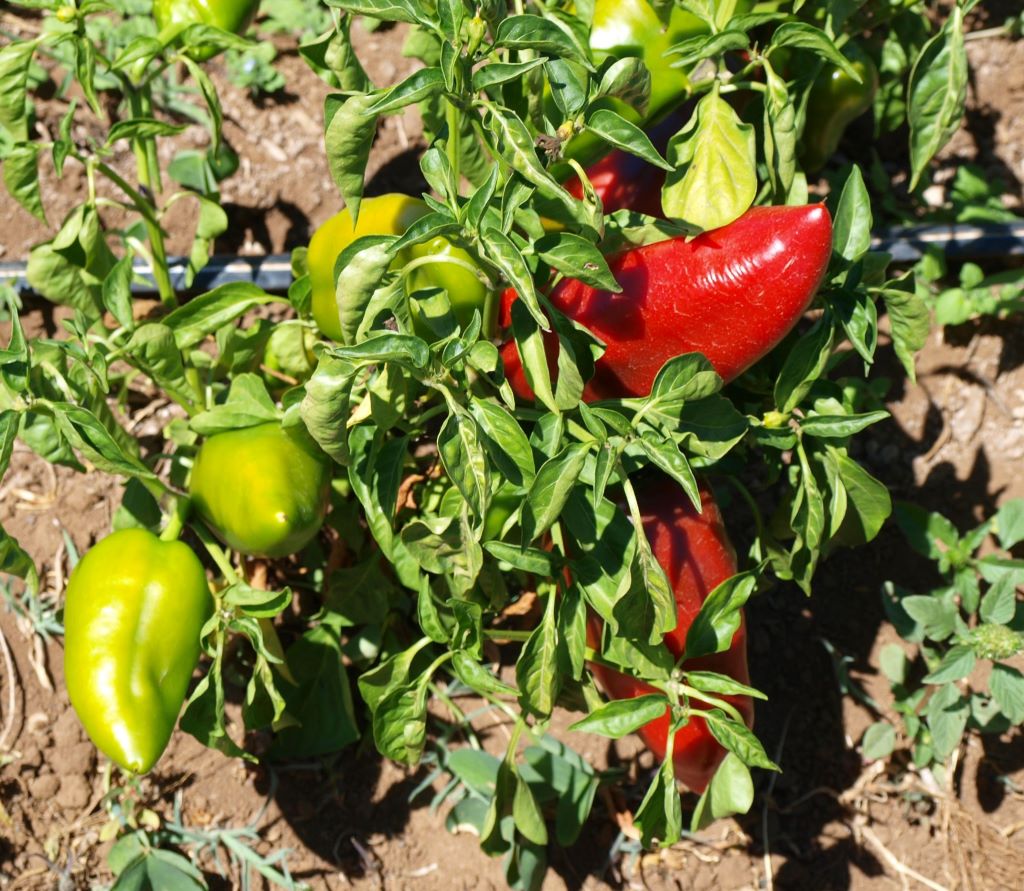
The fruits can be harvested anytime after they reach full size. To get the highest yields you can harvest them as soon as they reach full size and are still green. When fruit starts to ripen it invariably slows the plant down.
It’s useful that peppers can be eaten while green, but unless you are very impatient, or frost threatens, I don’t recommend it. Their flavor and nutritive value improves markedly as they ripen (in most countries they are never eaten green). If you want more fruit it makes more sense to simply grow more plants to make up for the lower yield of ripe fruit.
Remove all small fruit about a month before you expect the first fall frost. These wouldn’t have time to ripen anyway and removing them allows the plant to channel all of its energy into ripening the remaining larger ones. Once they reach full size the green fruit will ripen indoors like tomatoes. You can also eat fruits that haven’t reached full size, but they aren’t usually very good.
How: Harvest peppers by cutting the fruit from the plant, leaving a short stem on the fruit. You can break them off, but the stem is quite tough and there is a risk of damaging the plant.
Storage: Sweet peppers can be stored in a plastic bag in the fridge for several weeks. For longer term storage the fruits can be chopped and frozen, though they will only be good for cooking once frozen.
Seed saving: Though peppers are mostly self-pollinated they do cross-pollinate to some extent. To ensure purity you should have only one variety flowering at a time, or you can isolate them by 400 feet, or cover with row covers. Hot peppers are more prone to cross-pollination as their styles protrude more from the flower than those of sweet peppers.
It’s easy to save pepper seed; just let the fruits ripen fully and collect the seed when you prepare them for eating. Take seed from the first and biggest fruit to appear on the best plants, as these will produce the best seeds. Ideally you will take seed from a minimum of 5 plants to ensure genetic variation.
Unusual growing ideas
Ornamental use: Peppers are quite attractive plants and with their colorful (green, red, yellow, orange, purple) fruits don’t look out of place in the ornamental garden. Some of the hot pepper varieties are quite spectacular.
Containers: Peppers can grow quite well in containers (use a 2 gallon pot for each plant). These have the advantage that you can move them around to take advantage of a warm microclimate.
They can also be treated as a perennial and brought inside in cold weather. They have even been used as house plants!
Increasing light: Aluminum foil mulch has apparently increased yields by 30%, by increasing light levels on the plant. However I’m not sure that would be good enough reason to have sheets of shiny metal in my garden.
Cuttings: Soft cuttings of peppers can be rooted (in water or vermiculite) and this is one way to get plants for overwintering. The length of time they take to root varies a lot though.
Varieties
Peppers tend to be very regional and a variety that does well in one area may not do well in another. It is important to choose varieties that will grow well in your area.
When reading catalogs remember that days to maturity usually means the time from the transplant being set out, to the green fruits reaching full size (but not turning red). Don’t ask me why its not from seed to ripe fruit, I don’t know.
Sweet Peppers: If you are adverse to intentionally inflicting pain on yourself, you may be more interested in these. There are now a lot of hybrid varieties available, but they don’t offer huge advantages (and seed saving is so easy with the open pollinated types).
Bell peppers
California Wonder – Introduced in 1930 and still very popular (70 days from transplant).
Gypsy F1 – A standard hybrid red pepper for hot or cool areas (60 days from transplant).
Purple Beauty – Heirloom with dark purple fruit (75 days from transplant).
Sweet Chocolate – Sweet chocolate brown fruit (65 – 85 days from transplant).
Specialty peppers (not bell shaped)
Corno Di toro – Italian heirloom with bulls horn shaped fruit (80 days from transplant).
Cubanelle – Small fruit prized for frying (75 days from transplant).
Jimmy Nardello – Sweet Italian pepper for frying (75 days from transplant).
Lipstick – Very sweet small fruit are produced abundantly (70 days from transplant).
Red Ruffled – Small, pleated, sweet fruit (85 days from transplant).
Kitchen use
Sweet peppers – These are most often used raw, but can also be bakes, grilled and roasted. They have a unique flavor that goes well with basil, garlic, tomatoes, olive oil, onion and rice.