


Tomato
Lycopersicon esculentum
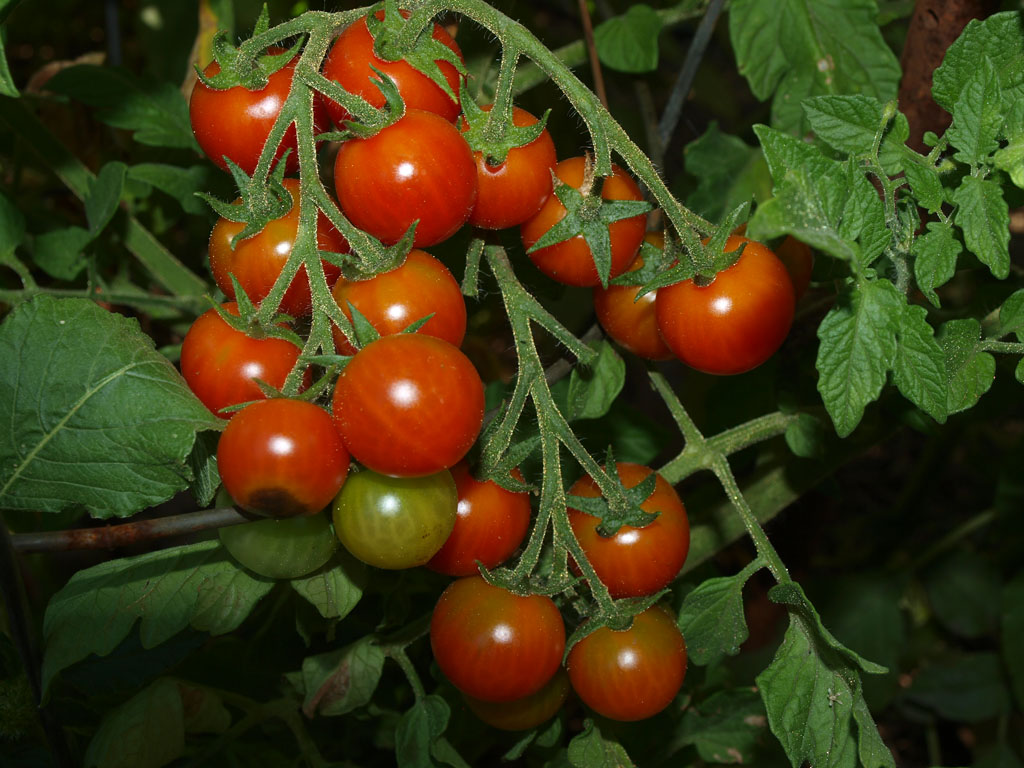
Introduction: Tomato is native to South and Central America and was introduced into Europe in the sixteenth century. It took a long time for it to be accepted there as a safe and wholesome food. It first became popular in Italy, and is still closely associated with Italian food. Tomato is actually a tender perennial, but must be grown as an annual in temperate climates.
The tomato is the most popular garden vegetable crop in America and more square footage of garden magazine space has been devoted to it than any other vegetable. It is popular because it is easy to grow, very productive (it is one of highest yielding vegetable crops) and because home grown fruit is generally far superior to commercial fruit. Few food crops have suffered as much as the tomato in the search for agribusiness perfection.
Nutritional content: Tomatoes contain vitamin C and A (beta carotene) and a whole range of valuable phytochemicals (lycopene, lutein, zeaxanthin and more). They are not a good source of energy, with only about 80 calories a pound!
With the exception of the ripe fruits, all parts of the tomato are somewhat poisonous (not to mention unpleasant tasting).
Climate: The tomato prefers warm weather and doesn’t like it when night temperatures drop below 50°F, They don’t like very hot weather either and may fail to set fruit above 95°F.
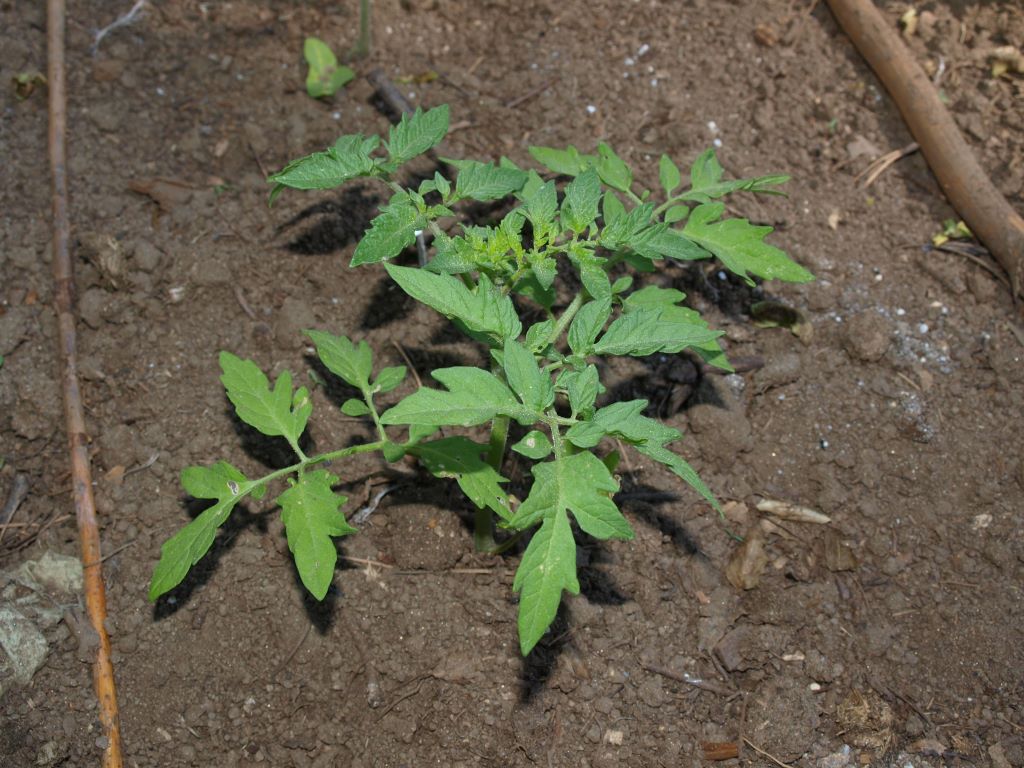
Ease of growing: In a suitably warm climate the tomato is pretty easy to grow, which is part of the reason it is the most popular home garden crop of all. They are so easy to grow they sometimes even show up as volunteers in cracks in sidewalks.
| About Tomato Seed facts Germ temp: 60 (75 – 85) 90°F Germination time: 5 – 14 days 43 days / 50°F 14 days / 59°F 8 days / 68°F 6 days / 77°F * Optimum 6 days / 86°F Seed viability: 3 – 7 years Germination percentage: 75%+ Weeks to grow transplant: 4 – 10 Planning facts Hardiness: Tender Growing temp: 50 (70 – 75) 95°F 50 – 55°F at night Plants per person: 3 – 5 Plants per sq ft: ½ Planting Start: 2 – 6 wks before last frost Plant out: 2 wks after last frost Succession sow: 6 wks later Harvest facts Days to harvest: 80 – 120 50 – 85 days from transplanting Harvest period: Determinate: 4 – 6 weeks. Indeterminate: 6 – 12 weeks Yield per plant: 2 – 6 lb Yield per sq ft: 1 – 3 lb sq ft |
Crop use: The tomato isn’t the most nutritious crop, but it is very much a kitchen essential, as it is used in a huge number of dishes.
Soil
pH 5.5 (6.0 – 6.8) 7.5
Tomatoes aren’t particularly fussy about soil, but generally the better the soil the larger the fruit. The perfect soil for tomatoes is a deep loam with lots of moisture retentive organic matter. It should also be well-drained as they are prone to root rot in wet soils. Early crops do better in light sandy soil because it warms up faster. They prefer a fairly neutral soil, but aren’t very sensitive to pH.
Tomatoes are fairly heavy feeders, using quite a lot of nitrogen (180 lb /acre), a moderate amount of phosphorus (21 lb / acre) and a lot of potassium (280 lb / acre). They have deep roots that may go down 5 feet, but most of their feeder roots are in the top 2 feet.
Soil preparation: Tomatoes are fairly hungry plants, so incorporate 2˝ of compost into the soil generally and then put any additional amendments directly into the planting hole.
Nitrogen: This is most important during the initial vegetative growth stage, though some is also needed for fruit set.
Some gardeners make the mistake of giving the plants too much nitrogen. This isn’t good as it can result in plants with too much lush foliage and not enough fruit.
Phosphorus: This is probably the most important nutrient for tomatoes, so put a handful of colloidal phosphate in the planting hole. This will supply phosphorus for early growth and good fruit set (a lack of it can delay maturation).
I read somewhere that Alan Chadwick used to put a layer of phosphorus in the top 4˝ of soil and another down 18˝ deep to account for this (but I never could pay that much attention to the details).
Potassium: This is also important while the plants are young. Put a handful of greensand or wood ashes in the planting hole.
Calcium: Tomatoes need quite a bit of calcium and a lack (when combined with irregular watering) can result in the common affliction known as blossom end rot.
The commonest source of calcium is ground limestone (such as dolomitic lime) and if your soil pH is low this is the best source. If you don’t want to alter your soil pH very much then you could use gypsum, eggshells or even calcium antacid tablets. You can put these directly in the planting hole, so it is immediately available to the plants roots.
Other nutrients: Tomatoes need trace elements right through their growth cycle. If you have added lots of well-rotted compost, aged manure, or seaweed to the soil before planting, this will supply all of the micro-nutrients they need. If you haven’t then you may want to feed regularly with liquid kelp.
Planning
Where: To grow the very best tomatoes you need a warm sheltered site and 10 or more hours of sun daily (they can be grown with as little as 6 hours daily, but they won’t be as productive).
It is best to avoid wet sites and those with poor air circulation, as disease can be more problematic there.
If the climate is cool, put them against a south facing wall or on a south facing slope. You could also grow them under cloches, or in the greenhouse.
When:
Tomatoes are very tender and have little tolerance for frost. They are usually started indoors anywhere from 4 – 10 weeks before the last frost date. The seedlings can be planted out a couple of weeks after the last frost date.
Generally determinate varieties need 4 – 8 weeks to be ready for transplanting outside. The rather slower indeterminate varieties may take 6 – 10 weeks to attain a suitable size. If you have a very long growing season you can direct sow them outside.
The reason for the big variation in start date is because the rate of seedling growth is very much determined by temperature. If your greenhouse is a cool 60°F the seedlings may take 10 weeks before they are ready to go outside. If it is a cosy 85°F they may be ready to go in as little as 4 weeks. In very warm conditions they will grow like weeds.
It is good to get the starting date right, because you don’t want to have plants sitting around inside in pots for too long (if they start to flower it is definitely too long).
Succession: Though tomatoes will produce fruit for quite a while, they do have a peak bearing season and eventually get less productive (even indeterminate types). You might want to start a succession sowing 4 – 6 weeks after the first (or direct sow some plants when planting the first batch out). If your growing season is long you might even plant a third one a month or so after that.
You can also stretch out the season by planting several varieties with different maturation times.
Cuttings for succession: A quick way to get plants for a second sowing is to use cuttings. Pinch out some of the suckers from your favorite plants and root them in water. These cuttings will give you new plants faster than you could grow them from seed.
Crop rotation: Don’t plant tomatoes where any other member of the Solanaceae (eggplant, pepper, potato) has grown within the last 3 years.
Planting
Buying transplants: This is the easiest way to get tomatoes, though you don’t get as much choice as to varieties. You may also buy problems in the form of disease, weeds or insect pests, so check them carefully before you buy.
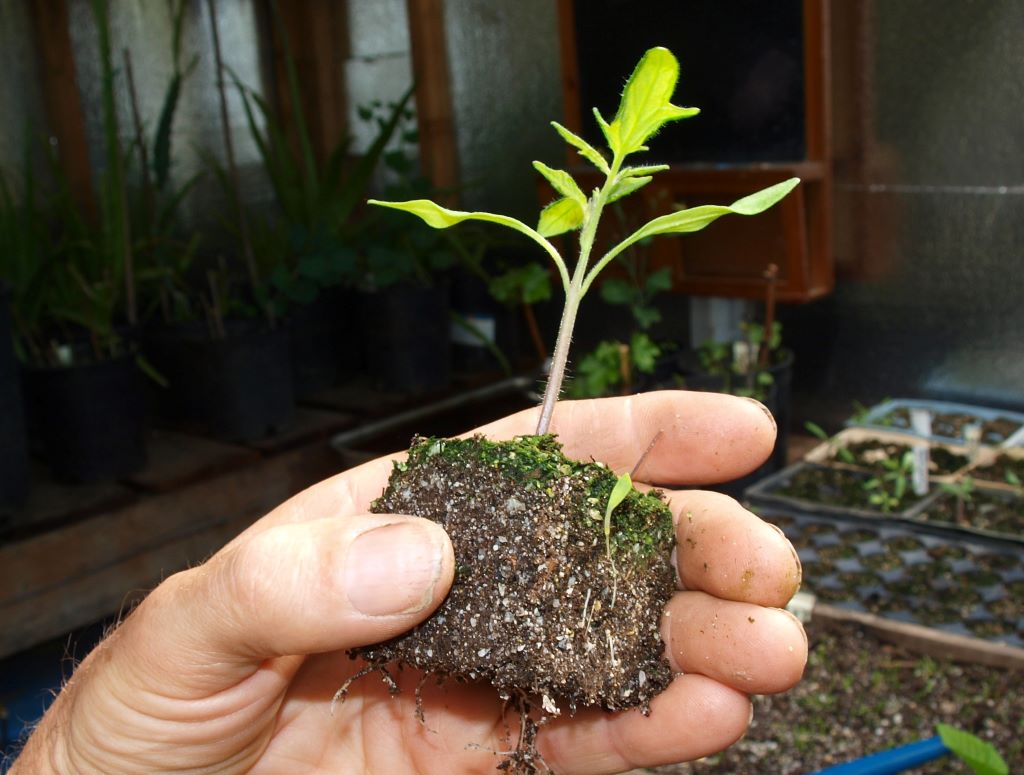
The best transplants are about 8˝ tall and stocky (never leggy). Don’t buy plants with flowers, or tiny fruit, in the belief this will save you time. Premature flowering is actually a sign of stress.
The larger the plant, the greater the setback from transplanting, which is why smaller plants usually do better in the long term.
Transplants
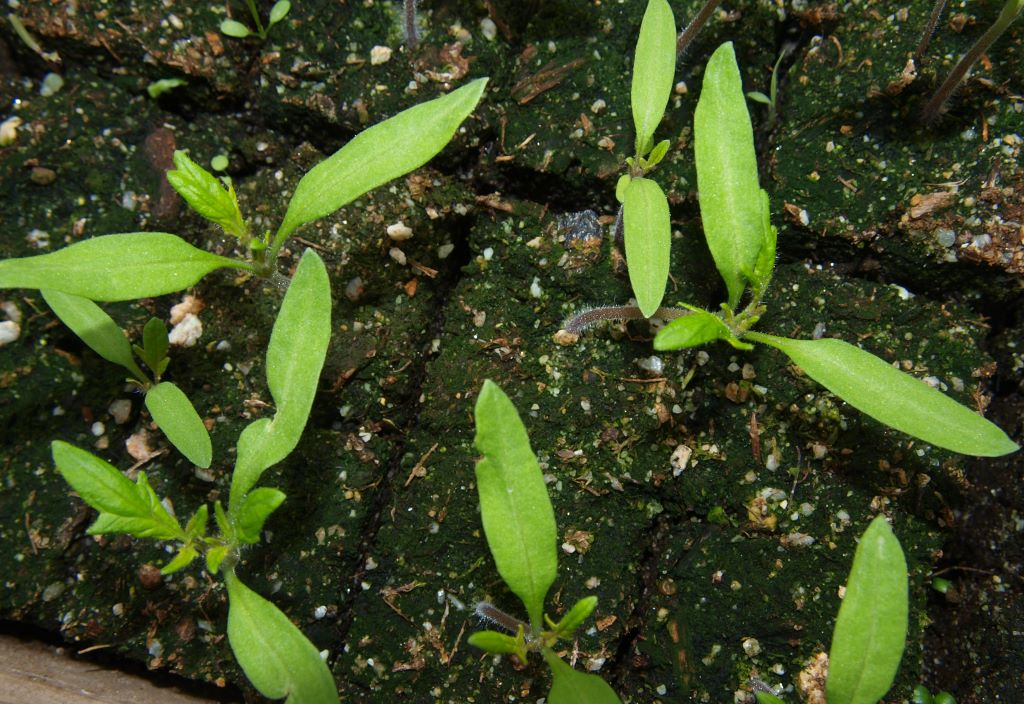
Starting indoors: The seeds should be planted ¼ – ½˝ deep in flats, soil blocks or cell packs and put in a warm place to germinate. They germinate best at a temperature of around 75 – 85°F during the daytime and 10°F lower at night.
A common mistake is to plant far more seeds than you need; don’t grow 50 plants if you only have room for 10. If you sow 3 seeds for every plant you require, that should be plenty. When you only plant a small number of seeds, you can also give them plenty of room – an inch apart is good.
When the first true leaves appear, the seedlings should be transplanted to 4˝ pots. Plant them deeper than they were growing, as they will produce roots all along the buried stem. Temperature can also be slightly lower (65 – 75°F in the day and 55 – 65°F at night).
You must now give the seedling everything it’s little green heart desires: water, humidity, warmth, all the nutrients it needs and plenty of light.
It is not good to have your tomato plants sitting around in the greenhouse for too long. Once the roots have filled the soil in the pot, you must either plant them out or move them to bigger pots. Don’t let them linger inside, as the roots will start to circle around and it will get root-bound. They may even start to flower, which (as I just explained) is not good.
Hardening off: If you are planting tomatoes out in cool spring conditions, they should be hardened off carefully. Do this slowly over a week, by reducing the amount of water they get and by leaving them outside for longer periods each day. On the first day put them outside for two hours during the warmest part of the day. Next day give them four hours, then six and so on. This helps them to slowly get accustomed to the somewhat less than ideal conditions to be found outside. You can also put them in a cold frame, which you open during the day and close at night.
In warm summer weather there is no need to harden them off. However you may want to keep them outside in the shade for a day or two, so they can get used to the different growing conditions.
Planting out: It is important that the soil be sufficiently warm (60°F minimum) for planting tomatoes outside. If it is too cold they will simply sit there without growing and may even be permanently retarded. For very early plantings you might warm up the soil with plastic (clear or black) and use cloches to protect the young plants.
The best time to transplant tomatoes (or anything else) is on a cool cloudy day, if rain threatens even better. If you don’t get cool cloudy days, then transplant them in the early evening, not in the heat of the day.
You can give tomatoes a lot of attention while planting, because you don’t usually plant very many. Dig a fairly large planting hole and amend it with a couple of handfuls of compost. It should be deep enough so you can bury most of the seedling (pinch off the lower leaves), leaving just the top few leaves sticking out of the ground. When you do this additional roots will grow all along the buried stem.
If the soil is still fairly cool when you plant, you can lay the plants almost sideways in shallow trenches, rather than deep holes. The plants will benefit from the warmer soil at this depth and will still produce roots all along the buried stem. This is also a good way to plant very large or leggy plants.
Water well after planting and keep the plants moist until they are well established. It is a good idea to put the supporting stakes, or cages, in the ground at this time, to avoid disturbing the plants later.
If you have a cutworm problem, wrap collars of aluminum foil or paper around the stem near ground level. A ring of wood ashes might also help.
Direct sowing: Sowing seed directly outdoors is only a practical proposition in areas with a very long growing season.
The seed should be planted ¼ – ½˝ deep, after the soil has warmed up. If you are in a hurry you can pre-germinate the seed inside to speed things up.
Of course the problem with direct sowing is that the plants take up bed space from the moment they are planted, but don’t give any return for months. It would be more efficient to raise transplants in an outdoor nursery bed (a protected outdoor bed used specifically for raising transplants).
| Determinate or indeterminate Determinate plants only grow to a certain height and then flower and produce fruit. They produce one flower cluster on each side branch and then stop growing and are finished. These varieties are hardier, shorter (good for under cloches), earlier and produce a lot of fruit in a short time (usually 4 – 6 weeks). Indeterminate plants never stop growing (at least theoretically). The side branches keep growing and can eventually turn into another stem, producing many clusters of flowers. They take longer to start bearing, but keep producing for much longer. They produce more poundage of fruit per square foot than the determinates. |
Spacing: The ideal spacing for tomatoes varies a lot, because of the difference in the size of the varieties and in the fertility of the soil.
Beds: Intensive bed spacing puts plants at 18˝ – 24˝ – 30˝ apart.
Rows: They may be spaced anywhere from 18 – 36˝ apart, in rows that are 36 – 60˝ apart.
You could also experiment with closer spacings. This reduces the yield per plant, but may actually increase the yield per area, as you grow more plants. Sunlight isn’t needed for ripening the fruit, so the foliage can be quite dense.
Care
For highest productivity tomatoes need lots of sun, enough room and a steady supply of available water and nutrients. If you give them all they need, they will respond by flowering earlier and fruiting more profusely.
Watering: Tomatoes are quite drought tolerant and don’t really need a lot of water. More water means more and larger (but less tasty) fruit, while less water means fewer (but better flavored) fruit.
You don’t need to water these deep rooted plants very often, but you should water regularly (unless you intend to try dry gardening). This is especially important when the fruits are sizing up. At this time you might water deeply twice a week.
Don’t wait until they show signs of water stress as this can lead to problems with blossom end rot. Uneven watering may also cause fruit to split.
Don’t get tomato foliage wet, as it can invite the spread of fungus disease. Drip irrigation is the best way to water, as it keeps the soil evenly moist but the plants stay dry. If you must use overhead watering then do it early enough in the evening, so that the foliage can dry out quickly and doesn’t stay wet all night.
Fertilization: High nitrogen fertilizer is a help when the plants are growing rapidly, but once the flowers appear they need phosphorus more than nitrogen.
If your soil is poor you may give your plants a foliar feed of compost tea or liquid kelp every week until they start to flower. Then feed every 2 – 3 weeks.
Instead of using liquid feed you could top dress with a fertilizer mix, or use compost as mulch.
Mulch: Mulch is useful to keep down weeds, conserve moisture and keep the fruit clean. It can also reduce disease problems by keeping soil off of the foliage. In very hot areas mulch is also useful to keep the soil cool.
Don’t put down an organic mulch until the soil is warm (when plants start to flower), as it insulates the soil and can prevent it from warming up quickly.
In cooler areas tomatoes are sometimes planted through black plastic mulch, which suppresses weeds, holds in moisture and keeps the soil significantly warmer. Some experiments using red plastic have shown significantly earlier and higher yields.
It is also possible to grow tomatoes with a living mulch such as clover (See Unusual growing ideas)
Support
No support: It isn’t absolutely essential to support your plants, they can just sprawl on the ground. Determinate varieties work best when grown in this way, as they tend to be smaller. Indeterminate varieties can get quite large and do better if given some kind of support.
Allowing plants to sprawl along the ground can work okay in hot dry climates. In more humid ones it is just inviting problems with disease because of the much reduced air circulation and proximity to moist soil. Pests are also a bigger problem as there isn’t much distance between the fruit and the soil with its multitude of hiding places.
I have to say I haven’t had much luck with letting plants sprawl on the ground and don’t recommend it. There are situations where this will work, but my garden isn’t one of them (I lost a large proportion of the fruit to pests and disease).
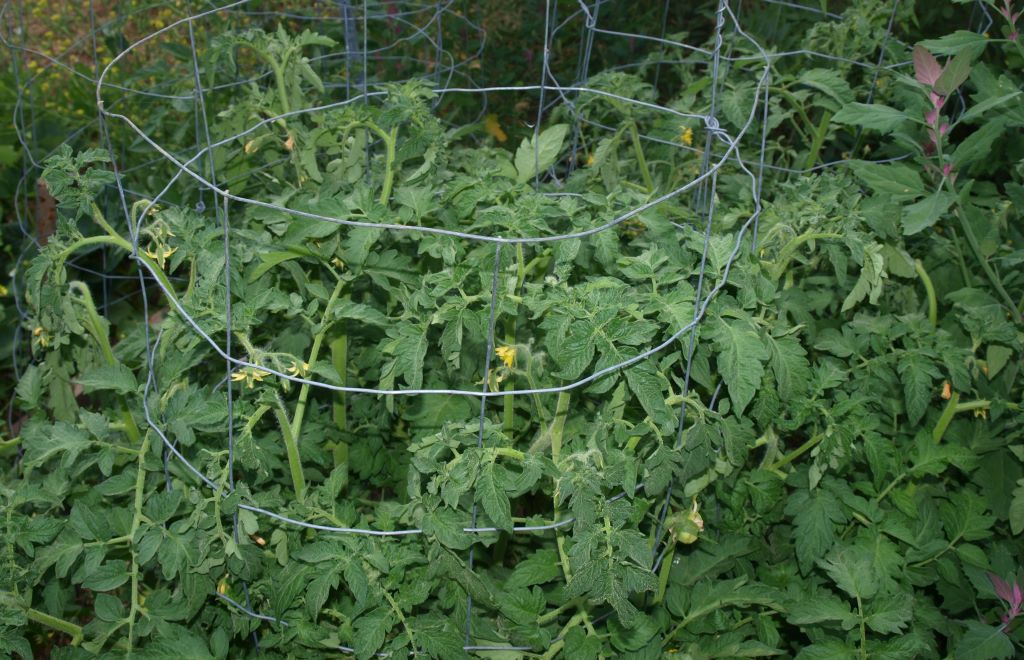
Support: Raising the plants off of the ground has distinct advantages. It keeps the plant away from the soil with its pests and diseases. There is also better air circulation so leaves dry out more rapidly and are less vulnerable to disease. When plants grow vertically, rather than horizontally, they take up less space, so you can grow more of them in a given area. All of these things result in a significantly larger harvest that offsets the additional work involved.
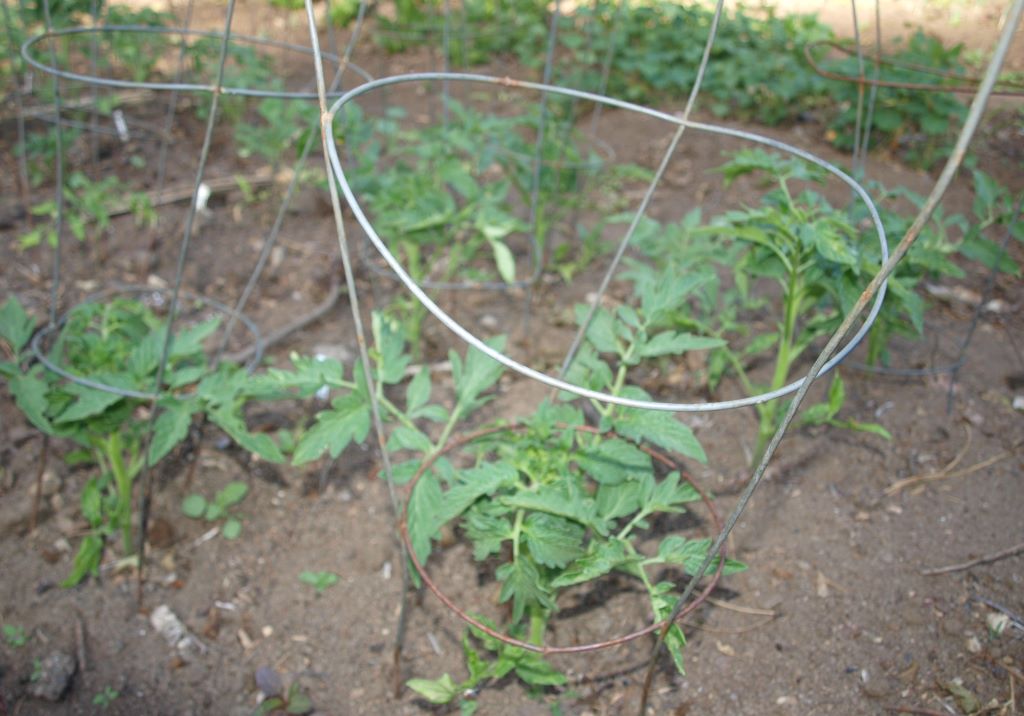
I tend to go for the easiest kind of support, because I always try to get the most results for the least effort. In my opinion this is the wire cage. Commercial tomato cages are widely available, but often tend to be too small. I find it’s cheaper and better to make my own, using 6˝ square concrete reinforcing wire mesh. You can make cylinders 18˝ in diameter and any height you want (3, 4, 5 or 6 feet tall).
In windy areas it is a good idea to fasten the taller cages to short stakes (or to each other), so they don’t get blown over. In cool spring weather you can wrap the bottom of the cage with clear plastic to keep the plant warmer.
You can also open up these cylinders and spread them across the bed to form a wire tunnel (like a cloche frame). The plants will grow up through the mesh and sprawl on the top. In spring you can cover it with plastic to turn it into a cloche for early growing.
The simplest and cheapest supports are bamboo or wooden stakes. Their length is determined by the eventual height of the plants, plus the 12˝ or so that goes down into the ground. They may need to be 4 feet tall for some varieties, 6 feet tall for others. It’s a good idea to put these in the ground while planting, to minimize future root disturbance. The plant can be tied to the stake with strips of cloth or wire ties.
If your plants start to outgrow their supports you can always add a couple of taller stakes (carefully so as not to damage too many roots).
Pruning:
Some people prune their indeterminate tomatoes (they are mostly control freaks without enough to do). It basically consists of pinching out all the suckers (these appear in the axils of leaves) you don’t want to grow into stems. Determinate plants should never be pruned, as it will reduce their already limited yields.
Pruning is most often done in cool climates to reduce the number of fruit produced and give them a better chance of ripening. It can also improve fruit quality by increasing the amount of light entering the plant and increasing aeration (though light isn’t needed for ripening). It may hasten maturation by as much as two weeks and allows for closer spacing of plants.
The drawback to pruning is that it reduces the area for photosynthesis, so means less fruit per plant (yields may be half that of unpruned plants).
I don’t bother with pruning, it just seems like extra work I don’t need to do. The most efficient way to grow tomatoes is to use indeterminate varieties, unpruned, in cages.
Double stem: More fruit can be obtained if you allow one sucker to develop into a second stem (this is really training rather than pruning). You pinch out all of the suckers, except the one below the first flower cluster. This will quickly grow into a second stem. It can be supported by planting two flexible stakes together and spreading them apart at the top with a small stick. One stem is trained up each stake.
A third stem could produce even more fruit, but this gets even more complicated.
Problems
Frost protection: Tomatoes can’t stand any frost, which can be a problem because you may encounter it at either end of the growing season
Spring frost protection: This is rarely needed because you don’t plant tomatoes until the soil is warm. If a rare late frost threatens, it is not difficult to cover the low plants with row covers, mulch, plant pots or whatever is at hand.
Fall frost protection: This is important, as an early frost will usually kill unprotected tomato plants. If you can help your plants make it through this first frost there may not be another one for several weeks, during which time you can get a lot more ripe fruit. You can cover the plants with almost anything to help them to survive a mild frost: old bed sheets, straw mulch, plastic sheet, cardboard.
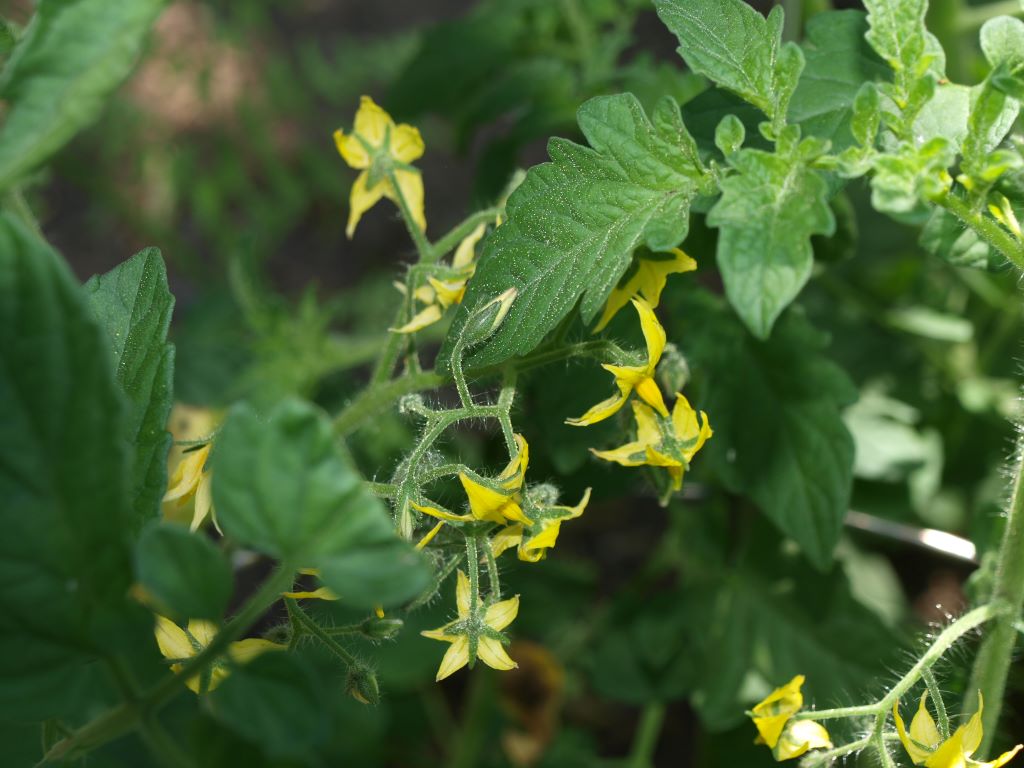
Pollination: Most tomato varieties are self-pollinated, so pollination isn’t usually a problem. Often the first flowers fall off without bearing fruit, especially if temperatures go below 60°F, or above 90°F. In very hot weather you should water frequently to keep the plants cool. In cool weather you should put them under cloches.
Pests: When I said tomatoes are one of the easiest crops to grow, I could have added if you don’t encounter a serious pest or disease problem. They have so many potential enemies, that it seems like it must be impossible to grow them at all. Potential pests include aphids, cutworms, Colorado potato beetles, flea beetles, leafhoppers, mites, nematodes, stink bugs, tomato fruitworms and of course slugs and snails.
Tomato hornworm: These huge caterpillars can do a lot of damage to tomato plants. I used to hand pick and kill them (usually with a stick as touching them didn’t appeal to me). After a time I resorted to deportation from the garden because I found out that they turn into a spectacular moth (I know the deported caterpillars may well have died with no tomatoes to eat, but I can’t think of everything!)
In recent years I haven’t had to do anything, as trichogramma wasps do the dirty work for me. Their white cocoons can be seen on the motionless and unfortunate caterpillars – I almost feel sorry for them.
Disease: Tomatoes are also vulnerable to the host of diseases that affect members of the Solanum family. These include anthracnose, bacterial canker, bacterial spot, early blight, southern bacterial wilt, fusarium wilt, verticillium wilt.
You can help to keep some of these problems under control by rotation. Be careful when watering as many diseases can be spread on wet leaves (use drip irrigation). Many modern tomato varieties are resistant to verticillium wilt (V), fusarium wilt (F) and nematodes (N).
Tobacco Mosaic: This serious disease can be spread by smokers who handle the plant after smoking cigarettes. It may also be brought into the garden on seedling tomatoes. Prevent it by growing your own seedlings and not smoking.
Late Blight: This is the same killer that gets potatoes and is worse in cool humid weather. Spots appear on the leaves and then the whole plant turns black and dies (often overnight). You may be able to control it if you remove infected plants immediately, but it’s an indication that the plants don’t like the growing conditions. Up in western Washington I had whole beds of tomatoes and potatoes die almost overnight. They just didn’t like the cool moist conditions (whereas the late blight did).
Other Tomato problems
Blossom end rot: Patches on the fruit turn black and rot. It most commonly affects the first few trusses of fruit. Remove any affected fruit immediately (they won’t be any use anyway), to reduce stress on the plant. Pruning may make this problem worse. For some reason indeterminate varieties are less commonly affected.
Blossom end rot isn’t a disease and is usually caused by lack of water during early fruit development, combined with a lack of calcium. The water shortage affects the transport of calcium in the plant, so the rot is caused by a local calcium deficiency.
Sunscald: This can occur when there isn’t enough leaf cover to shade the fruits from direct sunlight and is most common on pruned plants. The simple way to avoid this is to stop pruning. Another simple answer is to put the plants closer together, so they shade each other.
Catfacing: This is caused by poor pollination and most often occurs in cool weather.
Splitting: This is caused by a sudden abundance of water, which causes the inside of the fruit to grow faster than the skin. In my garden this happens every year after the first fall rains. Cracked fruit are still perfectly edible, though they should be eaten quickly, as they won’t keep for very long (they often go moldy).
Slugs and snails: If your tomatoes are unsupported and close to the soil, they may be damaged by slugs and snails. The best way to deal with these is to hand pick after dark.
Harvesting
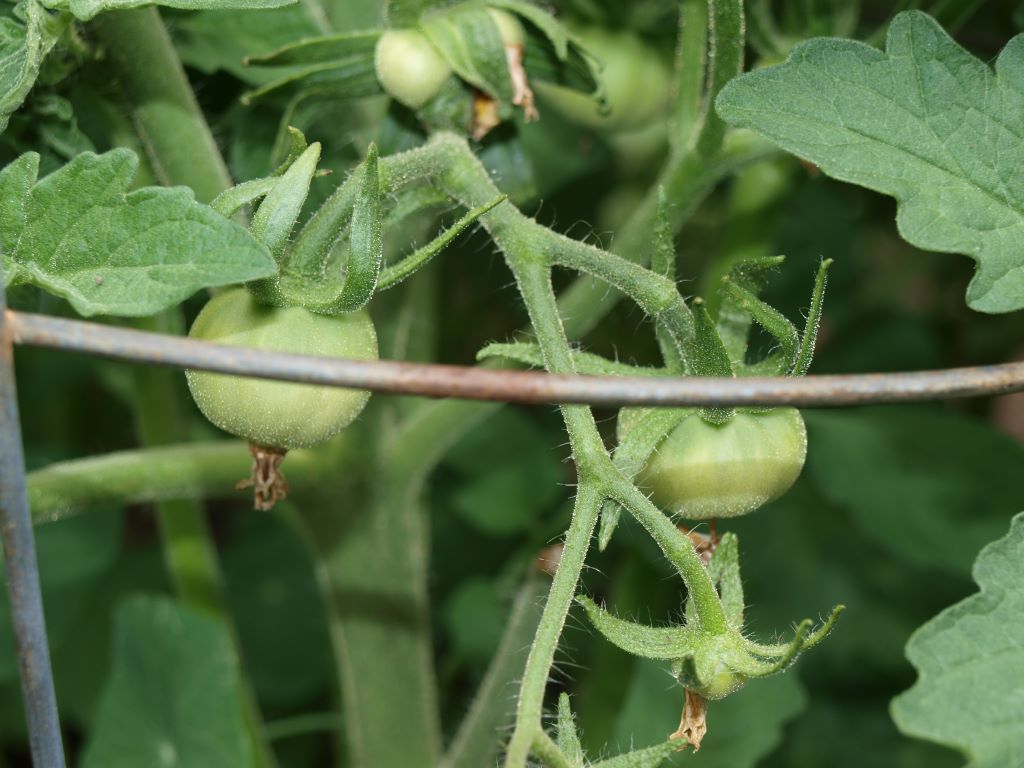
When: The fruit will usually be ready to harvest 45 – 75 days after flowering (depending on variety). The fruit takes 30 – 45 days to reach full green size (where it will ripen off the plant) and a further 15 – 30 days to reach full ripeness. They are fully ripe about a week after they turn red. The fruit won’t usually ripen below 55°F, or above 85°F.
Sunlight isn’t necessary for ripening the fruits, only warmth, consequently they will ripen even in the dense shade in the middle of a plant.
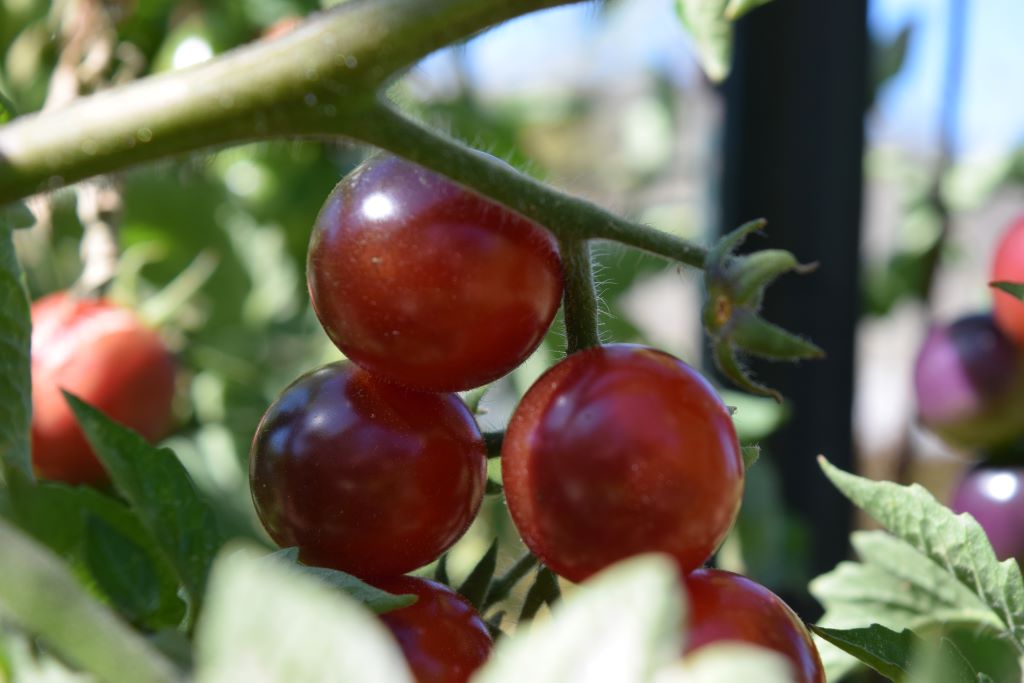
I was going to write that you can recognize a ripe tomato because it is soft and red, but nowadays that is not necessarily true. They might also be yellow, green, purple, orange, white, pink or even black!
How: Gather the fruit when it comes away from the vine easily. Their flavor is at its peak when they are fully ripe. They can be gathered earlier however, as they will ripen off the vine.
If frost threatens, gather any fruits that are nearly full size, even if they are still green and ripen them indoors in a warm place. They won’t be as good as fruit ripened on the vine (they will also have less vitamin C), but they’ll probably be as good as anything you could buy.
Storage: Don’t store tomatoes in the fridge, or below 55°F as it spoils their flavor. They should keep for a week or two at 55 – 65°F.
Tomatoes can be peeled and frozen for storage (peel by dipping in boiling water), or you can puree and freeze them. I put the whole fruit in a blender and puree them, skins and all.
Green tomatoes can be ripened in a warm dark place. Just make sure the fruit don’t touch each other and remove any that start to rot (check them regularly). There are varieties (i.e. Burpees Long Keeper) that are intended for slow ripening indoors. If you have a lot of green fruit, keep them in a cool place and bring them into a warm room to ripen as needed (it takes about 2 weeks.)
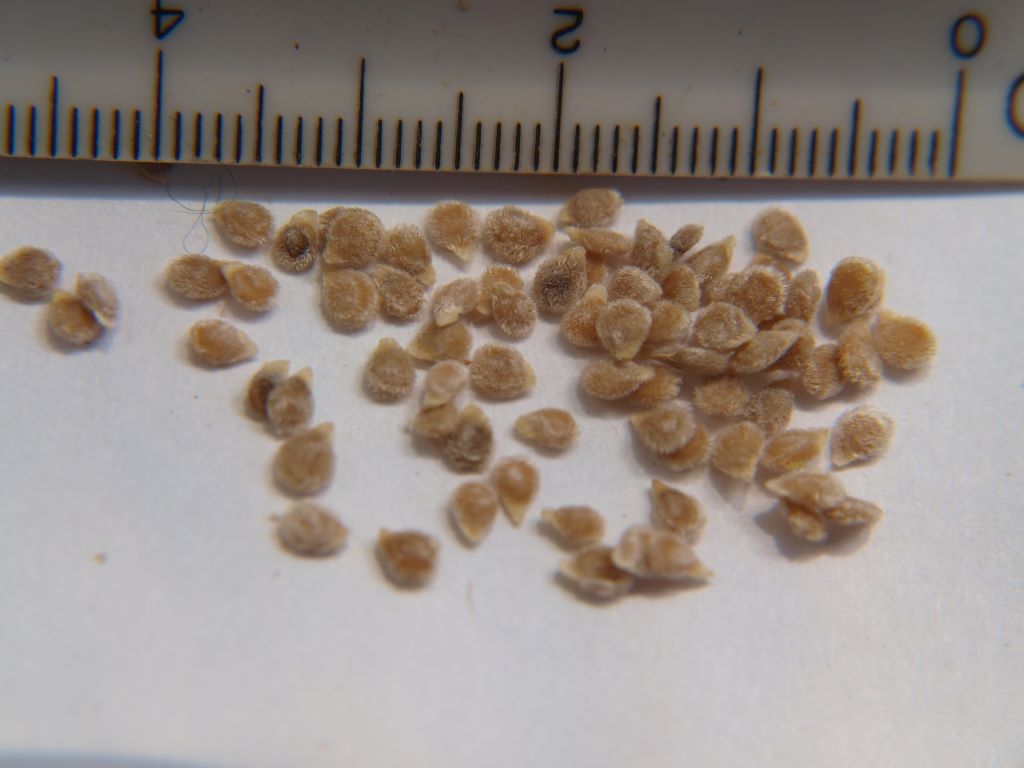
Seed saving: Tomatoes are usually self-pollinated so saving seed is easy. A few varieties have a high degree of cross-pollination (these usually have long styles that stick out of the corolla) and should be isolated for purity, either by distance (25 ft and a barrier planting between them) or row covers. It doesn’t hurt to separate the short style types by 10 ft and put another crop in between.
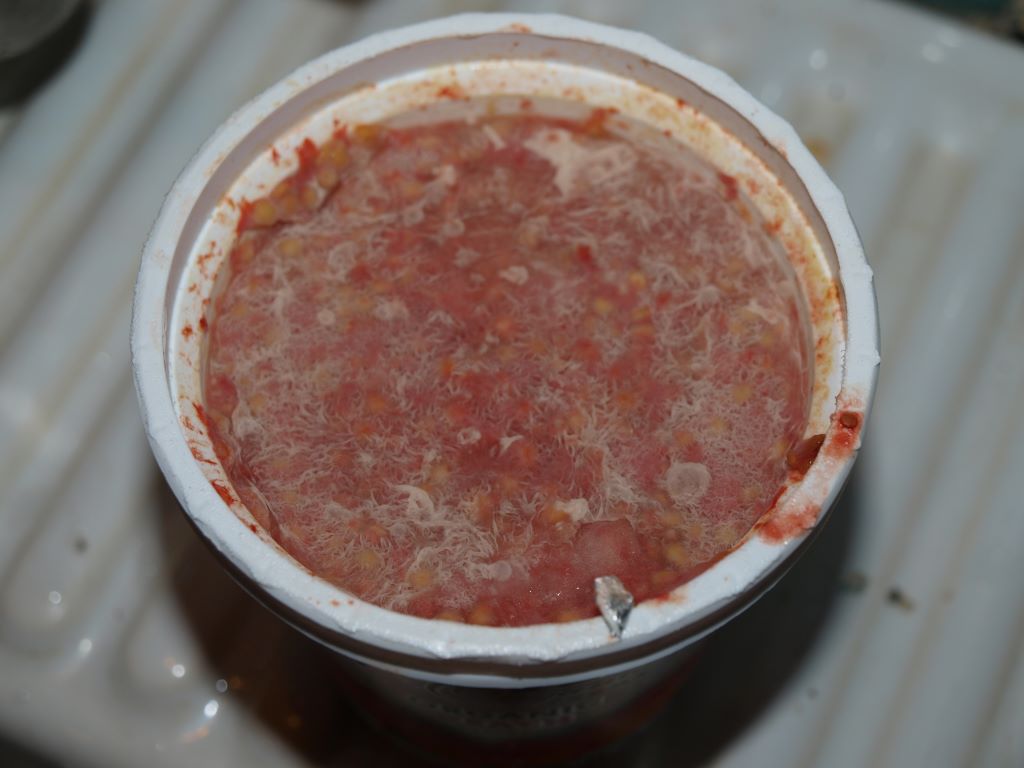
To get the seed, simply squeeze it from the ripe fruit (eat the rest), along with its juice (add a little water if it is dry) and let it ferment in a warm place for a few days. This will kill any disease organisms on the outside of the seed. Then scrape the scum from the top and rinse the seeds several times to remove bits of flesh. Strain the cleaned seed and dry it in a warm, dry place until you are sure it’s dry.
Unusual growing ideas
Dry gardening: Tomatoes were once commonly dry farmed in California, where they received no irrigation water (or rainfall) at all. Such plants are markedly sweeter than conventionally grown plants. This is worth trying if you have a lot of space, but a limited amount of water for irrigation.
In a dry garden the plants must be spaced further apart than in a conventional irrigated garden. This eliminates competition with neighboring plants and gives their roots more space to forage for water. A mulch may also be helpful, as it conserves moisture and keeps down thirsty weeds.
Volunteers: Tomatoes are commonly found as volunteers in the garden. If these are not hybrids and you have the room, you might allow some of them to mature for a late crop.
Cool climate growing: To grow tomatoes outside in cooler climates, you have to use one of the fastest maturing and cold hardy varieties, such as the Sub-Arctics or Siberians (which may mean sacrificing some flavor). Start them inside early, warm the soil with plastic and cover the transplants with cloches. If you plan on using wire tunnels as supports, you can convert them into cloches by simply covering them with clear plastic. Some cool climate growers use black plastic mulch for the whole of the growing season, as it keeps the soil warmer.
Early crops: Getting an early crop of tomatoes means growing them in a cool climate for the first few months of their lives. See Cool climate growing above, for ways to do this.
Some people have part of their ego tied up in getting earlier tomatoes than their neighbors. If you are one of these people and do succeed in your quest to beat everyone else in your neighborhood, I prefer a subtle approach to letting everyone know about it. I just slip into the conversation that I am already getting sick of tomatoes. Of course the potential disadvantage of this approach is that you might be asked to give some away.
Containers: Some tomato varieties do well in containers, especially the smaller determinate cherry types (some of these even do okay in hanging baskets!) You can also grow the larger types too, though you will need a bigger container. You can also grow tomatoes in grow bags, which are simply large plastic sacks filled with a suitably fertile potting mix (see Potatoes for more on these).
Cuttings: You can get extra tomato plants by rooting suckers in water. This is a good way to multiply a single special plant you might have. It is also an easy way to grow your succession tomatoes.
Grafting: You can use this to grow a tasty heirloom tomato, while getting the advantage of a disease resistant variety by using it as a rootstock. I have never thought that this would be worth the effort, but it may be if you face big problems with disease.
Greenhouse: Tomatoes are a great greenhouse crop and in cooler climates this may be the only way you can grow them. They can be grown inside from early spring until late fall. In Europe there are varieties bred specifically for green-house growing.
Living mulch: I haven’t tried it yet, but it is possible to grow tomatoes using living mulch. This means planting the transplants into an established bed of growing plants, which are usually some kind of annual nitrogen fixer, such as crimson clover or hairy vetch. This will require additional water, as you don’t want the plants to compete. Yields may be somewhat later, but are often higher. Perhaps the biggest advantage is that it improves the soil while you are growing a crop.
Varieties
For a long time modern seed producers focused on the needs of commercial growers (understandably because they buy their seed by the pound rather than the gram). Their breeding work often concentrated on producing fruit that could withstand mechanical cultivation and harvesting. One of their achievements was the square tomato. This wasn’t really square, but slightly angular so that it wouldn’t roll off of conveyor belts so easily.
Home gardeners were largely ignored by these seed companies, so many gardeners started to ignore them. They turned instead to the vast number of varieties that already existed; plants that have now come to be known as heirlooms. These are gifts to us from the gardeners of the past and are the common heritage of gardeners all around the world.
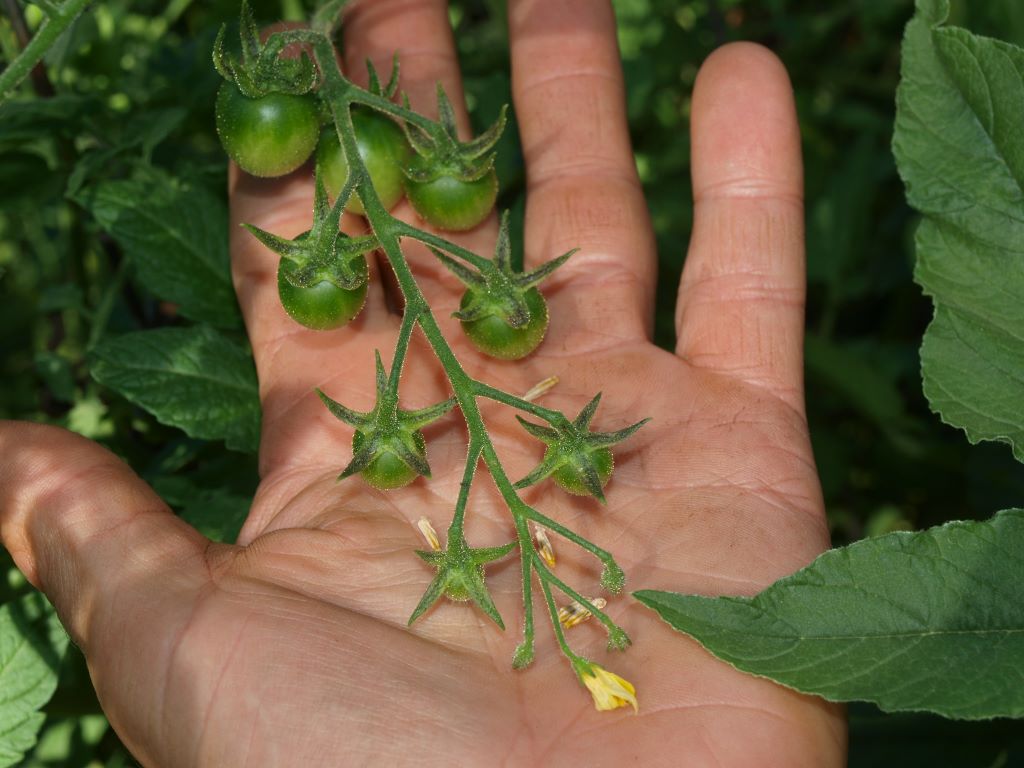
Probably no other crop has benefited as much from the recent interest in heirloom vegetables, as the tomato. We now have a mind boggling range of varieties, from 2-pound monsters down to the size of a pea. Determinate, indeterminate, climbing, early, mid-season, late, paste, black, green, purple, orange, yellow, striped and more. Ironically some of these are now finding their way on to supermarket shelves, alongside the descendants of those square tomatoes.
There is now so much choice of tomatoes it can be a problem knowing where to begin. You could grow 20 or 30 different varieties every year and not even begin to get through them all. In fact old varieties are probably reappearing faster than you could grow them all.
The number of days to maturity mentioned on seed packets and in catalogs means from transplanting (so add 6 – 10 weeks to this).
There are also plenty of good hybrid varieties out there. I mostly avoid them though, simply because saving the seed of open pollinated varieties is so easy.
| The best tasting tomatoes If you are going to grow tomatoes you may as well grow something that tastes good. Here are some varieties that commonly appear on lists of best tasting tomatoes. Ananas Noir Aunt Ruby’s German Green Better Boy F1 Black Krim Black Plum Brandywine Carmello F1 Caspian Pink Cherokee Purple Momotaro Mortgage Lifter Sungold Super 100’s Sweet million |
Taste: My first criteria in choosing a tomato is taste. The flavor of different varieties varies enormously, some are almost tasteless and others are delicious. I never could understand why anyone would want to grow a fruit that doesn’t taste of anything. If I’m going to the trouble of raising a plant from seed, I want to have something special to show for it.
Climate also affects flavor, so a variety may taste good in one area, but not so good in another. For example in cool climates the large fruited types don’t develop their best flavor. It really pays to experiment to find the best varieties for your area. This is fun too and every year I try some new varieties along with the old trusted friends.
The number of tomato varieties has exploded in recent years. Here is a tiny sampling of some of the best.
Early:
Glacier
Beaverlodge Slicer
Siberian
Stupice
Oregon Spring
Early Girl
Main
Beefsteak
Brandywine
Ponderosa
Marmande
Mortgage Lifter
Paste
Amish Paste
Principe Borghese
Roma
San Pablo
Cherry
Camp Joy
Chadwick Cherry
Gardeners Delight
Sungold
Unusual
Caro Red: Contains 10 times vitamin A of most tomatoes.
Kitchen use
Tomatoes are a tremendously versatile food. They are good raw or cooked and of course are a basic ingredient of Italian cooking.
| Salsa This is quick and easy to make and very satisfying. All the more so if you can gather all of the ingredients from your garden (except the salt). 8 tomatoes 1 medium onion 6 cloves garlic ½ cup cilantro 1 or 2 finely chopped jalapeno peppers 1 tbsp lime juice ½ tsp salt Chop all the ingredients and mix together. Some people use a food processor, others prefer to hand chop. This is so good it is commonly eaten immediately, but it will be much better if left in the fridge overnight. This is only a basic recipe and can be altered in any way you like. You will probably want to vary the quantity of pepper you use, depending upon personal taste and how hot your peppers are. |