


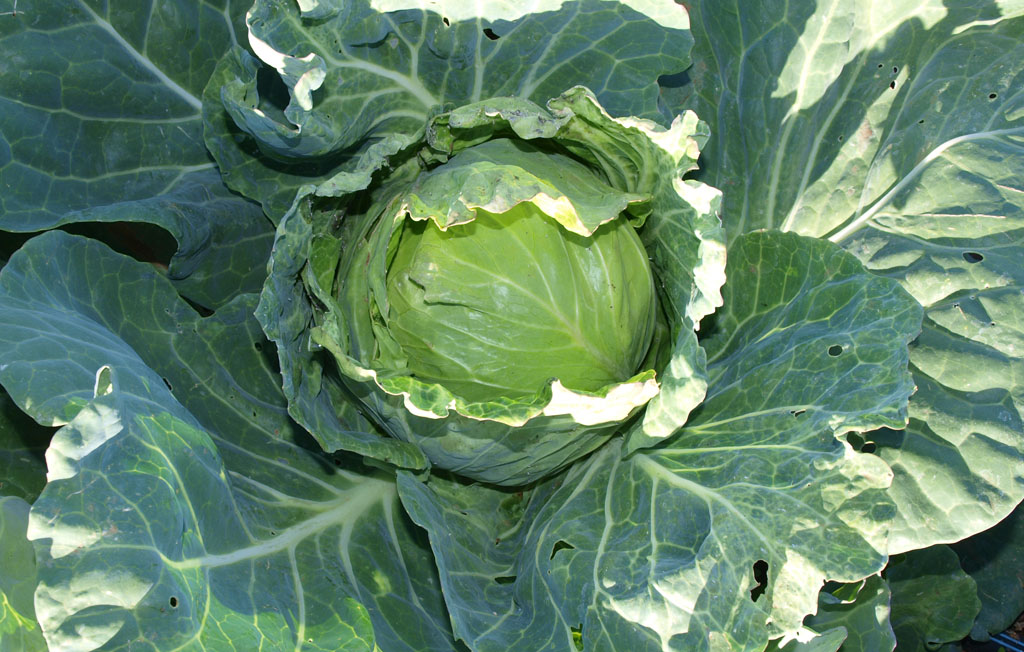
Cabbage
Brassica oleracea var capitata
Wild Cabbage (Brassica oleracea ssp oleracea) is native to the coastal areas of Western Europe and is still found growing wild there. An impressive variety of cool weather garden crops have been bred from this unimpressive looking plant, including kale, collards, cabbage, broccoli, cauliflower, Brussels sprout and kohlrabi. Cabbage was probably refined into the familiar crop in Germany and is still very popular there. The word cole is an old name for cabbage (hence coleslaw).
Crop value: Cabbage was a staple food of Northern European peasants for centuries. It is an ideal crop for self-sufficiency for many reasons. It is easy to grow and store, nutritious, high yielding, hardy and can be harvested fresh during cold weather after most other crops are finished.
Cabbage was the crop to depend upon when all else failed and there are varieties for harvesting for most of the year. Perhaps because of this association with poor peasants, cabbage has never been held in very high esteem by gourmets, but it can be very good.
Ease of growing: Cabbage is pretty easy to grow if you pay attention to the minor details. Give it a good soil, water and weed regularly and plant the right variety at the right time.
Nutritional content
Cabbage is rich in vitamin C, calcium and several cancer preventing phytochemicals (anthocyanins, sulforaphane, isothiocyanates, dithiolethiones). It has been found that people who eat lots of Brassicas, have lower cancer rates than those who don’t.
As a source of energy cabbage contains about 110 calories per pound, so those peasants who relied upon it as a winter food would have had to eat a lot!
| About Cabbage Seed facts Germ temp: 45 – 85˚F Germ time: 4 – 20 days 15 days / 50˚F 9 days / 59˚F 6 days / 68˚F 5 days / 77˚F * Optimum 4 days / 86˚F Seed viability: 3 – 10 years Germination percentage: 75+ Weeks to grow transplant: 4 – 5 Planning facts Hardiness: Hardy Growing temp: 40 (60 – 65) 75˚F Plants per person: 5 Plants per sq ft: 1 Days to harvest: 70 – 200 days from seed 50 – 150 days from transplants. Planting Transplants: Start: 6 wks before last frost Plant out: 2 wks before last frost Direct sow: 2 wks before last frost Fall crop: Sow in late summer Harvest facts Yield per plant: 1 – 2 lb Yield per sq ft: 1 – 3 lb sq ft |
Climate: Cabbage is an adaptable plant and can tolerate a variety of situations. It prefers fairly cool growing conditions (ideally 60 – 65˚F) and in warm weather areas it only grows well in spring and fall (and maybe winter). It is quite hardy (some varieties much more than others) and tolerates hard frost down to 20˚F. It doesn’t taste very good when grown in hot weather.
Soil
pH: (6.0 to 6.5) to 7.5
Cabbages are hungry plants and must have rich soil if they are to produce well. They prefer heavy soil with lots of organic matter to retain moisture and lots of available nutrients (especially potassium and phosphorus). They don’t need a lot of nitrogen however, as this can lead to sappy growth that isn’t very hardy.
Cabbage doesn’t like poorly drained soil. Early crops may do better in lighter soils that warm up more rapidly, or in raised beds.
Potential micronutrient deficiencies include boron and manganese.
Soil preparation: Cabbages love organic matter, so incorporate 2˝ of compost or aged manure into the top 8˝ of soil. This is often applied the previous fall, in which case fresh manure can also be used. They also like phosphorus.
Clubroot can be a problem in acid soil, so try to keep the pH above 7.0. Low pH may also lock up molybdenum, potentially causing a deficiency. Raising the pH with a liming agent will also add calcium which is good for cabbage.
Planning
Where: If you are growing cabbages in cold weather, they should be planted in a warm sheltered place with full sun. In warmer climates they may do better in light shade.
Crop rotation: Cabbage is prone to a host of pests and diseases, so it is important to rotate it. Don’t plant it where any Brassica has been grown in the past 3 years. They often follow nitrogen fixing legumes in a rotation.
When: Cabbage doesn’t do well in hot weather, as it causes excessive transpiration from the large leaves. It really needs cool weather and short days to head up satisfactorily. This means that it does best when planted early (to mature before midsummer), or late (to mature in fall). If you live in a climate with cool summers you can harvest right through the summer. If you live in an area with mild winters, you can harvest right through the winter too.
With all the options of when to plant, it is important to choose a variety that is appropriate for the season in which it will be grown. Cabbages are bred for growing at specific times and generally won’t perform well if grown at the wrong time of year.
Spring: The first cabbage plants can be started 6 – 8 weeks before the last spring frost and planted out 4 – 6 weeks later. They should still be small enough that they won’t be vernalized by a late cold snap, which would cause them to bolt (see Broccoli for more on vernalization). If you plant early and feed them well, the first plants should be mature by early summer.
Summer: In places with cool summers it can be grown almost year round, by succession sowing and using different varieties.
Fall: Start a fall crop 12 – 16 weeks before the first fall frost. This can be planted in a nursery bed, or in any vacant spot. Just be sure to give them protection from slugs and other predators. Plants grown at this time of year tend to be much better flavored than those grown in warmer weather.
Winter: In areas with mild winters cabbage can be planted in late summer as a winter crop. This will mature in late autumn and then stand right through the winter in good condition. These plants can get very big.
Cabbage can also be planted in autumn, to over-winter and mature the following spring. In milder areas it might also be planted in January for a spring crop.
Succession: Plant cabbage in succession every 3 – 4 weeks. Generally you only need a few plants to mature at any one time, so you should only plant a few seeds (a dozen or so) at each sowing.
Planting
Transplants: Cabbage is hardy enough to be direct sown, but is more often grown from transplants. It actually seems to like being transplanted and is said to grow a stronger root network as a result. These can also give you an earlier start in spring.
Starting inside: The first spring cabbages are usually started indoors 6 weeks before the last frost date. Plant the seeds 1˝ apart and ½˝ deep and keep them warm (60 – 80˚F) for fastest germination. Once they are growing, reduce the temperature to between 50 and 70˚F, as they grow better in cooler conditions. When they have 2 sets of leaves they should be pricked out into a larger container, leaving 2˝ between plants.
The seedlings will be ready to go in the ground 4 weeks later, when they have 4 or 5 true leaves and are about 4˝ high. Be sure to plant them outside as soon as they are of sufficient size. If they sit around in containers for too long, they will get stressed and deficient and won’t perform well.
You can also buy cabbage transplants of course, but they are so easy to raise yourself there is usually no reason to.
Hardening off: If transplants are to go outside while it is still cold, they must be hardened off (failure to do so can result in badly shocked plants that just don’t grow well). They will then tolerate temperatures as low as 25˚F. Start by putting the plants outside for 2 hours on the first day, then 4 hours on the second day. Add 2 hours every day for a week and then plant out.
Planting out: Planting the seedlings is pretty straightforward; just bury the stems up to their first true leaves. Press down gently around the plant to firm the soil and leave a slight depression. Water the plants the day before you transplant them, and immediately afterward to help them recover.
If cutworms, root maggots or birds are a problem in your area, you will have to take suitable preventive measures.
Cutworms: If you find whole plants laying on the ground, severed at the base, cutworms are usually responsible. Dig in the soil around the fallen plant and you will usually find a small, dark, curled up caterpillar). If you find it you can prevent it killing other plants.
Cutworms can be a real problem for young seedlings in spring. A good solution is to wrap the stems in individual cutworm collars, made of cardboard, newspaper (2 layers) or aluminum foil. These should go 2˝ into the soil. You can also use a bottomless paper cup to surround the whole plant.
Starting transplants outside: In mild weather the transplants can be started in an outdoor nursery bed. Sow the seed about 1˝ apart and when they have all emerged and are growing vigorously, transplant them to stand 3˝ apart. This is a much more efficient use of space than direct sowing, as the plants don’t take up much bed space for the first 4 – 6 weeks of their lives.
Direct sowing: As the weather warms up, cabbage is often sown directly outdoors. The plants grow well when direct sown, though there is a danger that they may end up as dinner for some of the many hungry pests that love Brassicas.
Some people sow turnip seed along with the cabbage, as many pests seem to prefer it and will then leave the cabbage alone. You can also plant a lot more seed than you need, to compensate for some losses. The problem of predation is one reason Brassicas are often started indoors, where they are more easily protected.
If you want to direct sow plant the seeds ¼ ˝ deep in cool soil, up to 1˝ deep in warm soil. Space them 2˝ apart, to be thinned to the desired spacing when they get big enough (you can eat the thinnings).
Spacing: This varies according to variety, soil fertility, the time of year and how large you want the plants to get. You can control the final size of the plants by the spacing – a wider spacing means larger, but fewer, plants. You can also plant closer together initially and harvest every alternate plant for use as immature greens (this goes along with planting extra to minimize the effect of pests).
Beds:
12˝ spacing is for very fertile soil, summer and smaller heads.
15˝ spacing is for average soil, summer and average heads.
18˝ spacing is for poor soil, winter and large heads.
Rows: If you want to plant in rows, the traditional spacing is 12 – 18˝ apart in the row, with 18 – 24˝ between the rows (exact spacing depends upon the size of the variety).
Care
For best quality the plants must experience no check from lack of water or nutrients, or competition from weeds.
Weed: Keep down weeds around the plants. This is particularly important when the plants are young, as they can’t compete very well.
Water: Cabbage needs a regular water supply to grow well, at least an inch of water per week. They are quite shallow rooted, so make sure there is plenty of moisture in the soil at all times. This is particularly important in hot weather, as dry soil can severely impact the harvest.
Consistent watering is also important. Lack of water can result in strongly flavored plants and thicker, tougher leaves. If plants are suddenly soaked after being very dry, the resulting burst in growth can cause the head to split. An extreme measure to prevent this happening (perhaps after heavy rain) is to cut some of the roots with a knife or spade. This reduces the amount of water the plant can take in.
It is best if the leaves don’t get wet when watering, as several diseases can be spread in this way.
Fertilization: A liquid feed of compost tea is helpful in early spring, while the soil is cool and nitrogen is not readily available. A second feed may be given as they are heading up, to help them grow bigger.
Mulch: These widely spaced plants benefit from a mulch to keep down weeds, keep the soil cool and to conserve moisture.

Problems
Heading up: Before a cabbage begins to head up it stores nutrients in its outer leaves. These are then used during the heading up phase, when more nutrients are needed in a shorter time than the roots can easily supply.
Pests: Plants of the Brassicaceae family have developed a pungent and toxic oil to protect themselves from insect predators. This is very effective in most cases, however a number of insects have not only evolved some resistance to it, but are now actually attracted by it. These are serious pests of Brassicas and can make growing them much more difficult than it should be.
Aphids: These are the ever-present pests of Brassicas. Blasting them off with a strong jet (I mean strong) of water makes a big difference. It also pays to have lots of insectory plants (Phacelia, Asteraceae. Apiaceae) around to feed the predators that prey on aphids.
Caterpillars: Several types of caterpillar live only on the various Brassicas and can strip a young plant to the midribs in a short time. It is important to keep an eye out for these, so you can deal with them before they devastate your crop.
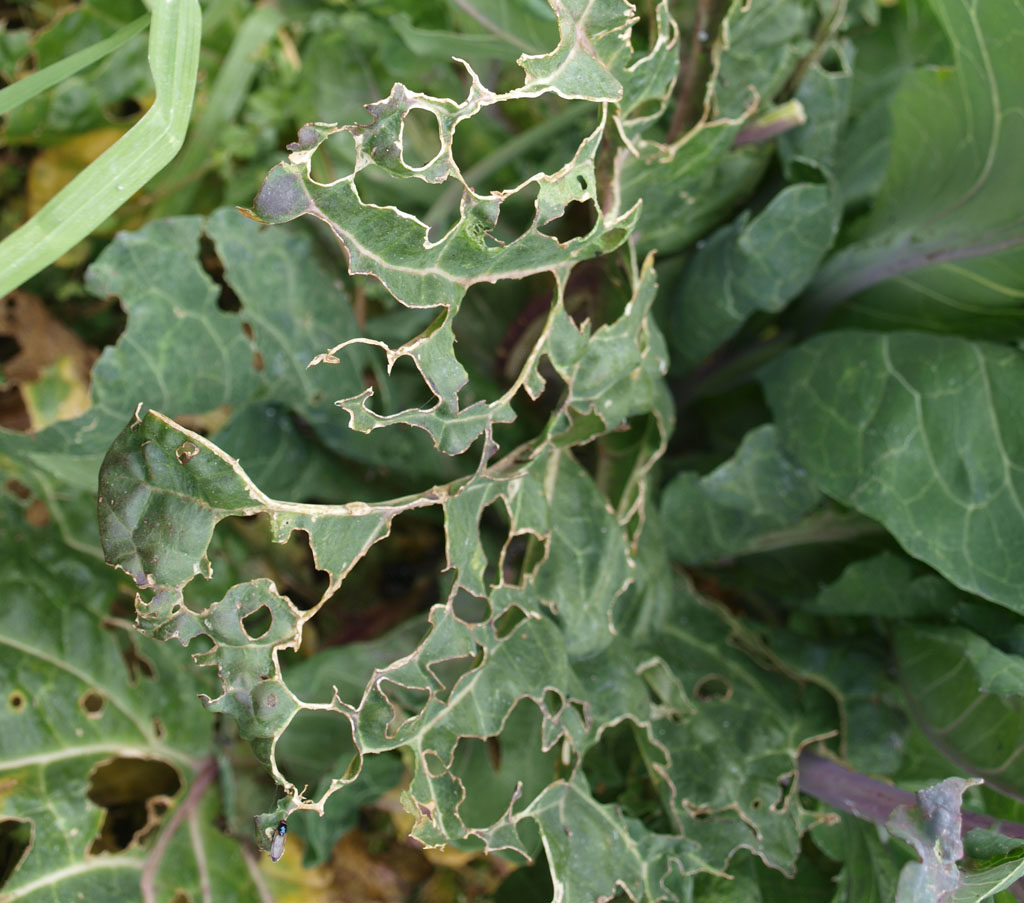
If you have only a few plants, hand picking is the best way to go. If you have a whole field then a spray of BT (Bacillus thuringensis) is usually recommended. Parasitic wasps can kill a lot of caterpillars if given the chance, but not if you start spraying poisons. Red cabbage is not as attractive to caterpillars as the green, though it is more attractive to aphids. If they are really bad you might also go after the conspicuous white butterflies with a butterfly net.
Flea Beetles: These tiny insects are common in spring and eat small holes in the leaves of the young plants. Transplants can usually take this damage without too much problem, they will just put out new leaves, but newly germinated seedlings may be killed. If they are a big problem you could use row covers, or plant some turnip seed as a trap crop.
Cabbage Root Fly: This is probably the worst Brassica pest. It lays its eggs at the base of the plant and the newly hatched larvae work their way down to the roots and eat them. If they are numerous enough they pretty much destroy the roots and kill the plant. The first warning sign is when a plant wilts in sunny weather. If this occurs, examine the root for the small white maggots, which look like small grains of rice. If you find affected plants, remove and kill the maggots to stop them maturing and reproducing (or just to make you feel better).
The easiest way to deal with these pests is to use row covers, which prevents the fly getting near enough to the plant to lay eggs.
Another effective control is to use 6˝ squares (or disks) of foam carpet backing. You cut a slit to the center of the square and put them around the stem. These work very well, because the foam can expand as the stem enlarges. These disks not only make it harder for the fly larvae to get into the root, but also provide refuges for the predatory beetles that eat the eggs and larvae. These disks have achieved 70% control, which is as good as most pesticides.
The flies prefer Chinese cabbage and will lay their eggs near it, in preference to cabbage. You could plant these near your cabbages as a trap crop.
You don’t have to eliminate all of these maggots. Some damage is tolerable, so long as it doesn’t seriously affect the crop.
Other pests: Cutworms, harlequin bugs, thrips, root knot nematodes, slugs and snails.
Birds: These will sometimes eat seedlings, especially in spring. If this is a problem you may have to net the plants (row covers used to prevent other pests will also work). In my garden quail are a problem for Brassicas year round, but particularly in winter. They love to eat the
leaves and will tear them to shreds (sometimes they strip whole plants).
Diseases: Alternaria blight, black leg, black rot, downy mildew, fusarium wilt and wirestem.
Clubroot: (Plasmodiophora brassicae): This serious root disease is a big problem in some areas. It causes the roots to swell up like clubs and can kill the plant. Clubroot likes acid soil, so the closer your soil is to neutral the better. If this disease gets into your soil it can stay there for years, even without any Brassicas to infect.
Nutrient deficiency:
Boron deficiency: Brassicas generally are quite susceptible to boron deficiency, which manifests itself as hollow stems.
Harvest
When: Harvest the first cabbage heads as soon as they are big and solid enough to be worthwhile, though you will get the biggest harvest by waiting until they are fully mature.
You can harvest the un-hearted (heartless) plants, any time they are big enough to bother with, but they will be much less productive. You could plant close together and harvest every alternate plant in this way.
If a mature head begins to crack (this may be caused by excess nitrogen, aging or irregular water supply) harvest it and use promptly. This doesn’t affect edibility, but it does affect storage life.
Delaying maturation: If too many cabbages are maturing at once, you can slow their growth by cutting through some of their roots with a spade. You can also twist the head a quarter turn, to break some of the roots.
How: Harvest by cutting through the base of the stem with a knife. When you harvest early cabbage, you might want to leave a few leaves on the root (this is the fastest way to get a clean cabbage anyway). These will keep the root alive and may enable it to produce a new crop of mini cabbages (these are known as cabbage sprouts in England). If you harvest all but one of these, the remaining one might even grow into another small head
If cabbage root fly or clubroot are a big problem you might want to remove the roots after harvest and compost or burn them.
Storage: Cabbages are usually left in the garden and harvested as needed. In milder areas they will even continue to grow. In colder areas you may have to protect them with mulch.
The fleshy leaves of cabbage are intended as food storage organs, so they are one of the easiest crops to store. They can be stored in plastic bags in a refrigerator (for weeks), or in a root cellar at 32 to 40˚F and 90 to 95% humidity (for months). Don’t wash them until you use them.
Seed saving: Cabbage is a biennial and takes two years to produce seed. Don’t save seed from plants that flower in their first year, as you don’t want to raise an annual strain that bolts quickly.
In harsh climates you may have to protect the plants over the winter. You can do this with a thick mulch of straw, cold frames, cloches or hay bales (half grown plants sometimes survive better
than larger ones). You may also dig them up (leave 12˝ of root attached) and store in a root cellar in damp sand.
Cabbage is usually self-incompatible and must be cross-pollinated by insects. This means there must be a number of plants flowering at the same time. Normally you should save the seed from at least 5 plants to maintain some genetic diversity.
All of the cole crops are the same species and will cross with each other. To maintain racial purity you have to ensure that only one type (and variety) flowers at once. The alternative is to isolate them, either by distance (1000 yards for different varieties, 1500 yards for different crops), or by caging them (don’t forget they need insects for pollination).
The plants flower in the spring of their second year. If the head is very dense the flower stalk may have a hard time emerging. If this is the case you can cut a 2˝ deep cross in the top of the head to help it get out.
A large healthy cabbage plant may produce as much as a half-pound of seed. This can get quite heavy and the stem may need support if it is not to break under its own weight.
The seed pods should be gathered when the older bottom pods first start to split open. Watch them carefully as they shatter easily when they are fully ripe. Cut the seedpod bearing stems and dry them in a warm place (I put small quantities in a paper grocery bag, so I don’t lose any seeds). The seeds are fairly big and are easily handled and cleaned. Of course it is essential that they are thoroughly dry before storage.
Unusual growing ideas
Intercrop: The plants need a lot of space when mature, but not when young. Use this temporarily vacant space by interplanting a fast maturing crop such as lettuce.
Spring greens: This is over-wintered cabbage planted very close together (only 6˝ apart). When the plants begin to touch, every other plant is harvested and eaten. The remaining plants can then either be eaten or left to head up to full size
Sprouting: If you save all of the seed from 5 plants, you will have far more seed than you actually need for planting. A good way to use the surplus is to sprout it like alfalfa. Cabbage sprouts have a nice spicy flavor and are highly nutritious.
Micro-greens: Any surplus seed can also be used to grow tasty micro-green salads materials (see Micro-greens).
Varieties
There are a number of different kinds of cabbage, grown for different purposes and at different times. Red, green, almost white, curly, crinkled, conical, spherical, lettuce-like, summer, autumn, winter, mammoth and tiny. The most important differences are; the time of harvest, time needed to maturity (this varies enormously), length of time they can be stored, disease resistance and their tolerance of frost. If you choose the wrong variety for your needs, it may not respond as you would like.
Early: 60 to 80 days
Copenhagen Market
Early Jersey Wakefield
Primo
Mid-season: 80 to 90 days Brunswick
Early Flat Dutch
Late: 90 to 110 days (these are bigger, have thicker leaves and store better)
Danish Ballhead
Late Flat Dutch
Savoy: Very hardy and attractive, it is usually grown over the winter. Melissa
Best-of-All
Red: These are the least hardy cabbages , but the most appealing visually.
Red Danish
Red Acre
Red Express
Kitchen use
A home grown cabbage, grown in cold weather and cooked really well, can be very good.
Cabbage is also great raw, in fact I actually prefer it that way.
| Cole slaw ½ head cabbage (chopped) 1 green onion (chopped) 2 carrots (grated) 2 tbsp parsley leaves (chopped) 1/2 cup mayonnaise (or vegan alternative) 1/2 tsp salt 2 tsp celery seeds 1/2 tbsp sugar 1/4 tsp black pepper 1 tbsp white vinegar Prepare the vegetables and mix them in a bowl. In a separate bowl mix the rest of the ingredients, then pour over the vegetables to cover them evenly. Chill in the fridge for one hour (this is so simple it is hardly a recipe at all). |