


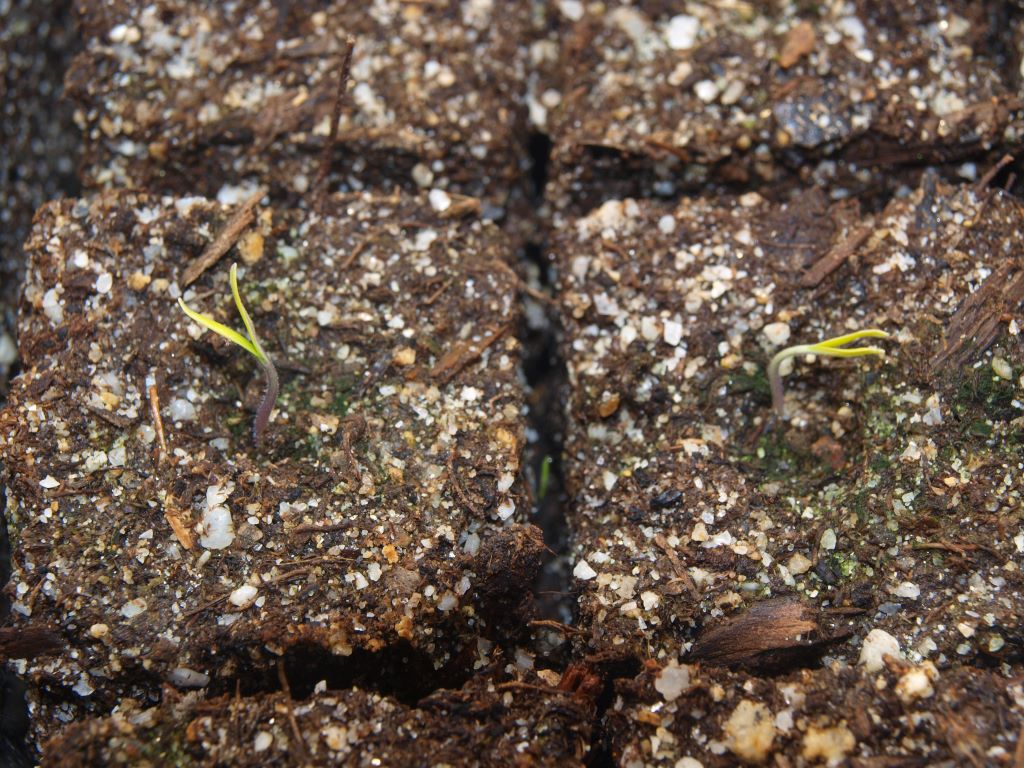
Soil blocks, making and using
Soil blocks are small compressed blocks of special sowing mix (this is not actually soil) used for starting seeds. They are fairly new in this country, but have been used for quite a while in Europe (I read a description of a gardener using them in England over 50 years ago). They have several advantages over other kinds of containers:
They are one of the most ecologically sound method of raising seeds, because they don’t use any materials at all, no plastic, wood, metal or styrofoam, just a specially formulated sowing mix. The only thing you need is something to sit them on for transportation, but any board will do.
There is no root disturbance when using blocks as there is no pricking out or transplanting. Once the plant roots fill the block, it is planted straight into the ground.
The relatively large volume of growing medium means they are less prone to drying out and contain more nutrients, so you can leave them longer before transplanting.
They are particularly useful if you are going to give a lot of plants away, as you don’t lose a container when you do so.
There are a couple of drawback to soil blocks, the biggest being that you need a special soil block making press to make them (these come in several sizes, but the 2” one is most useful). Another is that the process of making them is relatively slow.
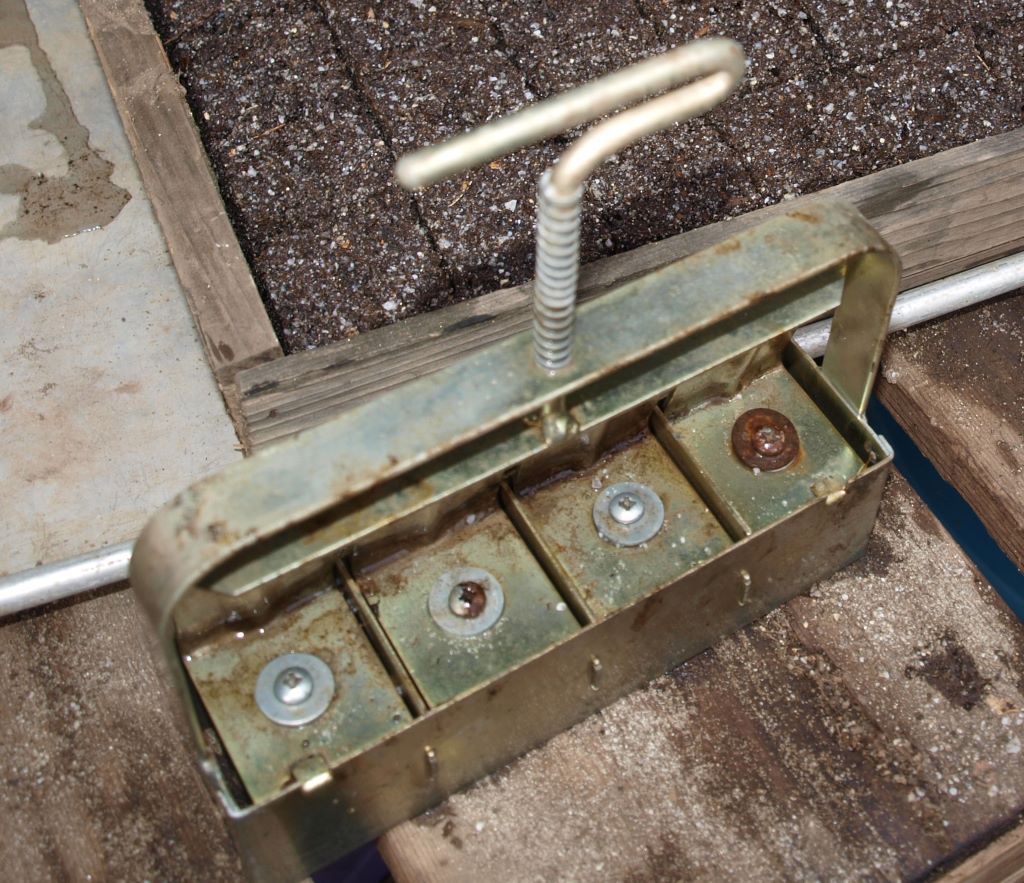
Block molds
To make soil blocks you need a special block mold to compress the mix. These are available in several sizes, though you only really need the 2˝ one (I have a ¾” one too, but never use it.) There is also a large 4˝ block mold, but it’s pretty expensive, so I just use recycled 4˝ pots. If they Aren’t ready to go outside. Commercial vegetable growers in Europe use automated block making machines that do everything, right down to adding the seed.
Sowing mix
A mix for soil blocks differs from other mixes, in that it has to be cohesive enough to hold together when ejected from the mold. They also usually contain more nutrients. Here are three simple “recipes” that work well:
2 parts peat (+ lime)
1 part soil
1 part vermiculite
1 part compost (or leaf mold)
1 part soil
4 parts peat (+ lime)
2 parts sand
1 part soil
1 part compost

Making the blocks:
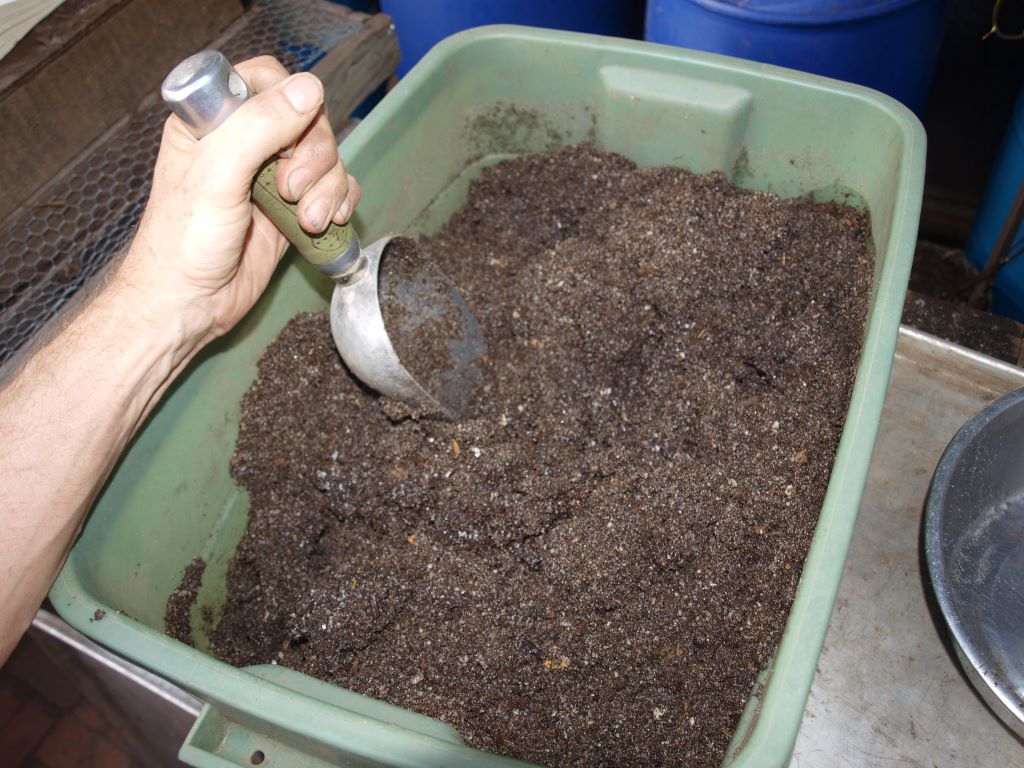
Measure out the pre-moistened ingredients and mix them together in a plastic tub. You wanta very wet mix with the consistency of freshly mixed cement or mud, so add about 4 parts mix to 1 part water and stir thoroughly.
The key to making soil blocks lies in the moisture level of the mix. If you don’t add enough water the mix will be so dry it won’t fill up the mold properly, or won’t eject. If you add too much water the mix may drop out of the mold prematurely, or the block may collapse when ejected. It’s not a bad idea to save a little dry mix for the not unlikely event that you make it too wet initially. Some gardeners leave the prepared mix for an hour or so before making blocks to make sure the mix has absorbed all the water it can hold.
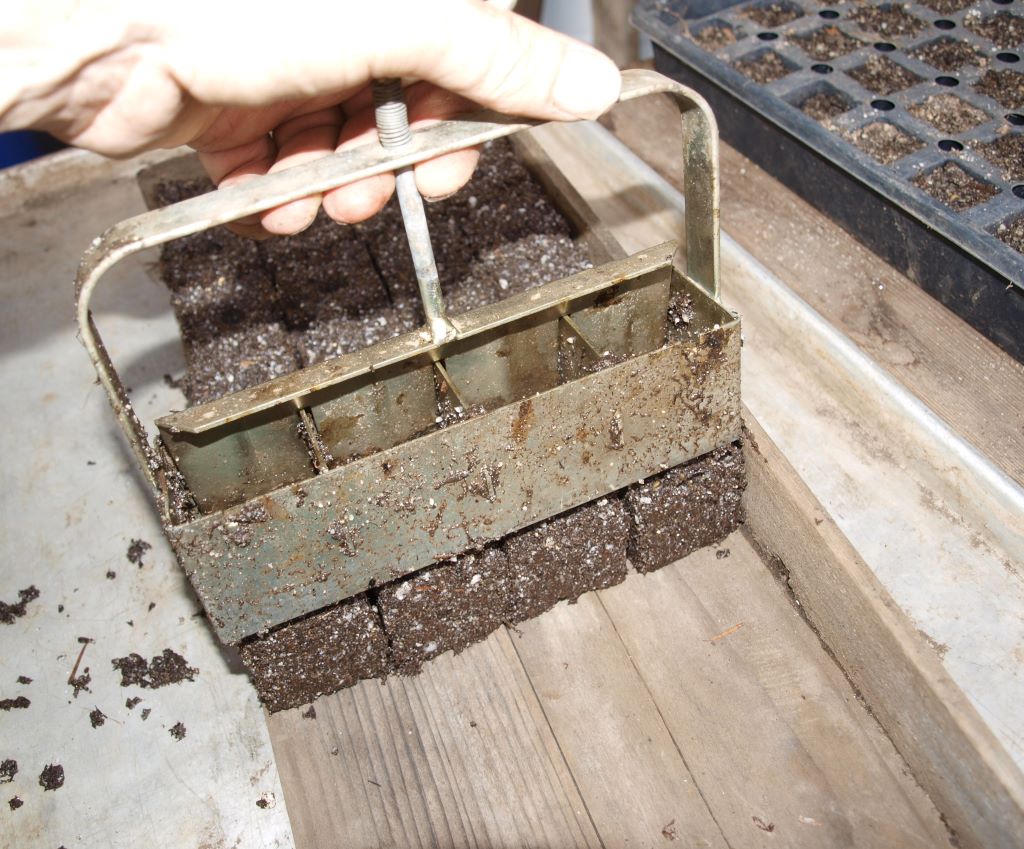
Fill the mold by pressing it into the mix 2 or 3 times. You will know when it’s full because surplus liquid will ooze out of the top. It helps if the mixture is in a 5 gallon bucket so it can be deep. Then you can fill the mold with one press by rocking from side to side and pressing hard. Scrape the mold across the top of the container (or with a trowel) to remove excess mix, put the mold on the chosen base and eject the block carefully. Rinse the mold in a bucket of water as necessary to stop the blocks sticking to them (some people do it every time).
Place the blocks close together to minimize hiding places for slugs and earwigs, but not so close that they are touching. Once the blocks are out of the mold you should handle them as little as possible, as they aren’t very strong. The block becomes more cohesive as the growing roots of the plant bind it together and eventually you can handle it quite roughly without it falling apart.
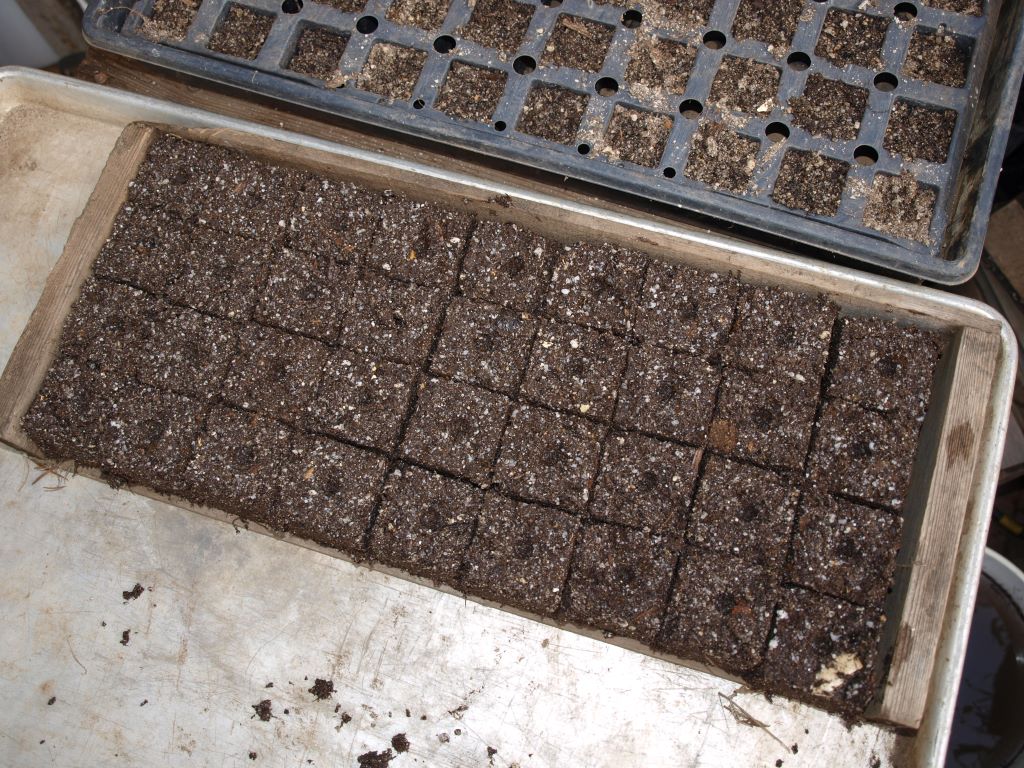
A receptacle for the blocks
The best receptacle for holding the blocks is a flat with one long side missing (this makes it easier to slide the blocks in and out). Put the open ends of two trays together to reduce evaporation on the exposed edge. I have also used boards, plastic serving trays and odd scraps of plywood.
Planting
Sow the block by dropping the appropriate number of seeds (usually 2 – 3) into the indentation on top. Cover the seed by pinching the indentation closed, or by covering with a little peat moss (or just leave them open and be careful to keep the block moist). For seeds with very poor germination you might use the small ¾˝ blocks (to save materials) and only pot on the best ones.
The blocks don’t really need watering for several days, but I like to mist the surface to wet the seeds thoroughly.
As the growing roots of the plant (or plants) bind it together, the block gets more cohesive and eventually you can handle it quite roughly without it falling apart.
Watering
Soil blocks must be watered conscientiously because the soil isn’t continuous and water can’t move from one area to another. The blocks have a lot of surface area for evaporation and if you don’t give them enough water they will gradually dry out over time. As with plug trays the blocks at the edge of the trays tend to dry out faster than the rest, especially if they aren’t in an enclosed container. If the blocks start to dry out they gradually get harder and harder, eventually to the point where seedling roots can’t penetrate their surfaces.
Blocks can be bottom watered by immersing them in a shallow pan of water and allowing them to soak up as much as they need. You can reduce the frequency of watering by setting them on capillary matting (this can be improvised from burlap or carpet padding).
Pricking out
Normally you don’t, the plants stay in the 2˝ blocks until their roots start to protrude from the sides of the block and then they go directly into the soil. The only times you may need prick out soil blocks is when when growing larger plants such as tomatoes or Cucurbits. If the weather outside remains too cool for warm weather crops, they can be potted up into 4˝ pots.