


Composting
Composting is a process whereby complex organic plant and animal matter is broken down into simpler forms. The artificially warm and humid environment of the heap gives you a way to accelerate and control the process of decay that goes on in nature all the time. There is alchemy in composting, do it poorly and nothing happens, do it right and you get magic.
Composting provides all of the following benefits without costing anything. You really don’t have to spend any money to make compost. There is no need for bins, inoculants, nitrogen sources, or anything else. All you have to do is use the right materials, in the right proportions and put them together in the right way.
The benefits of composting
• Compost is the best source of organic matter and humus for the garden. It is so valuable that the compost pile has been called the heart of the organic garden.
• Compost is often the main source of nutrients in a mature organic garden. These are securely held in the form of microorganisms and organic matter and are slowly made available to plants as soil organisms break them down.
• Compost encourages a healthy population of soil organisms, by providing food for them, as well as being full of living organisms itself. A teaspoonful of compost may contain 1 billion bacteria, 2500 protozoa, 300 feet of fungal hyphae and 150 nematodes.
• Composting gives you a simple way to dispose of organic household and garden waste and turn it into useful fertilizer. If you are ambitious it can even be used to dispose of human waste.
• Compost suppresses a variety of soil pathogens, including damping off (compost tea works also).
• The composting process breaks down toxins such as pesticides and can bind heavy metals to make them unavailable to plants.
Problems with compost
• My biggest problem with compost is that it takes work and foresight to make, which means I never have enough of it.
• Poorly made compost may not have heated up enough to kill weed seeds. Spreading this kind of compost on your beds can plant thousands of weed seeds.
• Poorly made piles may smell bad and can attract scavengers such as flies raccoons and rats, which can present public health problems.
Composting as a means of recycling
In recent years we have begun to realize the importance of recycling wastes, rather than discarding them and composting is particularly useful in this regard. It allows you to take materials that would otherwise end up in the landfill and convert them into a valuable product. The most commonly composted household material is kitchen waste, but almost anything that once lived can be composted, so long as it hasn’t been treated with (or mixed with) toxic chemicals.
Non-gardeners often imagine that compost making must be a smelly affair. They assume that decaying vegetation, food scraps and manure must inevitably smell and attract flies and vermin. Actually there is a big difference between a well-made compost pile and a heap of rotting garbage (throwing the daily accumulation of kitchen waste in a heap out in the garden isn’t composting. The compost pile doesn’t attract pests or smell very much. In fact composting is one of the best ways to dispose of this kind of material without having such problems.
How composting works
The workings of the compost pile have been studied closely and are now pretty well understood. The process begins when micro-organisms in the newly completed pile start to break down the most easily digested materials, the simple sugars and starches (these can be broken down by many organisms). The abundant food source causes a population explosion and the respiration of billions of organisms in a feeding frenzy causes the pile to heat up rapidly. As the pile heats up other organisms get to work on the more resistant materials. Cellulose can only be broken down by a few organisms (snails, termites and bacteria) that secrete the enzyme cellulase. This breaks cellulose down into simple sugars, organic acids and carbon dioxide. Proteins are broken down into amino acids, then into ammonium, then nitrates and (sometimes) then into ammonia gas (this is why some piles smell strongly of ammonia). Lignin, waxes and resins are very decay resistant and require a sequence of organisms to break them down.
When the readily available food has been consumed many of these organisms die and the ensuing reduction in respiration causes the temperature in the pile to drop. As organisms die they in turn are broken down and release the nutrients they have accumulated. The stuff remaining at the end of the composting process contains a large proportion of humus, a stable form of organic matter that is very resistant to decay.
During the fermentation process a lot of material in the heap is lost to volatilization. As much as three quarters of the carbon in the pile may be released as carbon dioxide, causing the C : N ratio of the pile to drop from around 30 : 1 to around 8 or 12 : 1. Some nitrogen is also lost as ammonia, especially if the C : N ratio starts out lower than 30 : 1 (the final C : N ratio will still be around 8 or 12 : 1).
Compost temperature: While the compost pile is cool, (up to 50°F or 10° C) it is said to be in the cryophilic stage and decomposition happens no faster than in the soil. As biological activity increases, heat is generated faster than it can dissipate from the well insulated mass of the pile, so it gradually heats up. When the interior of the pile reaches 112°F (40° C), the composting process enters the mesophyllic stage. Mesophyllic organisms are most efficient at higher temperatures, so decomposition proceeds rapidly as it gets warmer. As the heat builds in the center of the pile it gets hotter and hotter, until these organisms either die off, or migrate to cooler areas. The thermophyllic stage is then reached and specially adapted heat loving organisms take over (these can survive up to 180°F (80° C). Temperatures above 140°F (60° C) are needed to kill pathogens, weed seeds and pernicious roots, but decomposition slows somewhat at such high temperatures.
When most of the available nutrients are consumed the pile begins to cool down and mesophyllic organisms take over again (some of these survived out at the cooler edges of the pile). These keep on working as the pile cools, until the temperature gets low enough for cryophilic organisms such as earthworms and actinomycetes to come in and finish the job.
You might think that the hotter the pile gets, the better, but this isn’t the case. You don’t want it to go much above 150°F. Very hot piles waste nutrients through volatilization, so that 60% or more of the volume of the pile may disappear. You can cool a pile down by turning it, adding soil, or by adding more carbonaceous material.
A compost pile doesn’t heat up uniformly all the way through. The well insulated center gets the hottest and it gets progressively cooler towards the exterior, where it is easier for heat to escape. This is significant because it allows many organisms to avoid being killed in the intense heat of the center, by moving out to a zone more to their liking. As the pile cools they migrate back to the center. To ensure that all parts of the pile heat up sufficiently for good decomposition (and to kill weed seeds and pests), you should turn it at some point (see below).
Compost organisms: The compost pile is alive with almost countless living organisms and these are responsible for the transformation that takes place.
The bacteria are the most important decomposing organisms and are active from the beginning of the process until the end (some even fix atmospheric nitrogen in the pile). Fungi go to work on the pile within a week or so, but can only work in the cooler and well-aerated outer layers. Actinomycetes also work on the well-aerated outer layers and give the pile a grayish white color and a distinctive earthy smell. They appear during the final stage of decomposition and their arrival indicates the pile is almost finished. Other organisms are active during various stages, including earthworms (not the same as those which inhabit soil), beetles, protozoa and woodlice.
Essential elements of composting
When I first started gardening I piled plant debris in a wire cage, added some compost activator tablets and waited for it to become a compost pile. Needless to say it never happened, because I didn’t give the composting organisms what they needed. When you build a pile you are not making compost, you are simply providing the organisms that do the work with food and shelter. Just think of your compost pile as a big pile of tiny animals. Your aim is to keep these animals happy, so they will multiply and do the necessary composting work for you.
Gathering materials
You need a lot of material for a compost pile, so you may need a place to store it until you have enough (it’s not nearly as effective to build a pile in stages). Good organic gardeners are often good foragers, getting huge quantities of materials from a variety of sources.
Particle size and texture
The size of a particle largely determines how quickly it can break down. The smaller the particle, the greater its surface area in relation to volume and (theoretically) the faster it will break down (this is most important for quick piles). However if the particles are too small they are easily compacted, which excludes air and so slows decomposition. The ideal particle size is about 1 – 2˝.
You could chop larger materials (such as Brassica stems) with a machete or a sharp spade, or you could lay them on your driveway to be run over by cars. Small woody material can simply be used as a base layer under the pile. When the time comes to turn the pile it will be half decayed and can be chopped more easily
Shredding
You can hasten decomposition and produce finer compost by chipping stems, prunings and other bulky garden refuse in a shredder. However it is not really necessary. I bought an almost new electric shredder at a yard sale, but (like the first owner) I haven’t really used it for this.
Shredders can be useful for making very fine compost quickly, but this hardly justifies their cost. By reducing everything to a satisfying homogenous mass they fulfill an urge for neatness that some people will appreciate, but at some cost in noise, fuel, frustration and money (you could buy quite a few hand tools for the price of a shredder).
Mixing
Ideally the materials would be completely homogenous throughout the pile, but in practice we usually make the pile in thin layers of various materials, alternating nitrogenous materials (green matter, manure) with carbonaceous materials (straw, leaves and other dried plants) and the occasional thin layer of soil (for bacteria and minerals). We never have large masses of a single material, as this could slow decomposition. A shredder can be used to mix the materials in the pile, by simply alternating the materials you put through the shredder.
Moisture content
Probably the most critical factor in the whole composting process is having the right moisture content in the pile. It it is too wet or too dry the composting organisms won’t be happy and it simply won’t work. Well made compost has the texture of a wrung out sponge, it’s moist, but you can’t squeeze water out of it.
Too dry: In dry California I’ve seen many compost piles that weren’t working because they had dried out too much. A pile must contain 50 – 60 % water if it is to work well and if there is less than 45% water the pile may not heat up at all. As you add materials to the pile make sure they contain as much moisture as they can hold. This is especially important for dry materials such as dry leaves or straw. In very dry climates you may want to enclose the pile, to stop it losing too much moisture (though this may reduce the amount of air it gets also). You should also put it in the shade.
Too wet: In cool wet weather you must make sure the compost pile doesn’t get saturated with water. Too much water means too little air and can result in smelly anaerobic decomposition. Excess moisture can also result in the leaching of nutrients.
Carbon to nitrogen ratio
The carbon to nitrogen ratio is a very important factor in successful composting, as you need to keep the materials in the pile in roughly the right proportions. High carbon materials include straw, sawdust, hay and dry leaves). High nitrogen materials include green leaves, food waste and manure. For a pile to work well there should be a balance of approximately 25 – 30 parts carbon for every 1 part nitrogen. See the chart of carbon to nitrogen (C : N) ratios for various common materials at the end of this section.
Some gardeners prefer to make piles with a slightly higher carbon to nitrogen ratio (35 : 1 or more) so they won’t heat up as rapidly, or get as hot (only up to about 90°F). They believe cooler piles are better as they don’t lose so many nutrients through volatilization. The drawback is that they may not get hot enough to kill all weed seeds, pernicious weed roots, or diseased plant material. Of course the simple solution to this problem is to not put such stuff in the pile.
Composting isn’t rocket science and you don’t have to be too obsessive in calculating the carbon to nitrogen ratio, so leave the scale and calculator indoors. Approximate is good enough. If there is a higher proportion of nitrogen the excess will simply be given off in the form of ammonia and wasted (you will be able to smell it). If there is too much carbon the pile won’t heat up as quickly, or get very hot.
The carbon to nitrogen ratio is often expressed as a single number and indicates the number of units of carbon relative to one unit of nitrogen. For example a ratio of 30 would mean there was 30 units of carbon to every one unit of nitrogen A high number (such as 400) means there is a lot of carbon relative to nitrogen and that material will take a long time to break down.
Pile size
Big is beautiful in the case of compost piles, because the larger the pile the smaller the surface area in relation to its volume and the better it’s able to retain heat (a critical factor in rapid decomposition).
The main limit on how large a pile can be is in its height. If a pile is higher than 6 feet the weight of the pile compresses the interior and it becomes difficult for air to reach the center (unless specially ventilated). If it can’t get enough air then anaerobic organisms may take over. A very tall pile may also be so well insulated that it gets too hot in the center (they have actually been known to catch fire). Of course you aren’t likely to want to make a pile anywhere near 6 feet tall, because it becomes very difficult to get the heavy materials up that high. In reality the size is more limited by your ability to obtain sufficient materials and by the physical limitations of constructing it.
Garden compost piles tend to be fairly small because of the limited amount of material available to compost and because most people aren’t physically capable (or willing) to handle very large quantities. The minimum size for a freestanding pile is about 3 feet by 3 feet by 3 feet. Smaller piles should be enclosed to help them retain heat and moisture.
Pile shape
The only restriction on the shape of a pile is that it should have as small a surface areas as possible for its volume. This usually means the pile is fairly close to a cube in shape. In wet climates the pile should have a peak to help it shed rain (in very wet weather you should probably cover it with a tarp to prevent it getting too wet). In dry climates it’s better to make the pile flat on top, as this makes adding water easier.
| Carbon to nitrogen ratio of common materials This is approximate, as natural materials can vary a lot (carbon is first, nitrogen second). | |
| Activated sludge | 6 : 1 |
| Alfalfa hay | 12 – 20 : 1 |
| Apple pomace | 12 : 1 |
| Blood meal | 3 : 1 |
| Bonemeal | 4 : 1 |
| Bracken Fern | 48 : 1 |
| Cardboard | 150 : 1 |
| Coffee grounds | 20 : 1 |
| Comfrey | 10 : 1 |
| Corn stalks | 60 : 1 |
| Cottonseed meal | 5 – 20 : 1 |
| Dry leaves | 50 : 1 |
| Grass hay | 80 : 1 |
| Green plants | 15 – 25 : 1 |
| Hay | 25 ; 1 |
| Humus | 12 : 1 |
| Kitchen garbage | 15 – 25 : 1 |
| Leaf litter | 60 – 100 : 1 |
| Leaves, Alder | 25 : 1 |
| Oak | 50 : 1 |
| Pine | 60 – 100 : 1 |
| Legume hay | 12 – 25 : 1 |
| Manure, Chicken | 7 : 1 |
| Cow | 18 : 1 |
| Horse | 25 : 1 |
| Human | 10 : 1 |
| Oat straw | 50 : 1 |
| Paper | 150 : 1 |
| Seaweed | 19 : 1 |
| Slaughterhouse waste | 2 : 1 |
| Sawdust | 150 – 500 : 1 |
| Sewage | 20 : 1 |
| Soil organisms | 7 : 1 |
| Straw | 75 – 150 : 1 |
| Topsoil | 11 : 1 |
| Urine | 0.3 : 1 |
| Vegetable waste | 12 – 25 : 1 |
| Weeds | 30 : 1 |
| Wood chips | 400 : 1 |
pH
For most rapid decomposition the accumulated materials in a pile should be close to neutral (pH 6.0 – 7.0), just like a healthy soil. If the pH is too high or too low, the right soil organisms won’t get to work in sufficient numbers and the pile won’t heat up properly. Bacteria prefer the pH of a pile to be around 6.0 – 7.5, whereas fungi are slightly more tolerant of acidity (pH 5.5 – 7.5).
In practice the lower end of the pH range is preferable, as a higher pH increases the production of ammonia and hence loss of nitrogen. This is why it isn’t a good idea to add lime to a pile to alter the pH (add it to the finished compost instead).
Air
The compost pile must have a good supply of air for rapid breakdown. Make sure you don’t get it too wet, make it too tall, or compact it by walking, sleeping, or performing fertility rites on it. Always be aware of the potential for compaction, especially when using a large proportion of succulent greens or other wet material. You could easily end up with rotten silage rather than compost. If this happens you must turn and aerate the pile (see below for more on this).
Air must be able to get to the center of the pile for it to work. It’s common practice to put a layer of brush on the ground underneath a pile to improve aeration. You could also use old bamboo, or the thick hollow stems of Tithonia, sunflower or other large plants. The huge piles of municipal composting operations are commonly aerated with perforated pipe.
Time
The time it takes for a pile to decay is governed by all of the factors mentioned above and is limited by that factor which is present in the least amount (old Liebigs barrel with a short stave again). If all of these are taken care of optimally your compost could be ready in 3 months or less. If they aren’t then it might take a year or more. Quick compost (see below) can be ready for use in as little as 2 or 3 weeks, simply because it gives the microorganisms ideal conditions for their growth.
If you aren’t in a hurry you could ignore most of the advice I’ve given here and just throw stuff into piles. Almost anything will decompose if given sufficient time (and kept moist). It won’t be a compost pile though.
| Temperatures to kill pathogens Lower temperatures will kill pathogens too, but require longer heating times. 30 minutes at: 176°F (80° C): Will kill weed seeds 158°F (70° C): Will kill insects, bacteria, viruses. 140°F (60° C): Will kill slugs, fusarium, botrytis. 122°F (50° C): Will kill fungi, nematodes |
Making a compost pile
Composting tools: The most important compostingtools are the fork (ideally a manure fork) and a wheelbarrow for moving all the materials around. It’s also helpful to have secateurs, a spade, a machete and perhaps a large wooden block to facilitate smashing woody materials.
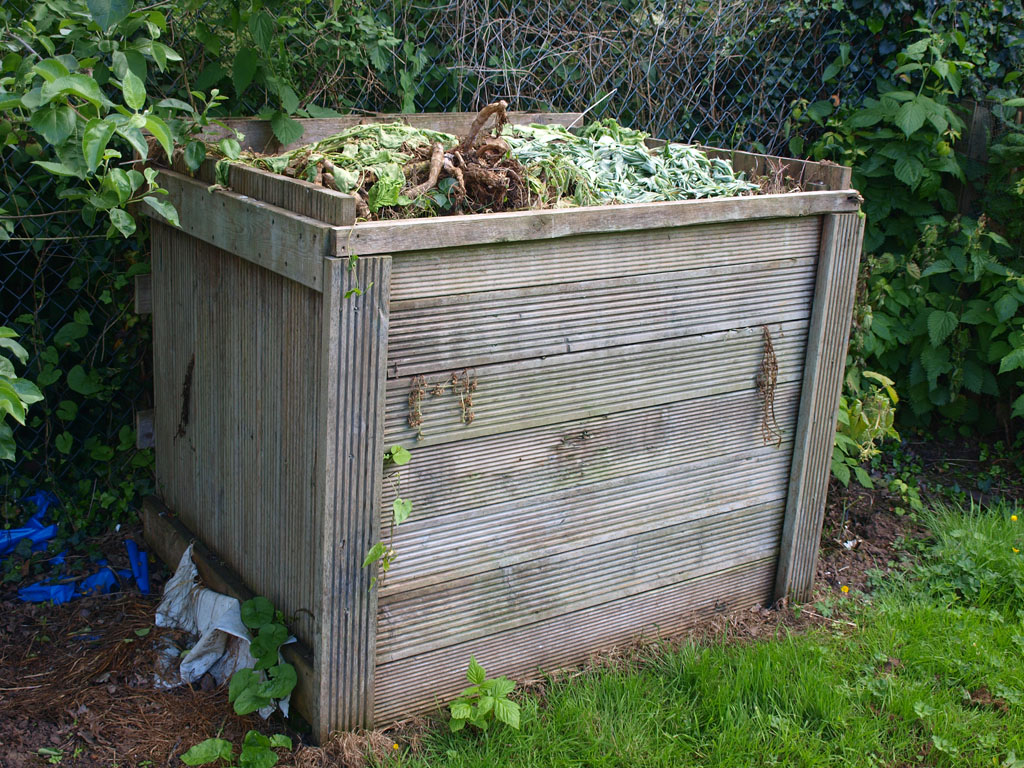
Composting containers: These aren’t necessarywhen making compost on a large scale, but they can be useful in some cases.
Home garden piles are generally too small for optimal heating, because they simply don’t have sufficient mass. Compost bins can help by insulating the pile so that it can heat up more evenly for good decomposition. Fast piles are usually made in bins for this reason.
Small open piles may also lose or gain moisture quickly when exposed to heavy rain or hot sun. Enclosing them in a covered bin reduces this tendency. This is especially important in winter, when a cover may also be necessary. Rain not only leaches out nutrients, but also drains away heat.
In small city gardens compost piles can attract the attention of one of the most difficult of all garden pests, complaining neighbors. A neat compost bin can help to minimize complaints by hiding the pile completely. Remember compost piles are illegal in some places.
Bins may be made from new or salvaged materials, bricks, old pallets, wire, salvaged wood, concrete blocks or corrugated iron. Some of the most useful bins have separate compartments, with removable partitions, so the compost is easily turned from one to another. Three compartment systems are the best because the pile can be started in the first bin, transferred to the second one and eventually to the third. By the time it’s finished in the third bin the compost is ready to use.
The cheapest and fastest bin is a length of wire fencing made into a large (at least 3 – 4 foot) diameter cylinder. This can be lined with cardboard to hold in moisture and heat, or black plastic to absorb the suns heat.
In cold weather you can make a bin out of spoiled hay bales, covered with corrugated cardboard (these materials are eventually composted too). Winter piles are sometimes made in pits to keep them warm, but in rainy climates there can be a problem with waterlogging.
In very hot dry climates compost is sometimes made in pits, as this keeps the compost moister and cooler.
When to make compost
If you hope to have enough compost for your needs, you will need to make a real effort to keep up with making piles. It can take 6 months or more for a pile to mature so it’s important to plan ahead. Some people merely build piles whenever they have a sufficient accumulation of materials on hand, others go out actively searching for materials. It’s a good idea to schedule your compost making activities (acquiring materials, building piles, turning piles) in your garden journal, otherwise they are often among the first things to get neglected when you get busy.
There is no best time to build a compost pile. You can make one any time the air temperature is high enough for the composting process to get started. Often people concentrate on pile building in spring and fall as materials are most readily available at those times. In spring you have skimmings from the beds, weeds and cover crops, while in fall you have large quantities of fallen leaves, skimmings from beds and crop residues.
The demand for compost is greatest in spring, when you are preparing a lot of beds in a short time. Keep that in mind when planning.
Siting the pile
The most important requirement is that the pile be located near to the garden, to reduce the work of hauling materials back and forth. If you plan on bringing in manure, leaves and other organic materials you might want access for a truck for unloading them easily. In urban areas or small gardens it may be necessary to keep the pile hidden from the sight of neighbors. In hot climates the pile should be in light shade to reduce water loss from evaporation. In cold climates it should be in a warm sunny place that is sheltered from cold winds.
You might designate a permanent composting area, or you might move the piles around the garden, to spread out the benefit of the soluble nutrients that leach from the pile. If you put the autumn pile on a bed it will work over the winter and can be removed in spring to leave a warm, clean, fertilized bed ready for planting. Another idea is to put the piles on areas of poor soil you want to improve for eventual inclusion in the garden.
How to build a pile (using a variation of the Indore method)
There is no great mystery to making compost, basically all you have to do is moisten all of the materials, combine them in the right proportions and sit back and watch. The chart of C: N ratios given above is a useful guide, but you would need a weighing scale and a computer to calculate the exact C : N ratios and proportions of materials for the average pile. Fortunately you don’t have to be that precise. A pile with too much nitrogen will simply vent off the excess nitrogen. A pile with too much carbon will just take longer to work (urine can be added to supply extra nitrogen).
Before you start the pile you may want to fork the ground to better connect the pile to the ground. Begin by laying down a 6˝ base layer of somewhat woody material (small brush, Brassica or sunflower stems). This defines the bottom of the pile and improves drainage and aeration. In dry climates you can forget about this base as you want to conserve moisture. Cover this with a 4˝ deep layer of weeds, green manure and bed skimmings, followed by a 2 – 3˝ layer of manure (horse or cow is good). Follow this with a sprinkling of rock powders (not liming agents), then a 3˝ layer of wetted straw or dry plants and finally a thin 1˝ layer of soil. If any of these layers are dry you should moisten them thoroughly as you lay them down. You could even soak them beforehand to get them thoroughly wet (you can’t make them too wet, as excess water will soon drain off).
Repeat these four layers (greens, manure, straw, soil) alternately until the pile is of the desired height (4 – 5 feet is good). Concentrate on building the sides of the pile, keeping them as nearly vertical as possible and the inside will take care of itself. If the sides start to slope inwards then pull them back out to near vertical with a fork. When you get near the top start to slope the sides inwards to give a slight pitched roof effect (a steeper pitch is good in wet climates). Some gardeners finish off the pile with a thick layer of straw, while others prefer to cap it with a layer of soil.
Piles don’t have to be built exactly in this way, there is a lot of room for improvisation. No material is indispensable, you can use whatever is available, so long as you keep it in roughly the right proportions of carbon to nitrogen.
Examples of various piles
80% manure, 20% straw
50% green, 50% straw
20% manure, 40% green, 40% straw
33% green, 33% straw, 33% soil
Heating
You can tell when a pile is heating up just by looking at it, because it shrinks rapidly (often overnight) as the material consolidates (in cool weather it may also give off steam). If is hasn’t shrunk visibly you can check whether it is heating up by putting your hand into it. At a depth of 6˝ it should be warm, at 12˝ it should be almost too hot to comfortably hold your hand there.
In cool weather a pile may be slow to heat up, or may not heat at all. There’s nothing necessarily wrong, it just takes longer for the bacteria to reach a critical mass when it’s cold. If you could get it going somehow it would eventually generate enough heat to sustain itself. Old carpet, bins, straw bales, or black plastic can help to insulate and keep it warmer (you might even build it in a hoop house or greenhouse), but it’s best to get the pile going before it gets so cold that these measures are needed. In many areas winter is too cold for good decomposition (piles need to be enormous to hold enough heat at this time).
A compost thermometer is helpful for accurately recording the progress of your piles and gives you a way to compare the effectiveness of different mixes of material.
Monitoring moisture content
Don’t just build the pile and forget about it. It is a living thing and needs to be cared for as if it were another growing bed. Check its moisture content regularly and adjust as necessary.
Dry: A pile can lose a lot of moisture from surfaceevaporation in hot dry weather. If you suspect this is a happening then cover with old cornstalks, a mulch of straw, or a plastic sheet (this can reduce air circulation though). Remove this cover when it rains. Regular light watering will replace the small quantity of water lost through evaporation, though you have to be careful not to get the pile too wet. Don’t let the pile dry out too much, or it will be necessary to break it apart to re-wet it properly. It’s hard to get the pile evenly moist simply by watering from above, some areas get wet, while others stay dry.
In very hot and dry areas, compost piles are sometimes made in pits, as this helps to keep them moist.
Wet: In cool humid conditions the pile might have tobe covered during heavy rain to prevent waterlogging. If the pile gets too wet it may mat down into a gluey anaerobic mess. If this happens it will have to be turned to dry it out and get air into it. It takes a lot of effort to turn the heavy wet mush, but it’s the only way to dry it out effectively.
Turning the pile
It isn’t really necessary to turn a well-made and maintained pile, but it speeds up the composting process and ensures that the whole pile heats up uniformly. If you don’t turn a pile, the outer 10˝ layer of the pile won’t heat up sufficiently to decompose properly, or kill pathogens and weed seeds. When an unturned pile is complete this outer part can be stripped off separately and composted again.
A newly turned pile will heat up a second time as more air is supplied and the goodies in the outer layers are consumed. It won’t get as hot as it did the first time though. Some gardeners turn their piles a third time to speed up decomposition (and sometimes again – see Quick Composting).
If you want to add ground lime to the pile, do it the last time you turn it, after it has cooled down. Don’t add it when first building a pile, because it can cause nitrogen to be lost as ammonia gas.
Pests
If your pile heats up promptly you should have few problems with foraging pests. Meat, bones and other animal products are the cause of most problems, so they are often kept out of the pile, though any recognizable food waste is a potential lure. A cap of soil or straw will keep flies out of a pile until it starts to heat up (then it will soon get too hot for them).
Skunks, rats, raccoons, dogs and other animals (I’ve had a bear) can become a problem in poorly made compost piles, or those made in stages (as there is always edible food in them).
When is it ready?
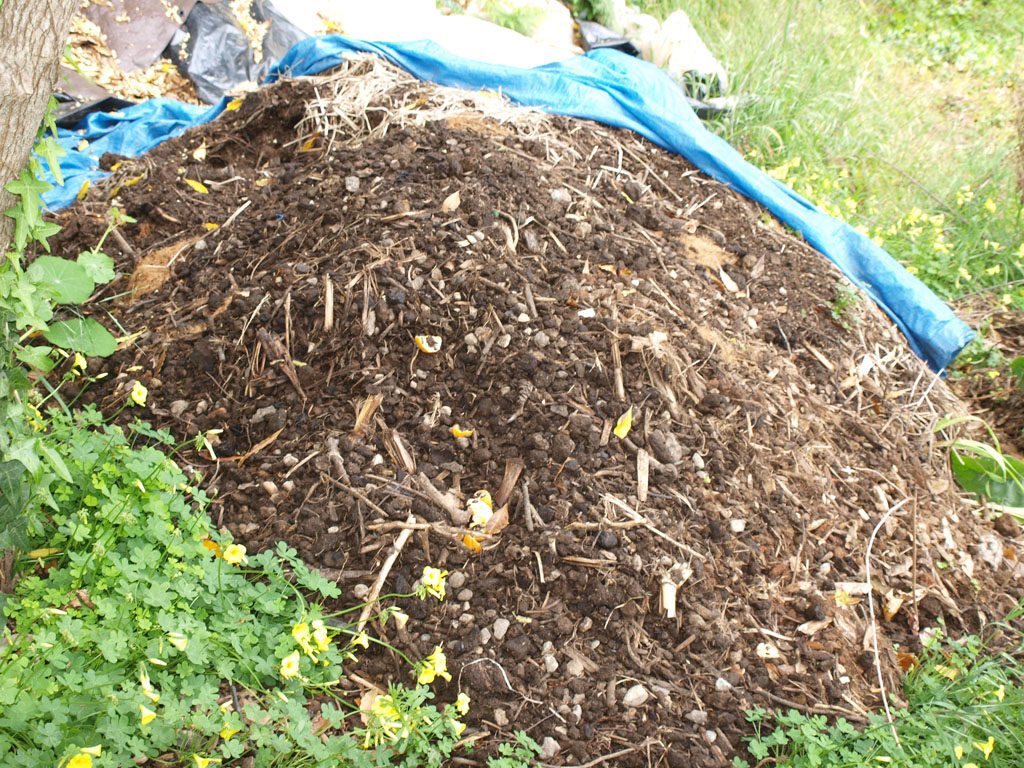
It takes about 6 months to produce fully mature compost. The end result has a rich brown color, no easily identifiable parts (85% of it will go through a half inch screen) and a sweet earthy smell (the smell tells you when it’s ready). The presence of earthworms indicates it has cooled down sufficiently to be ready for use.
If you really need the compost urgently you can use it after it cools down the first time. It will break down fully in the soil. Immature compost is sometimes added to clay soil to improve its structure, or put in the lower spit when double digging.
To get really fine compost for sowing mixes turn the pile twice and then leave it for a year to decompose fully.
Mature compost contains about 20% organic matter, 5% humus, 1% nitrogen, .7% phosphorus, .5% potassium and a lot of trace elements, beneficial fungi, bacteria and other organisms.
Using compost
This is pretty much covered in other parts of the book. There is really no best time to apply compost. It is most often applied in spring, because that’s when most bed preparation goes on, though it’s also applied throughout the summer when preparing the beds for planting.
Don’t leave mature compost standing around for very long, get it into the soil where it can do some good. If you must keep it for any reason (such as for spring seed starting) keep it covered to prevent leaching, drying out or oxidation.
As you use your compost, separate out any large undecomposed bits and add them to your next pile (or use for mulch).
Troubleshooting
Composting is a fairly predictable process and if something goes wrong it’s usually fairly easy to diagnose. These are the commonest problems:
Pile doesn’t heat up
Too dry: Turn and moisten.
Too cold: Wait until the weather warms up, insulate, or build a bigger pile
Insufficient nitrogen: Add more nitrogen (urine is good – if you can get any).
Too small: There is insufficient volume to the pile, make it bigger
Pile smells:
Too much nitrogen: The pile is giving off nitrogen in the form of ammonia. You could turn the pile and add more carbon material, or you could do nothing.
Too wet: Turn and aerate
Compost materials
Almost anything that has lived can be added to the compost pile, so long as you keep it within the appropriate proportions of carbon to nitrogen (see above). You will need a bulk source of high carbon materials and a source of nitrogen. Usually the biggest factors in what goes into the pile is availability, which simply means what can you get in sufficient quantity. Small gardens don’t produce enough material to make an adequate supply of compost, so good organic gardeners also tend to be good scroungers.
Manure: This is almost synonymous with compost for many people, yet others believe manure is detrimental and never use it. Manure provides the nitrogen component of the pile and is full of microorganisms. Composting manure makes it safer to use in the garden, as the heating destroys pests, pathogens and weed seeds. Some people even compost human manure in hot compost piles. Apparently 3 days between 130 and 170°F are sufficient to kill all pathogens and render it safe for garden use.
Urine: Sometimes known as H.L.A. (household liquid activator) or liquid gold to disguise its true origins, urine can be the main source of nitrogen for the compost pile. If you aren’t overly fastidious and are prepared to collect it, urine is actually a very convenient material and one that has to be disposed of one way or another. Dilute it (4 parts water to 1 part urine) before putting it on the pile. It is especially useful for getting a reluctant pile to heat up.
Soil: This provides the right decay causing micro-organisms and may help prevent the loss of nitrogen. However it isn’t needed in large amounts (that clinging to the roots of old plants is generally sufficient) and too much soil may slow the pile down. In fact soil is sometimes added to the compost pile to prevent it from heating up too much.
Green vegetation: This is one of the main sources of nitrogen for the compost pile. The commonest materials are those you take straight from the garden, cover crops, weeds and finished crops, but you can also go looking for any abundant fast growing (non-pernicious) vegetation, such as Vinca, Japanese knotweed, kudzu, ivy, aquatic weeds, algae and cat-tails. Never add the roots of pernicious perennial weeds such as bindweed, Bermuda grass or couchgrass to the pile, or any weeds that have set seed. They may come back to haunt you. See below for more on what not to use in the pile.
You can also plant fast growing plants specifically for composting (see Soil improving Crops for more on growing compost crops).
Grass clippings: Grass clippings are a rich source of nitrogen and other nutrients. They are usually mixed with coarser materials, as they tend to mat down and go anaerobic if used alone. Occasionally grass clippings contain viable seeds, and if this is a problem then compost them in a hot pile.
The best place to get grass clippings is from neighbors or professional gardeners (they will often unload their clippings on your property). You may also be able to pick them up from apartment complexes and sports fields. When gathering from such places you should be aware of the potential accumulation of toxins from nearby roads. Pesticides aren’t as much of a problem as these are mostly broken down in the composting process. Don’t take grass clippings from your own lawn though, they should remain there to feed the living grass (let’s not get into a discussion about whether you should even have a lawn).
Seaweeds: These add valuable trace minerals to the pile and stimulate microbial activity, but don’t add much humus. Fresh seaweed should be washed thoroughly to eliminate excess salt. Powdered seaweed is best added directly to the soil, as there is no advantage in composting it.
Straw, hay and dried plants: These are high in carbon, the other important ingredient of the compost pile. Spoiled hay is sometimes available for the hauling, though it’s very heavy when wet. It commonly contains weed seeds, so must be composted at a sufficiently high temperature to kill them. Straw stems are hollow and so help to improve aeration. It doesn’t usually contain weed seeds.
Tree leaves are an excellent compost material and are often available in large quantities. They should be chopped or mixed with other materials, as otherwise they tend to mat down.
These materials should be wet when added to the pile, as they don’t break down easily when dry (straw was once widely used for thatched roofs).
Sawdust: This is ultimately a good source of humus, but the decay process is slow because it contains so much carbon. It should only be used in small quantities in the compost pile and should be mixed with a rich source of nitrogen. If you have a large quantity of sawdust it can be composted in its own special pile (see Wood Waste Composting above).
Kitchen scraps: Vegetable kitchen scraps are high in nitrogen and other nutrients, so are an excellent addition to the pile. Meat, bone and other animal scraps can be used if
you are careful, but are best handled by quick composting, to minimize the time they are attractive to scavengers.
The biggest problem with kitchen waste is that it’s produced in small quantities steadily, whereas for composting you need large quantities at one time. You can’t simply add kitchen scraps to the pile as they are produced, as your pile will simply become a feeding station for flies, rats, skunks, raccoons, dogs or even bears, which isn’t good for you or the animals.
Because it isn’t very satisfactory to compost this kind of material incrementally, you may have to find a way to store the stuff until you have accumulated enough for a pile, without creating a stink or attracting pests. One solution is to empty your kitchen scraps into 5 gallon buckets, cover with a thin layer of shredded leaves or sawdust (to stop it smelling) and seal it with an airtight lid. As each bucket fills up store it in a cool place until you have enough to build a pile. This same system is sometimes used with human manure.
Some gardeners pick up large quantities of kitchen scraps from restaurants and grocery stores. This works well if you have the capacity and motivation to deal with that much stuff, but it can easily turn into a big mess. I once visited a house where the owner composted fish waste he picked up from the Santa Cruz wharf. His kiwi vines were awesome, but the flies around his composting operation were horrendous and for ever after we spoke of him as “the lord of the flies”.
Garbage: All organic based garbage; newspapers, cardboard, clothing (natural fabrics) and more, can be composted if there is no way to reuse or recycle them (which is a better way to go)
Highly carbonaceous material like paper and cardboard should ideally be torn into shreds and mixed with succulent greens (don’t merely throw folded up newspapers on the pile).
Semi-woody materials: You can compost small amounts of semi-woody materials such as Brassica stems, summer fruit tree prunings, semi-ripe wood and vines. They take a while to break down, but add a high proportion of valuable humus to the pile. You can hasten decomposition by chopping or shredding. Hand chopping is most easily done when turning the pile, as they will already be partially broken down.
Rock powders: Some gardeners add rock powders such as greensand and rock phosphate to the pile. The organic acids produced during decomposition may help to make their nutrients more available.
Ground limestone (calcium carbonate): This is sometimes used to raise the pH of compost, but it shouldn’t be added when building the pile, as this will increase the loss of nitrogen. It should be added when turning the pile for the last time, or just before application.
Gypsum (calcium sulfate): This is sometimes added to the pile to supply sulfur. It also contains calcium so should only be added after the pile has cooled down.
Non-compostable materials
Materials which should not be composted include:
Animal products: Many garden books caution against adding meat, fat, bones and other animal parts to the pile, as they can attract unwanted insects and animals. I have mostly lived in vegetarian households, so I haven’t had much experience with this. However it would seem to me that if your pile heats up quickly and thoroughly, they shouldn’t be much of a problem. I have composted a number of whole animals with no problems.
Dog and cat manure: This is high in nitrogen and other nutrients, but may also contain some rather unpleasant parasites. It could be composted in the middle of a hot pile, but why bother? It’s easier to just bury it near non-food plants.
Pernicious perennial weed roots, weeds with seeds: If these survive the composting process they may cause trouble, as they would go straight back into the garden in a pile of rich compost. You can sometimes tell where poorly heated, weed seed filled, compost had been applied, by the huge number of vigorous weeds.
It is possible to compost these materials, but you have to be careful to put them in the center of the pile, where it gets hot enough to kill them. If you aren’t sure about this, it is better to keep them out of the pile. It isn’t worth the risk for the amount of material involved. I try to be conscientious about not mixing such materials with good compostable stuff (and try to cut weeds before they set seed).
You can kill perennial weeds by drying them out in the sun before composting, but make absolutely sure they are dead. Perhaps leave them in a heap of their own for a while, before composting them.
A good way to compost pernicious weeds is anaerobically, in a plastic bag.
Woody and thorny branches: These materials won’t break down in a normal compost pile, they need special treatment (see Brush Composting. Keep thorny plants out of the pile because the thorns can easily end up in your anatomy.
Glossy and colored paper: Though these are now commonly made from non- toxic inks, some may still contain heavy metals and you can’t be sure which are safe. I avoid them.
Pressure treated wood: This is very toxic and doesn’t break very easily. No one in their right mind would try and compost this, in fact I don’t even know why I’m mentioning it. I also avoid plywood sawdust.