Crop planning, where to plant
Once you know how many square feet of each crop you need, you have to decide what crop goes where. It may help to draw a diagram of all of the beds in the garden on graph paper so you can see how much space you have. You can then allocate the required square footage for each crop.
You won’t actually need as much bed space as your list of crops suggests, because you won’t be planting everything at once. Some crops will be sown in succession. For example you may want to grow 100 lettuces through the season, but you don’t need to allocate 100 spaces in a bed. You may only ever have 30 or 40 plants actually in the ground at one time. Crops such as radish and green onions aren’t usually given any space of their own, but are slotted in to available vacant spaces as intercrops.
If you find you have more space than you need, don’t just plant more of the same crops to fill in the space. If you don’t need them it’s a waste of time and effort. It makes more sense to grow something else you will use, or plant a fast growing soil improving crop.
Arranging plants in beds
Where you decide to place the various crops in the garden, may be determined by a number of different things.
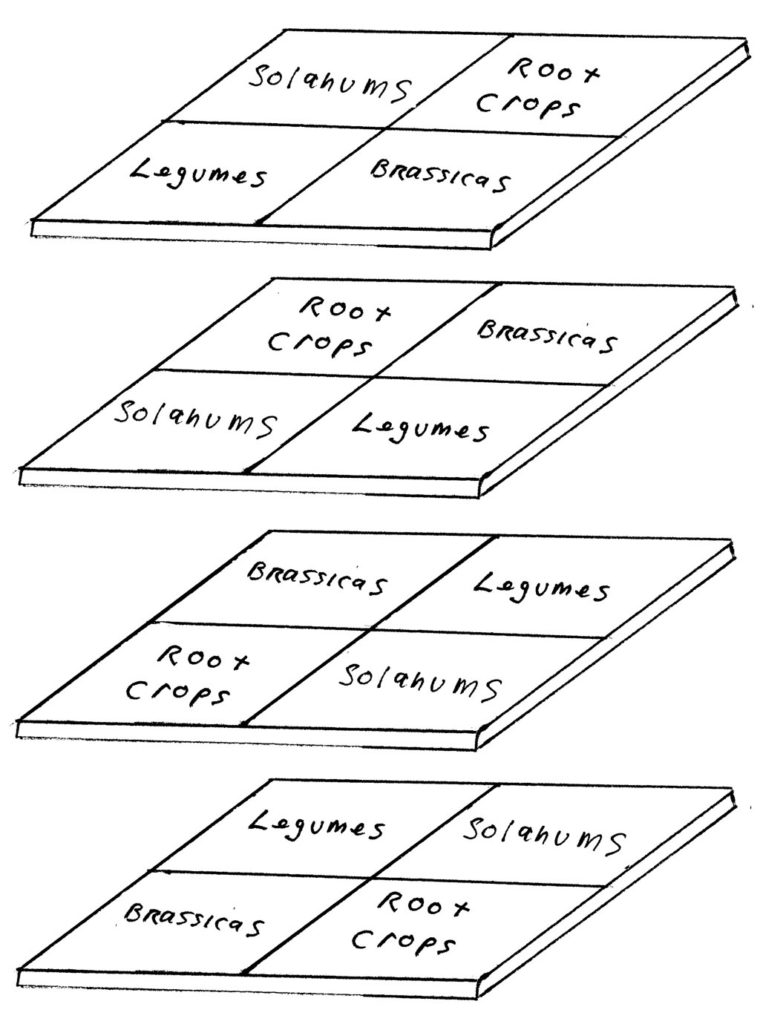
Crop rotation: You can put your plants in the beds according to your crop rotation plan. This only has to be done once, as in subsequent years you will just move everything over one bed. See Crop Rotation below for more on this.
Water requirements: Where I live we don’t get any rain from June to October, which means a lot of watering. I have found that if I divide crops according to their water requirements, I can give some beds more water than others and so get by with using quite a bit less water (but still get good crops).
Random: You could use a completely random distribution method. Start with the long- term crops, those that take up space for a large proportion of the season and slot the rest in around them. Fill in any remaining gaps with miscellaneous crops, flowers and green manures. Don’t leave any soil bare for any length of time.
It makes sense to separate perennials from the annual, so they don’t get in the way of bed preparation. They should have their own bed, or at least their own sections of bed.
Over-wintering crops are best kept together also (in the warmest beds), so they can be protected easily and don’t interfere with fall bed preparation.
Height
Tall crops are usually planted at the north side of the garden, so they don’t shade other plants. Though in summer you might want to use the shade they cast for crops that dislike heat. In the traditional herbaceous border, the taller plants go at the back and the shorter ones at the front, so all are equally visible and all get lots of light. This higher to lower planting plan can also be used in the vegetable garden (though of course you have to orient them to the sun).
| Plant size There is no clear boundary between tall, medium and low crops, but this should give you a rough idea of relative sizes. Tall crops: Amaranth, Jerusalem artichoke, globe artichoke, Brussels sprout, cardoon, corn, giant lambs quarters, quinoa. Medium crops: Asparagus, broccoli, eggplant, fava bean, garlic, kale, leek, mustard, okra, peppers, potato, summer squash (bush), tomato. Climbing crops: Beans, pole, cucumber, peas, summer squash, winter squash. Low crops: Arugala, beet, cabbage, carrot, lettuce, mustards, onion, shallot, shungiku. Creeping crops: Alpine strawberry, chives, parsley, purslane, thyme, violet. |
Making the most of limited space
Space saving ideas
In the vegetable garden small is beautiful, the smaller the area, the more productive it can be per square foot. The small garden should be looked upon as a challenge, not a disadvantage. You can give it all of the love and attention it needs to live up to its full productivity. Here are a few suggestions to help you use space as efficiently as possible.
• Use transplants to reduce the time a crop is actually taking up space in the bed. Plants grow exponentially, the more leaf area they have, the quicker they grow and mature.
• Grow the most productive and space efficient crops, those that give you the most food per square foot. Use crops that yield for an extended time, such as pole peas, pole beans, chard, broccoli, kale, tomato, cucumber. Use short season crops (or fast maturing varieties) that enable you to get 3 or 4 crops in a season, such as spinach, turnip, radish, scallions, lettuce . You can also grow crops that don’t take up much space, such as scallions or carrots and use compact varieties.
• Use intensive techniques like interplanting and catch cropping, to get more than one crop from the same area of soil.
• If space is very limited, concentrate on crops that can’t be purchased easily, taste better fresh, or that are always expensive (shallots, snap peas, alpine strawberries, radicchio). Go for quality and flavor, so you are growing things you couldn’t buy at any price.
• Grow crops out of season when they are the most expensive to buy, rather than in season when they are cheap.
• Fill your whole garden with food by growing multi-purpose plants that are both ornamental and edible.
• Grow up. Train space hungry climbing plants such as cucumbers or snap peas on trellises and you can increase their yield per square foot dramatically. Not only do vertical crops save space, but the produce is cleaner and has less pest damage. Be sure to put tall trellises where they won’t cast shade on other crops.
• Don’t try to get more food from an area by crowding the plants closer together than the soil can support. You will only succeed in reducing the yield.
• Grow cut and come again salad greens. These are harvested as individual leaves, when still very small (only a few inches long), so the plants are sown very close together (½” to 1”). Plants grown in this way may require only half the space of conventional rows.
• Once a crop stops producing remove it and plant something else. Don’t try to wring that last little bit of food out of it.
• If you find you are not using a crop, replace it with something you will use. Don’t waste valuable space.
If a space develops in a bed (from harvesting or pest damage) don’t leave it empty, fill it in with anything that is compatible.
| Sowing list / planting calendar Your sowing list becomes complete when you add information on what crops goes in which bed. Once you have worked out ll of the planning details (dates for sowing and transplanting, quantities to plant, varieties, successions and more) you can put all of the information into your journal under the relevant dates. You can also schedule other important garden work, soil building, manure collection, compost making, the planting and incorporation of soil improving crops, preparing beds, planting cover crops vegetative propagation and pruning. If a scheduled date turns out to be impractical, then change it and make a note in the journal, so you won’t make the same mistake next year. |
Crop rotation
Crop rotation means planning your crops so that similar crops (or closely related ones) don’t follow one another in the same soil. It is done for a number of reasons:
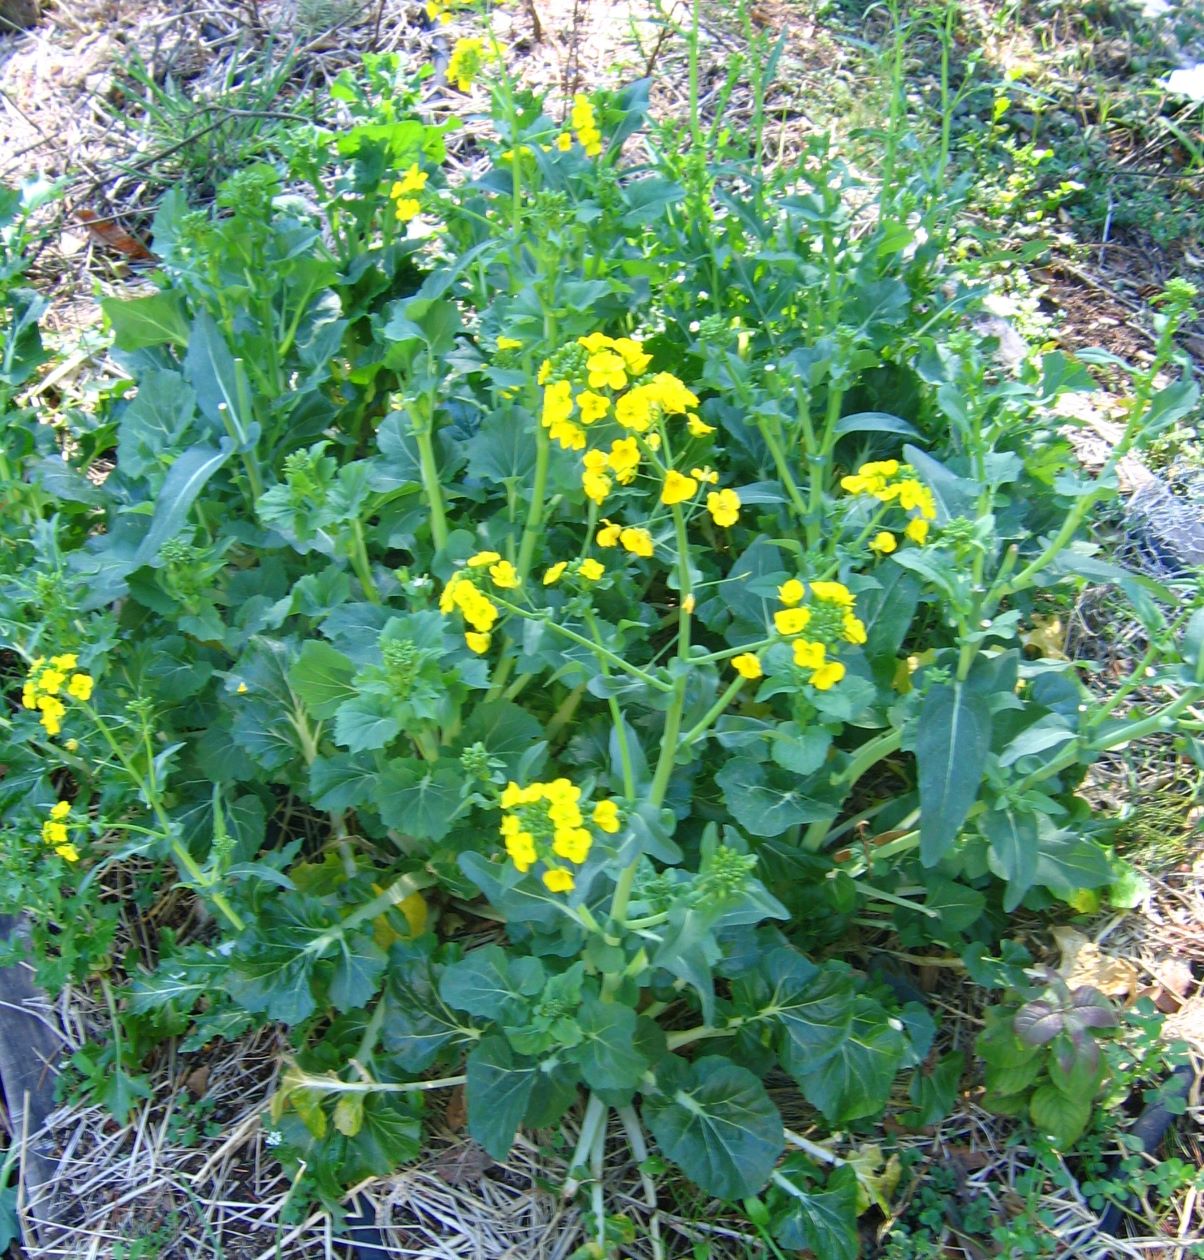
Rotation can reduce incidence of disease, as closely related crops are commonly subject to the same diseases (Brassicas are a notorious example). If you grow related crops in the same soil for several years then the diseases that afflict them may have time to get established. Unfortunately rotation is only of limited help in the small garden, as a disease like clubroot can be spread on the soil clinging to a spade or to feet.
Rotation may also reduce the incidence of pests, which also tend to afflict groups of crops. In most gardens it’s effectiveness is limited by the close proximity of the beds, as pests with any mobility can easily move to the next suitable bed. However this does make it harder for them and perhaps gives the crop a little time to get bigger and more able to resist predation. Rotation is most effective against soil dwelling pests such as nematodes.
While some crops really must be rotated to prevent disease or pests (notably the Brassica and Solanum families), some others (beans, beet, celery, corn, spinach, lettuce) don’t really need it, as they aren’t very susceptible to pests or disease. These can be placed anywhere that is convenient (use them to fill up any free space in the ‘blocks’. However even they may still benefit from following certain cultural practices, such as heavy fertilization, deep digging or nitrogen fixation.

Crop rotation can be a part of good soil management. Different crops take different nutrients out of the soil (leaf crops need nitrogen, root crops need potassium), so if you rotate your plants everything comes out even. This isn’t too critical in intensive beds as you will be replacing all of the nutrients taken by the crop and more (but it doesn’t hurt). It is helpful if compost and other fertilizers are in short supply, as you rotate the heavily fertilized crops through all the beds in turn.
Rotation allows you to take advantage of the fertilization of a previous crop. For example some plants dislike rich soils and can be planted after a very hungry feeder. Some crops like nitrogen and can be planted after a nitrogen-fixing legume, some dislike lime.
Rotation may even be helpful for weed control. Vigorous growing crops such as potatoes discourage weeds and can help clean the soil for weed susceptible crops such as carrots or onions. Some crops are easy to hoe, others quite difficult.
A rotation system
This doesn’t need to be very complicated, as some crops naturally follow others, for example light feeders follow heavy feeders, nitrogen fixers follow light feeders. Ideally the following crop will not only be compatible with the previous one, but will actually benefit from its cultivation practices. For example carrots, which are susceptible to weeds, could follow potatoes which clean the soil of weeds and loosen the soil. Don’t plant acid loving plants like potatoes after a crop that has been heavily limed.
| Some possible rotations Leaf crops (nitrogen lovers) Fruit crops (less nitrogen) Root crops (low nitrogen) Legumes (nitrogen fixers) Brassicas Roots Legumes and others Brassicas Solanums Roots Legumes and others Potatoes Brassicas Legumes Roots |
Intercropping
Intercropping (or catch cropping) makes use of the fact that a plant doesn’t need its full circle of space for its entire life, only for the final weeks when it is reaching maturity. For example a pepper plant may eventually fill a circle 24˝ in diameter, but for the first 6 – 8 weeks it’s in the ground it may only need a 6 – 9˝ diameter circle. This means there is an 18˝ wide space between neighboring pepper plants that is vacant for 6 – 8 weeks, a space that could be used to grow a fast growing crop such as lettuce. Not only will the lettuce not interfere with the peppers, but it may even help by shading the soil, increasing diversity and keeping down weeds (which inevitably grow on any soil left bare for 6 weeks). Sometimes you have to harvest selectively, removing the first crop to open up sufficient space for the maturing second crop
A number of fast maturing crops work well as intercrops between slow maturing ones. Lettuce with garlic, radish with parsnip, spinach with peas

It’s important that your intercrop doesn’t interfere with the main planting. They must both get all the nutrients and water they need. If the crops end up competing with each other, neither will do well and you may end up with less than if you had grown one crop properly.
Timing is important when intercropping. You might plant the intercrop at the same time as the main crop, several weeks after, or several weeks before harvesting the main crop.
• You could also plant different crops in rows along the bed. Put the biggest plants in the middle and smaller ones out to the sides. This is more efficient because you can place dissimilar, but complementary, plants alongside each other.
• You can also plant in short offset rows across the bed.
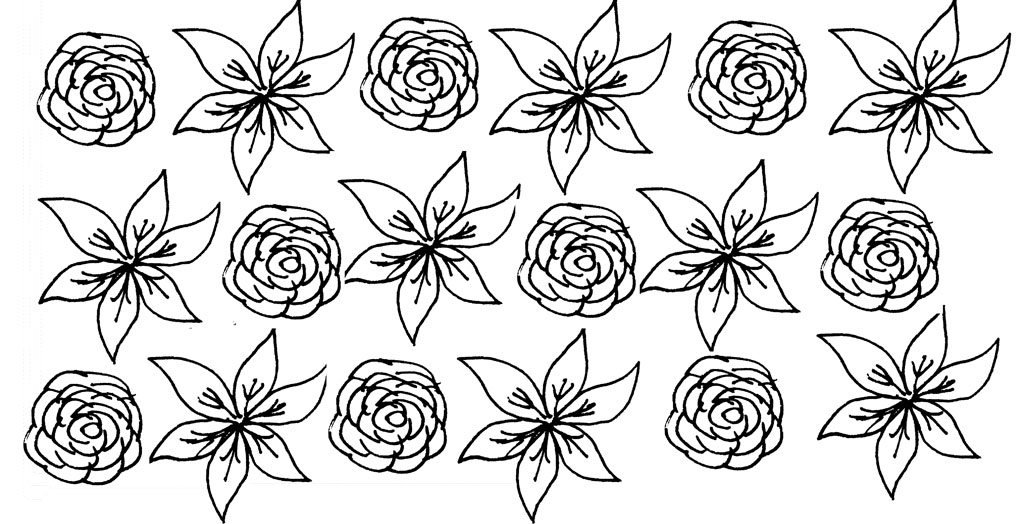
• Another way is to alternate crop plants in the rows, when setting them out.
Interplanting
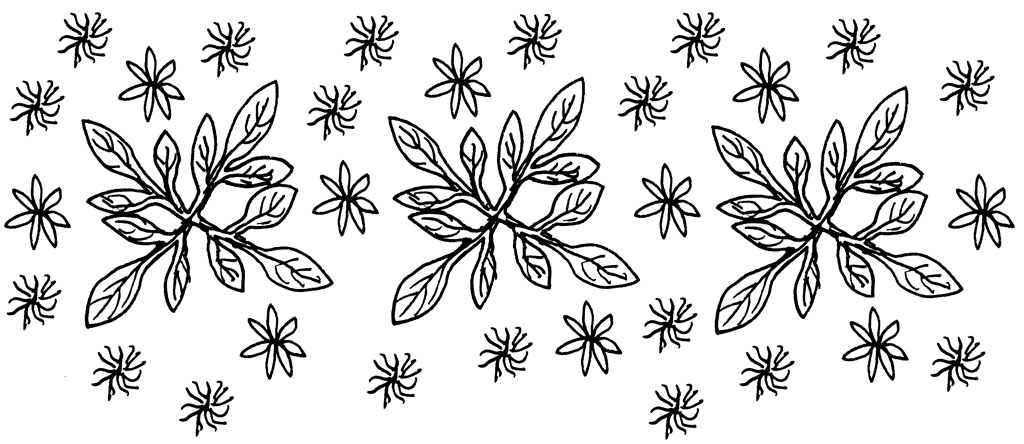
Interplanting is a form of intercropping whereby two crops are grown simultaneously in the same bed. It takes advantage of mutually compatible features to get the highest yield from the smallest area. It is commonly used by intensive gardeners to squeeze extra productivity out of a limited area. It can also be a method of pest control, by camouflaging the target crop from pests.
At first appearance interplanting seems to be a fairly complicated process, but if you break it down it’s simple enough. Don’t get too ambitious to begin with, try some of the simpler ones until you gain experience and don’t overdo it. If done poorly you might not get any crop at all.
Interplanting methods
There are a number of ways to plant more than one crop in a bed, some more complex and efficient than others.
• The simplest way is to plant in blocks. This has the virtue of simplicity, but isn’t particularly efficient because the plants in each block have exactly the same requirements as their neighbors and could potentially compete with one another.

Spacing for interplanting
To find the correct spacing between two different crop plants add up their recommended individual spacing and divide by two. For example planting Leek (9˝) and carrot (3˝) you would give you 12˝ divided by 2, or a desired spacing between the plants of 6˝. If the two plants are very compatible (see below) you could reduce this a little, perhaps spacing them 4˝ apart.
Interplanting suggestions
Use plants with complementary growth habit. For example corn and beans are often grown together. The beans replace some of the nitrogen used by the corn, while the corn provides support for the beans (this only works if the corn is well established before the beans are planted). They should also be compatible in their requirements for fertilization and watering, so you can then treat them in blocks.
You might want to plant together crops that will be harvested at the same time, thus freeing up large areas of bed space.
Conversely you could simply plant into vacant spaces between another crop as they become available.
I sometimes plant a marginal crop (such as an early or temperamental one) along with a reliable one. If the dubious crop fails you still have another one to fill in the space. If the marginal crop does well you can remove the other one.
You can also start transplants as an interplant. Simply sow seed in the space between an existing crop. When the seedlings get big enough transplant them to their own bed.
Complementary plants
Crops for interplanting should be mutually compatible, so take into account their complementary characteristics.
Shallow and deep rooted crops: These have different root zones and so don’t compete directly with each other. Shallow rooted crops include beans, Cucurbits, onion, garlic, lettuce and peppers. Deep-rooted ones include beet, carrot, parsnips, tomato .
Differing growth patterns: Interplanting crops with complementary growth patterns also reduces competition. Examples of this include the classic corn and beans (a tall plant and a climber) and leek and lettuce (a tall skinny plant with a short wide one).
Light loving and shade tolerant: Some plants thrive in the shade cast by larger crops, indeed in hot weather this may be the only place they do well. An example would be planting lettuce underneath corn or tomatoes. Shade tolerant crops include: celery, chard, cucumber, leek, lettuce, mustard, parsnip, pea, and spinach . Sun lovers include corn, melon, peppers and tomato,
Complementary nutrient consumers: Put plants that consume different nutrients together. For example put a heavy nitrogen user such as corn, with a nitrogen fixer such as beans . This won’t give much nitrogen to the corn (though some research suggests that it may give some), but will replace some of that taken from the soil.
Companion planting
Companion planting has been given an almost magical significance in some circles, probably a lot more than it really deserves. The basic premise is that some garden plants have a natural affinity for other plants and when planted together they will grow better and be healthier. Little of this has really been proven, in fact a lot of it seems to come from garden writers copying each other. Some people just really like the idea, so there seems to be more wishful thinking than critical thinking. Some suggestions are so silly they don’t seem to have come from a real gardener at all. If you plant horseradish with your potatoes, when you harvest the potatoes you would spread bits or horseradish throughout the bed and end up with a very large horseradish patch (I can’t say whether it would do anything for the potatoes, I don’t know).
Companion planting does work to some degree, as some plants do have special effects in the garden. In purely practical terms some combinations may work for a number of reasons. They may attract beneficial insects (especially members of the Asteraceae and Apiaceae), camouflage the smell of target plants (especially aromatic herbs), repel harmful pests, or work as trap crops (which pests will eat in preference to the crop plant).
I like the idea of companion planting and certainly think it is worthwhile, if only in that it is good to have a wide variety of plants in your garden. The best way to use companion planting is as a form of intercropping, where you are actually growing two usable crops. Otherwise the companion may actually reduce yields by taking up space that could be planted to crops.
I’m not going to say much more because quite frankly the whole subject confuses the hell out of me.
Companions that may work
Bean and corn
Broccoli and cucumber
Cabbage or kale and tomato (reduces pest damage).
Carrot and onion
Celery and leek
Peppers and catnip (reduced aphid numbers.)
Potato and tansy or catnip (but what to do with the tansy?)
Tomato and asparagus


